When AWOL Vision launched the Aetherion series on Kickstarter, it raised more than $10,000,000 in the first twelve hours. Nearly four thousand people ordered a projector that almost nobody had seen in person. No projector campaign had ever hit eight figures that fast, and the Aetherion went on to become the most successful projector campaign in the platform’s history. It closed at $18,649,456 from 7,050 backers, a sign of a big fan base, and Valerion’s success clearly helped.
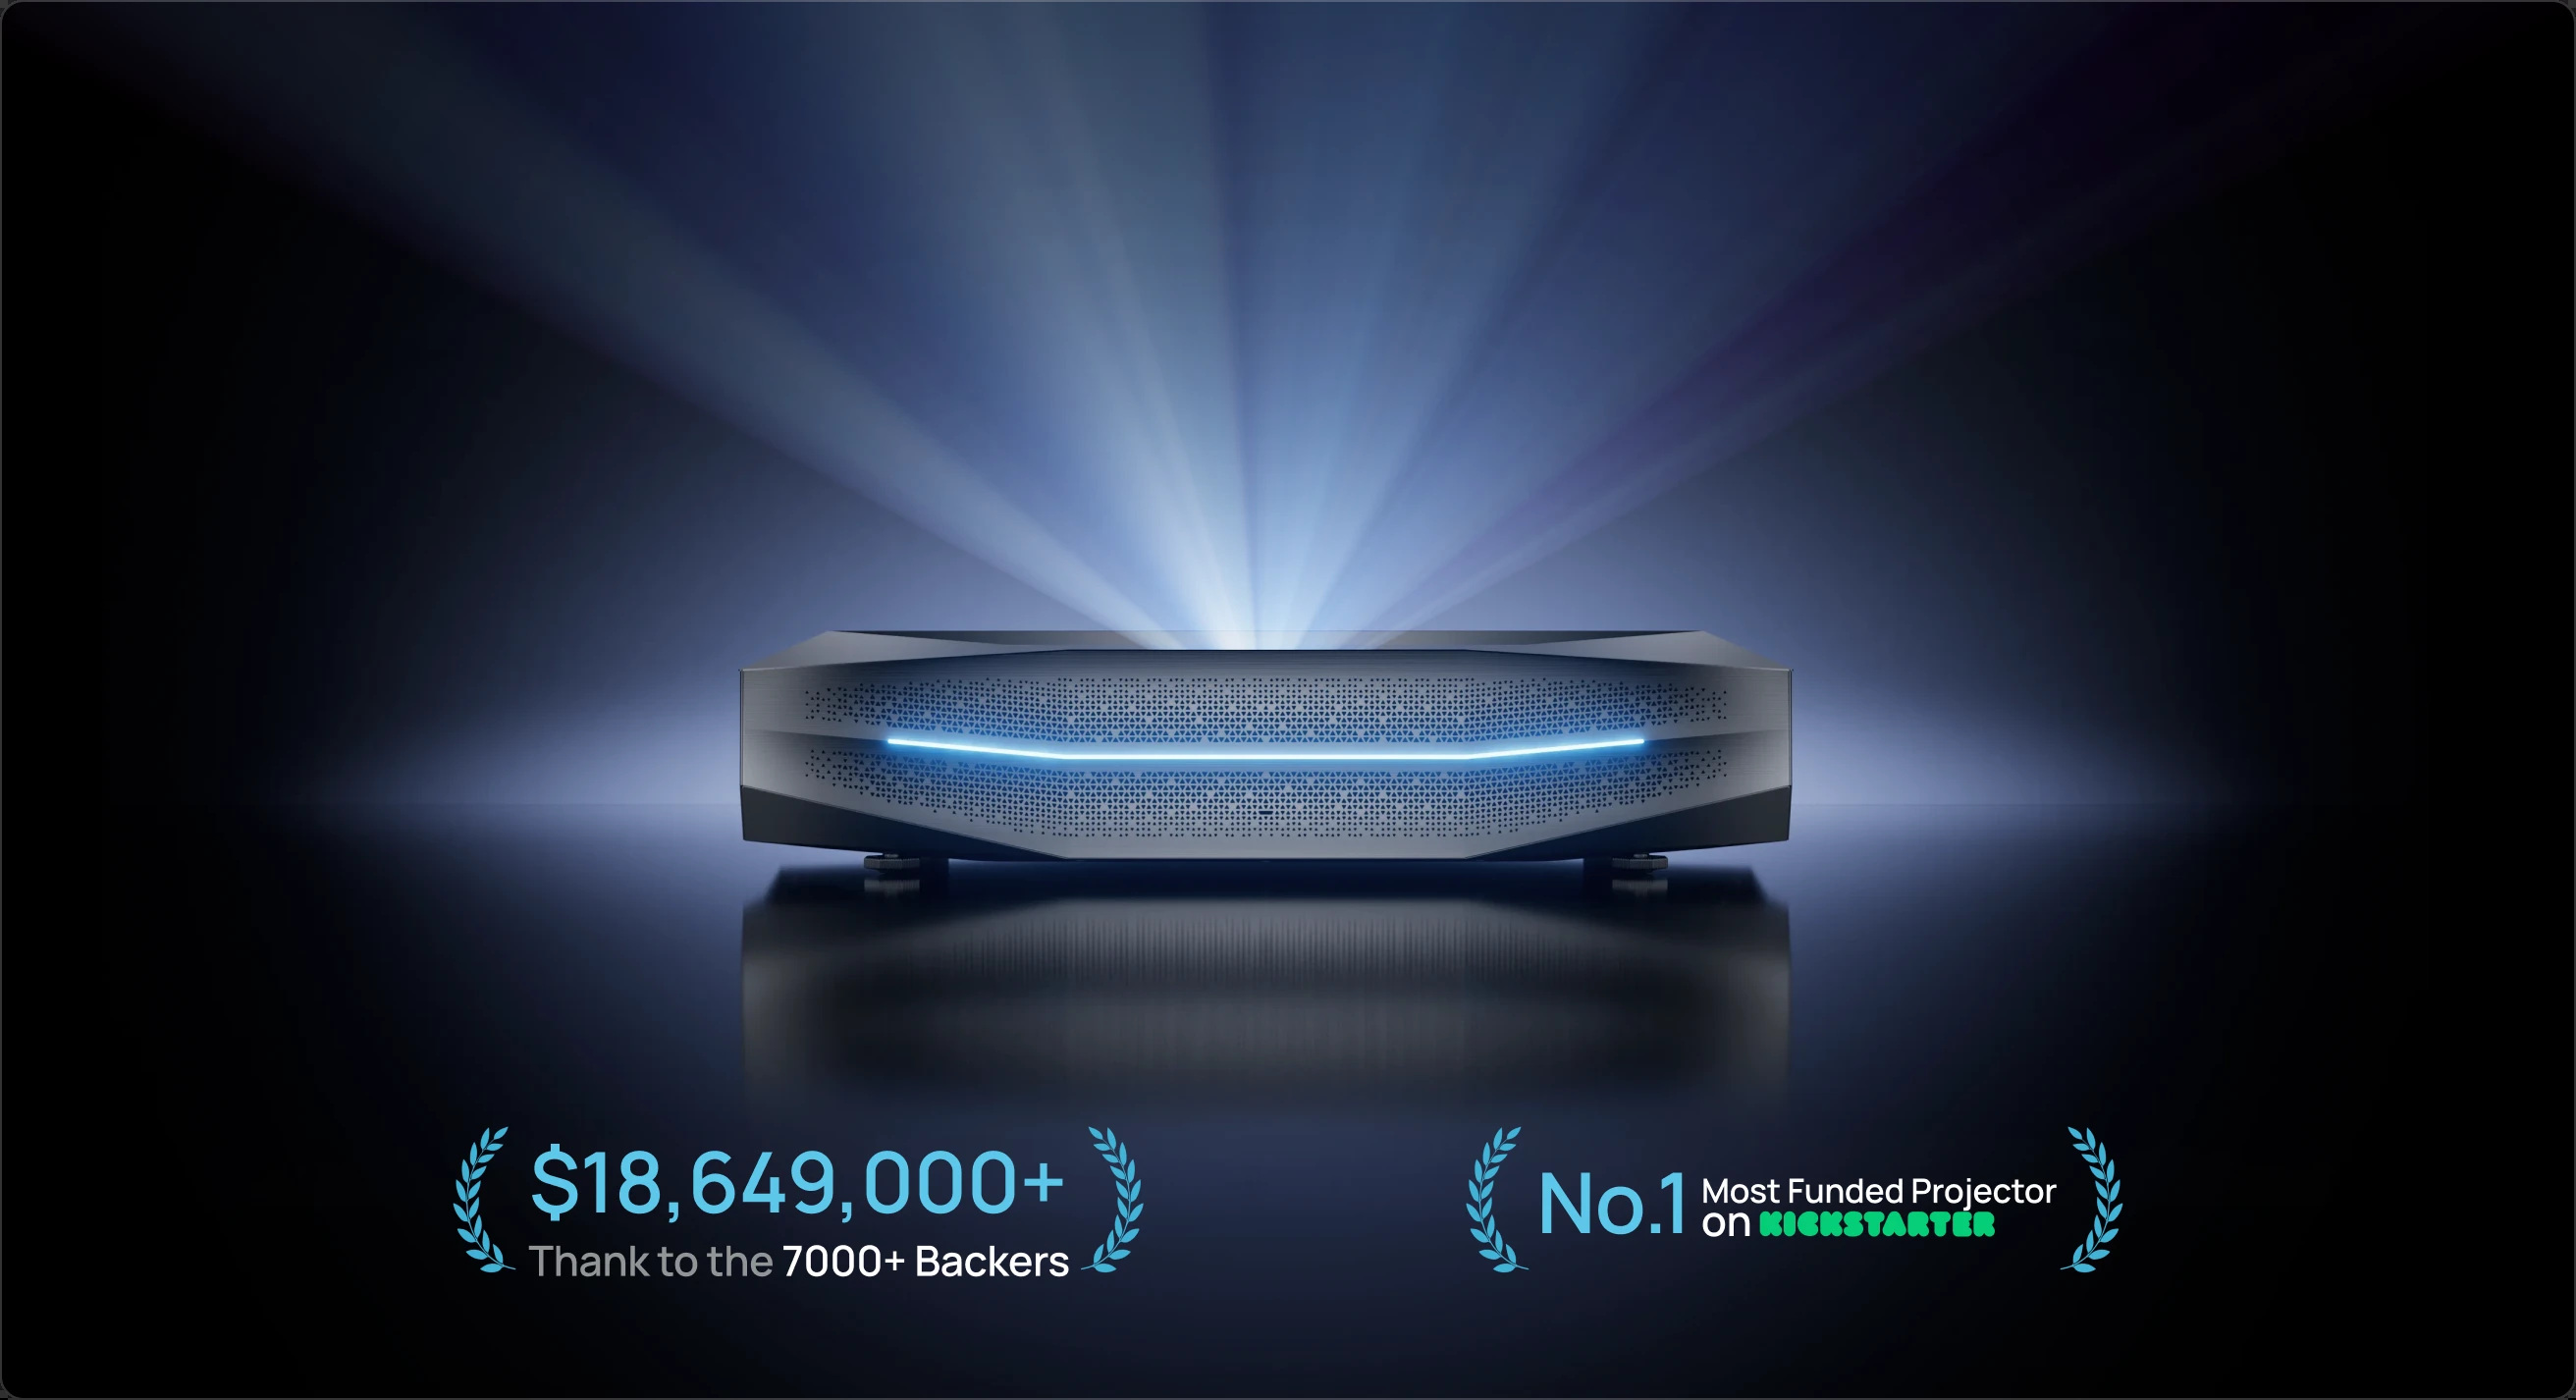
The record didn’t last long. In June, XGIMI closed its Titan Noir campaign at $18.8 million and took the overall crown by less than one percent. Among ultra-short-throw (UST) projectors, though, the Aetherion still holds the record.
UST projectors have one inherent engineering problem: throwing a picture onto a screen from such a short distance takes a lens with an enormous aperture and a mirror working at an extreme angle. A lot of stray light bounces around inside such a system, and some of it inevitably finds its way back to the chip or onto the screen where there should be black. That’s where the whole class gets its reputation: plenty of brightness, no contrast. Laser dimming alone can’t fix that, because the problem is optical.
With the Aetherion, AWOL tried to fix it in hardware, which is far more interesting than yet another brightness bump for a new flagship. The series has two models: the top-of-the-line Max, rated at 3,300 ISO lumens, and the step-down Pro at 2,600 lumens. They also differ in finish: the Pro is a darker, almost black graphite.
Start with the optical engine. It’s been redesigned from the ground up, and every change serves one stated goal: eliminating internal stray light. The manufacturer puts the result at 6,000:1 native contrast. That’s a record for a triple-laser UST. The closest rivals rarely got past 4,000:1, and many quoted only dynamic contrast.
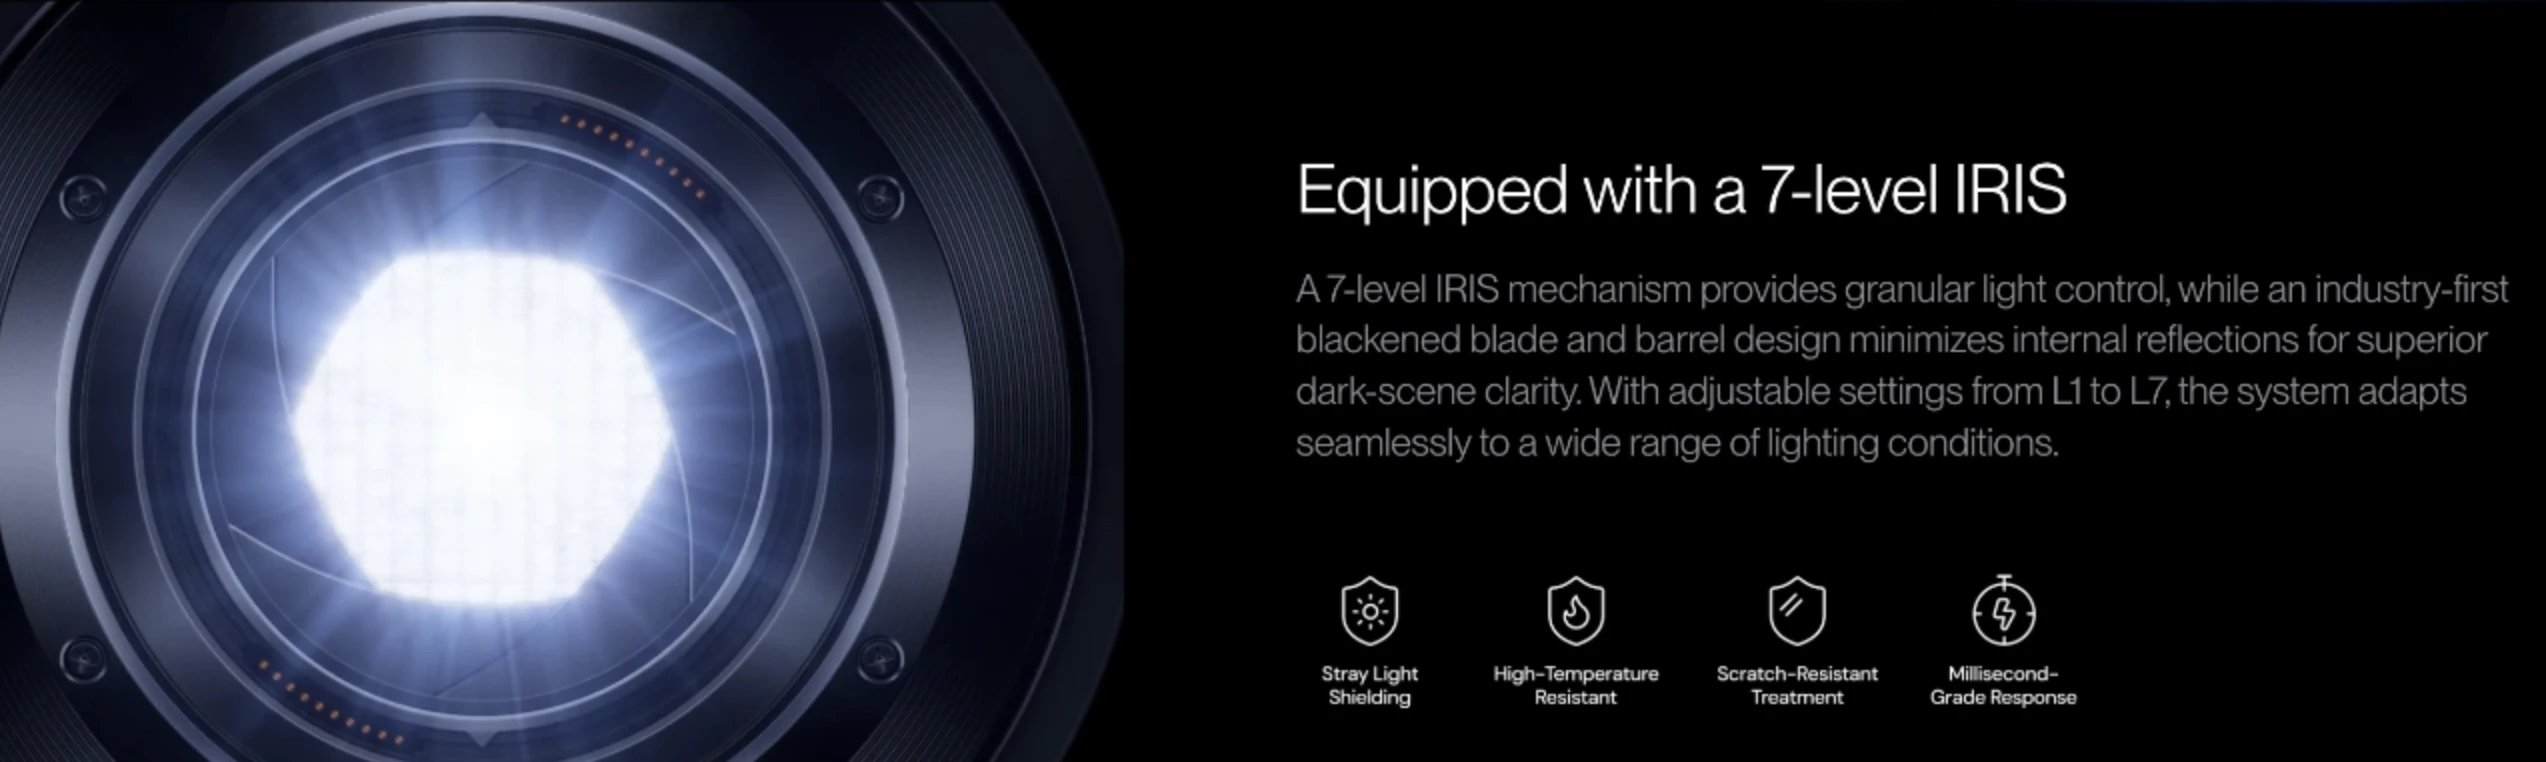
The key is an iris: seven steps plus fully open. It’s the first time AWOL has put an iris in a UST at all. Most DLPs in this class do without one, since an iris eats light and brightness is close to the most important spec a UST has. AWOL leaves the call to you: open it up for lumens, close it down for contrast. A recent firmware update adds a dynamic mode too. How the iris actually moves between its presets turned out to be a story of its own, and I get to it later in the review.
On top of the iris sits EBL, the proprietary laser-dimming system familiar from Valerion projectors. Together with the iris, it makes up what AWOL calls NoirScene System II, which is where the 60,000:1 dynamic contrast figure comes from. Treat numbers like that with caution. Real contrast in movies depends heavily on how the laser dimming is implemented and how aggressive it is, not on a peak figure measured on a full-black field. We measured how EBL performs on real scenes, so you can judge the actual effect for yourself.
The optics are built around a lens with sapphire glass and an anti-reflective coating applied by planetary deposition. Convergence and geometry are handled by a set of solutions marketed as PixelLock, officially a “Precision-Engineered Lens System” promising “pixel-level clarity at any scale.” To keep focus stable, AWOL uses a multi-element lens plus a titanium thermal mesh between the reflective elements that acts as a heat shield.
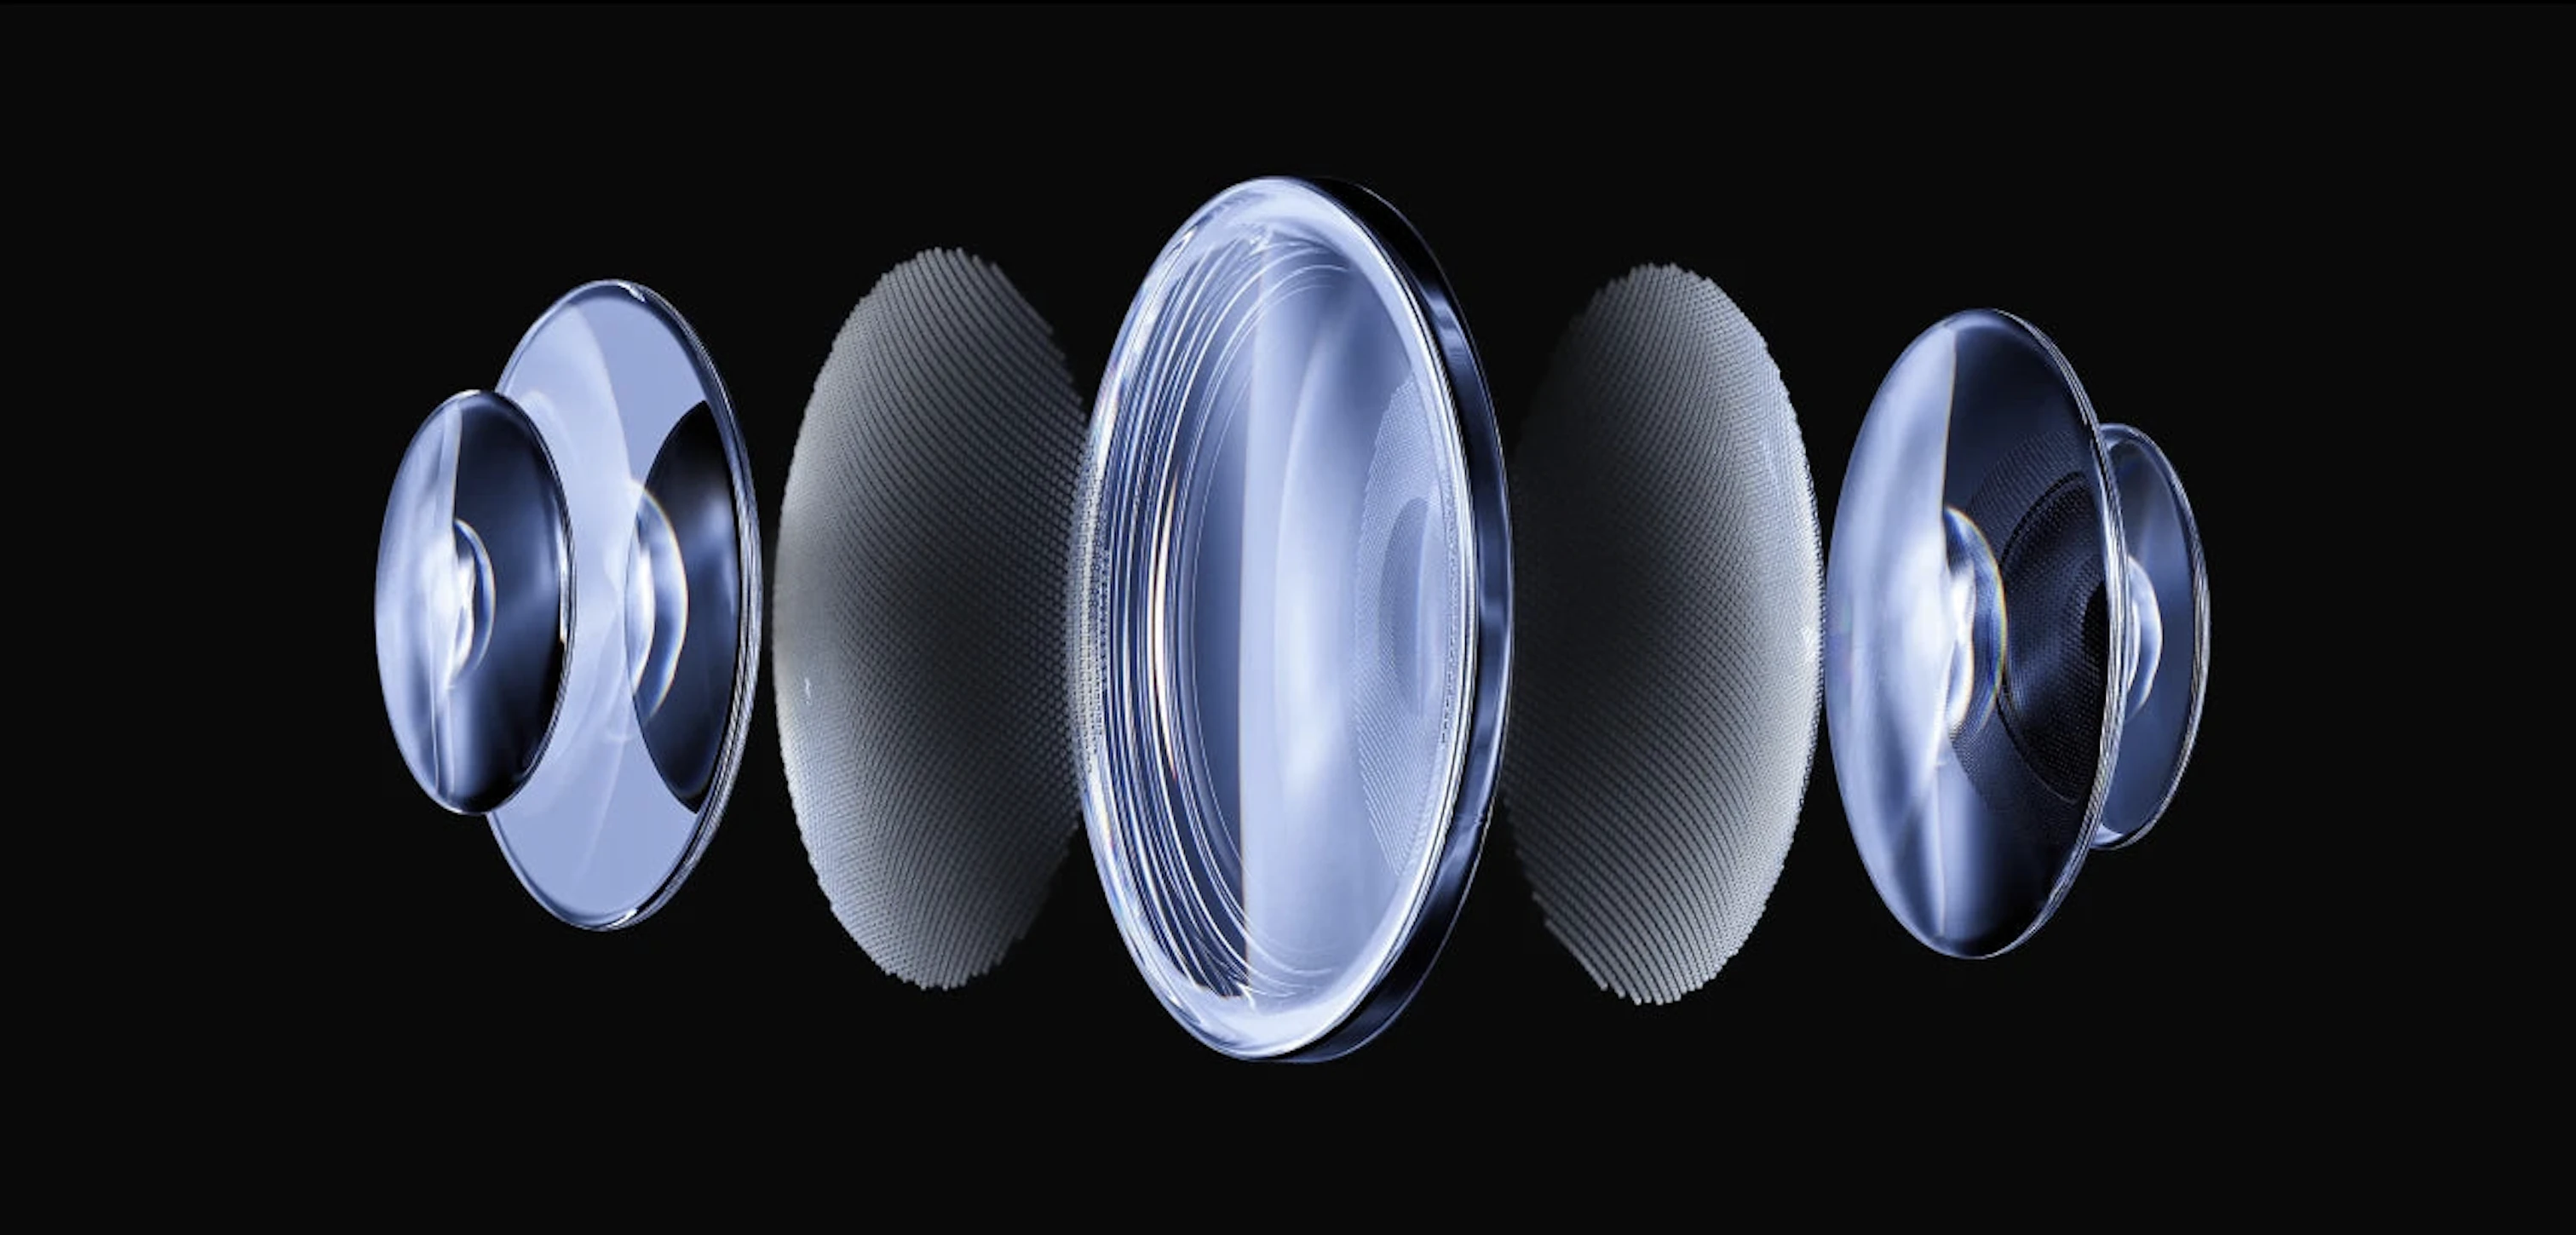
The logic makes sense. A UST lens runs hot, and as it heats up the geometry drifts, taking the focus with it.
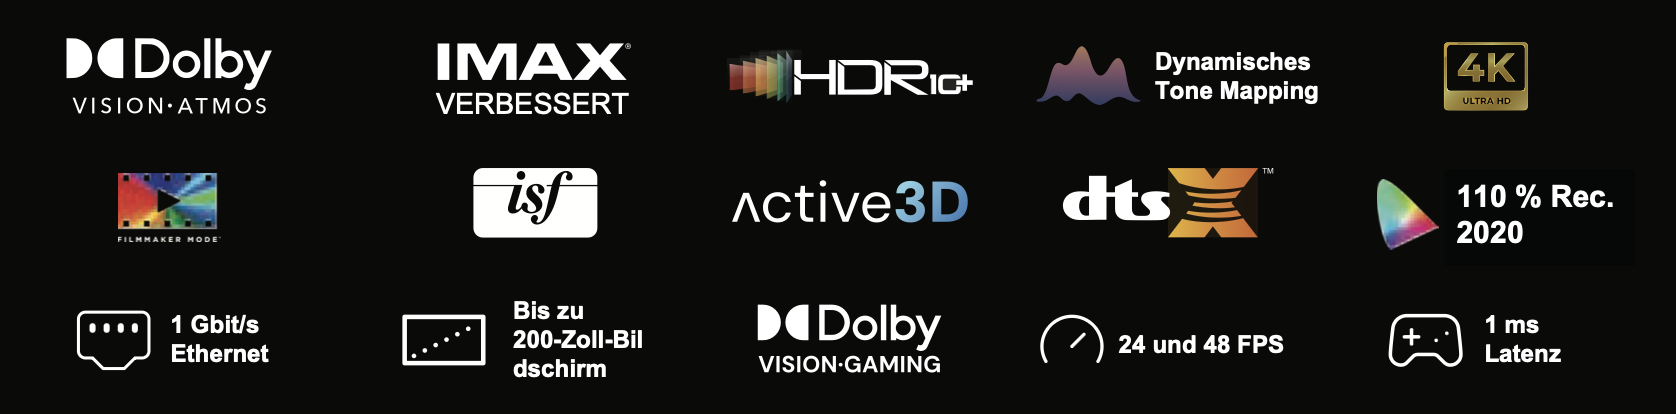
The platform is a little unusual for the segment: a 0.47″ DLP472TP DMD, the new DLPC8445 display controller, and standard XPR pixel shifting to 4K, with an interesting twist I’ll get to later. Other spec-sheet highlights: 1080p at 240 Hz with a record-low 1 ms input lag, VRR and ALLM, Dolby Vision Gaming, the full HDR set (HDR10, HDR10+, HLG, Dolby Vision) with dynamic tone mapping, and an Anti-RBE mode inherited from Valerion.
The DLP472TP is a TRP-platform chip, TI’s previous generation. The new one is called SST and hasn’t reached UST projectors yet. The controller is new, though, and the Aetherion is the first UST to get it. It belongs to the same architectural family as the DLPC8455 in the Titan Noir. 1080p at 240 Hz isn’t new, the Valerion VisionMaster Max already had it on the older controller, but the new one is what makes the record-low input lag possible: it brings rolling (line-by-line) scan-out instead of full-frame output, the same rolling buffer we covered in detail in the Titan review. The trade-off: gaming input lag drops sharply, but you also inherit the side effects of rolling scan-out. More on that later.
The smart-TV side runs on a MediaTek MT9655 (better known as the Pentonic 800) with 8 GB of RAM and 128 GB of storage, which is very generous for a projector. It should stay snappy for years.
The claimed specs are impressive: 3,300 ISO lumens and 6,000:1 native contrast. We couldn’t pass it up, so we bought a retail Aetherion Max specifically for this review and checked every claim: brightness in every mode, contrast along the full ADL curve, EBL frame by frame across different scene sequences, and the optics pixel by pixel. That last test produced the most unexpected result of the whole review, and it doesn’t flatter the projector, at least in its current implementation.
Packaging
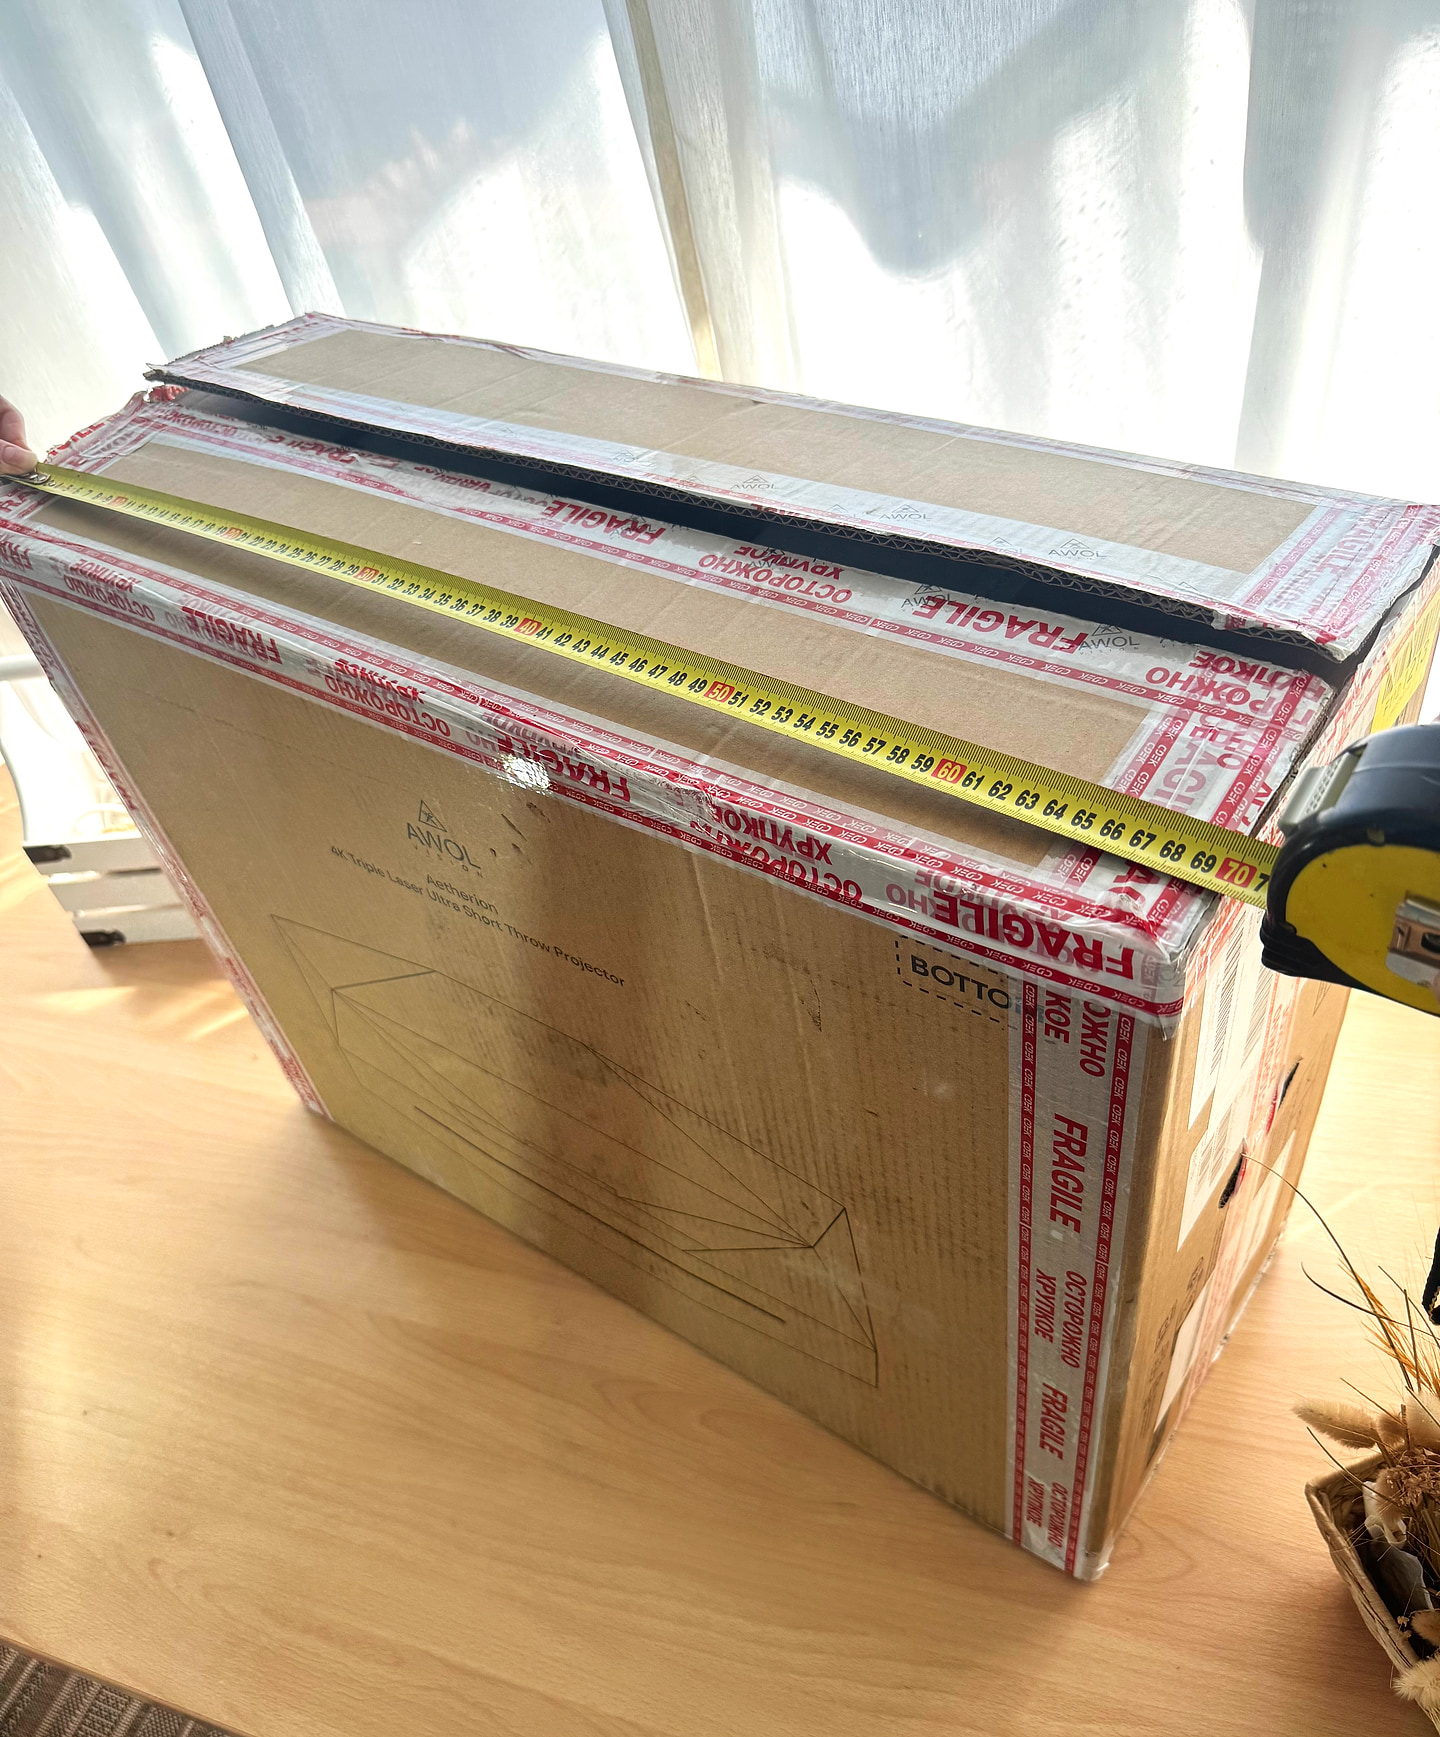
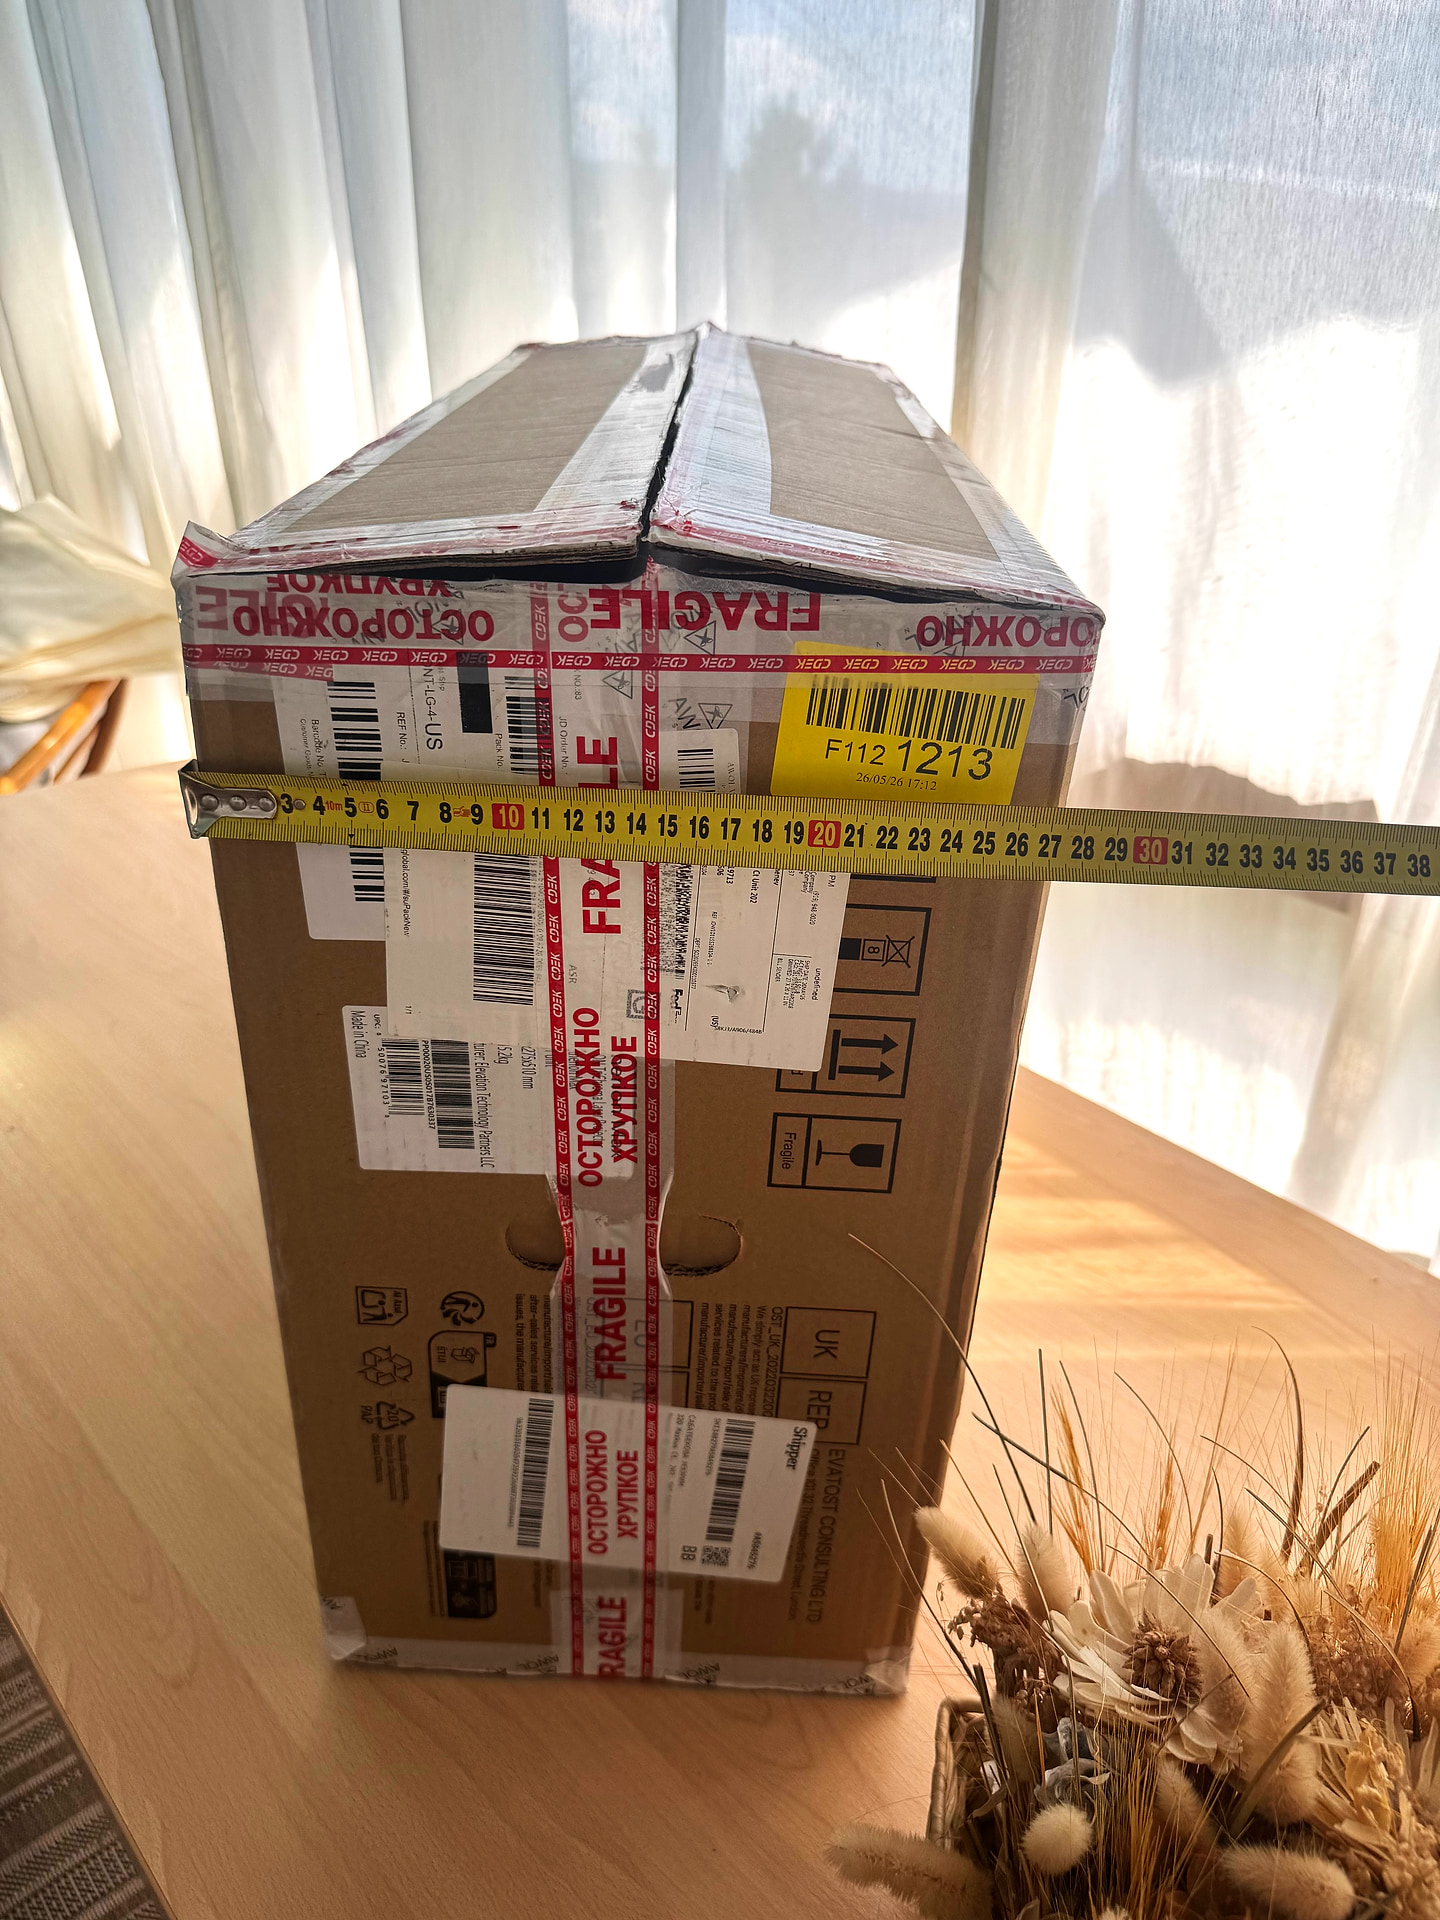
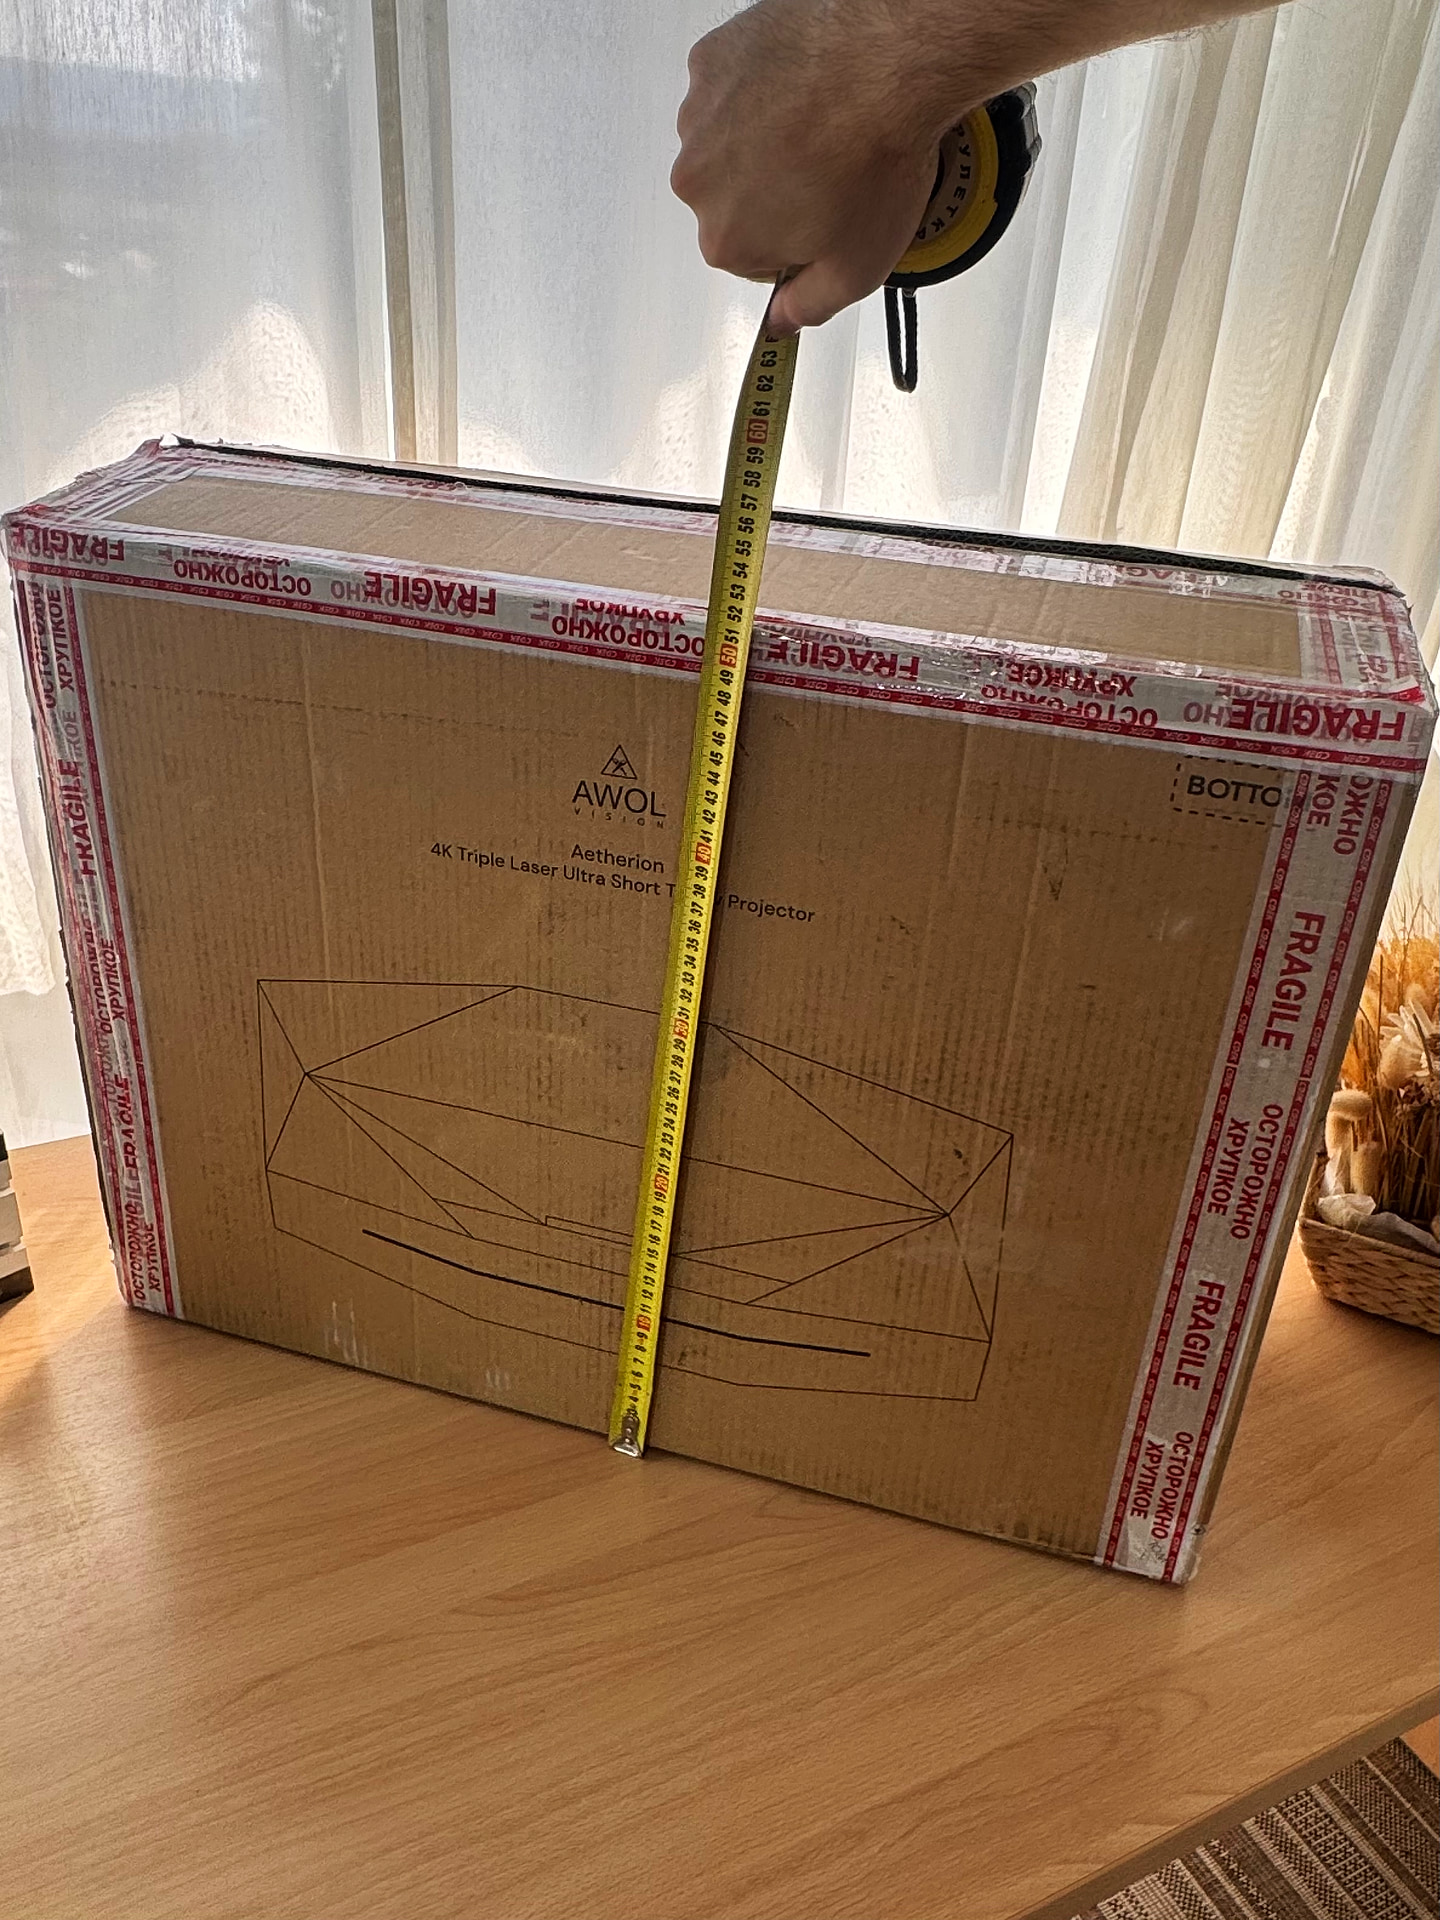
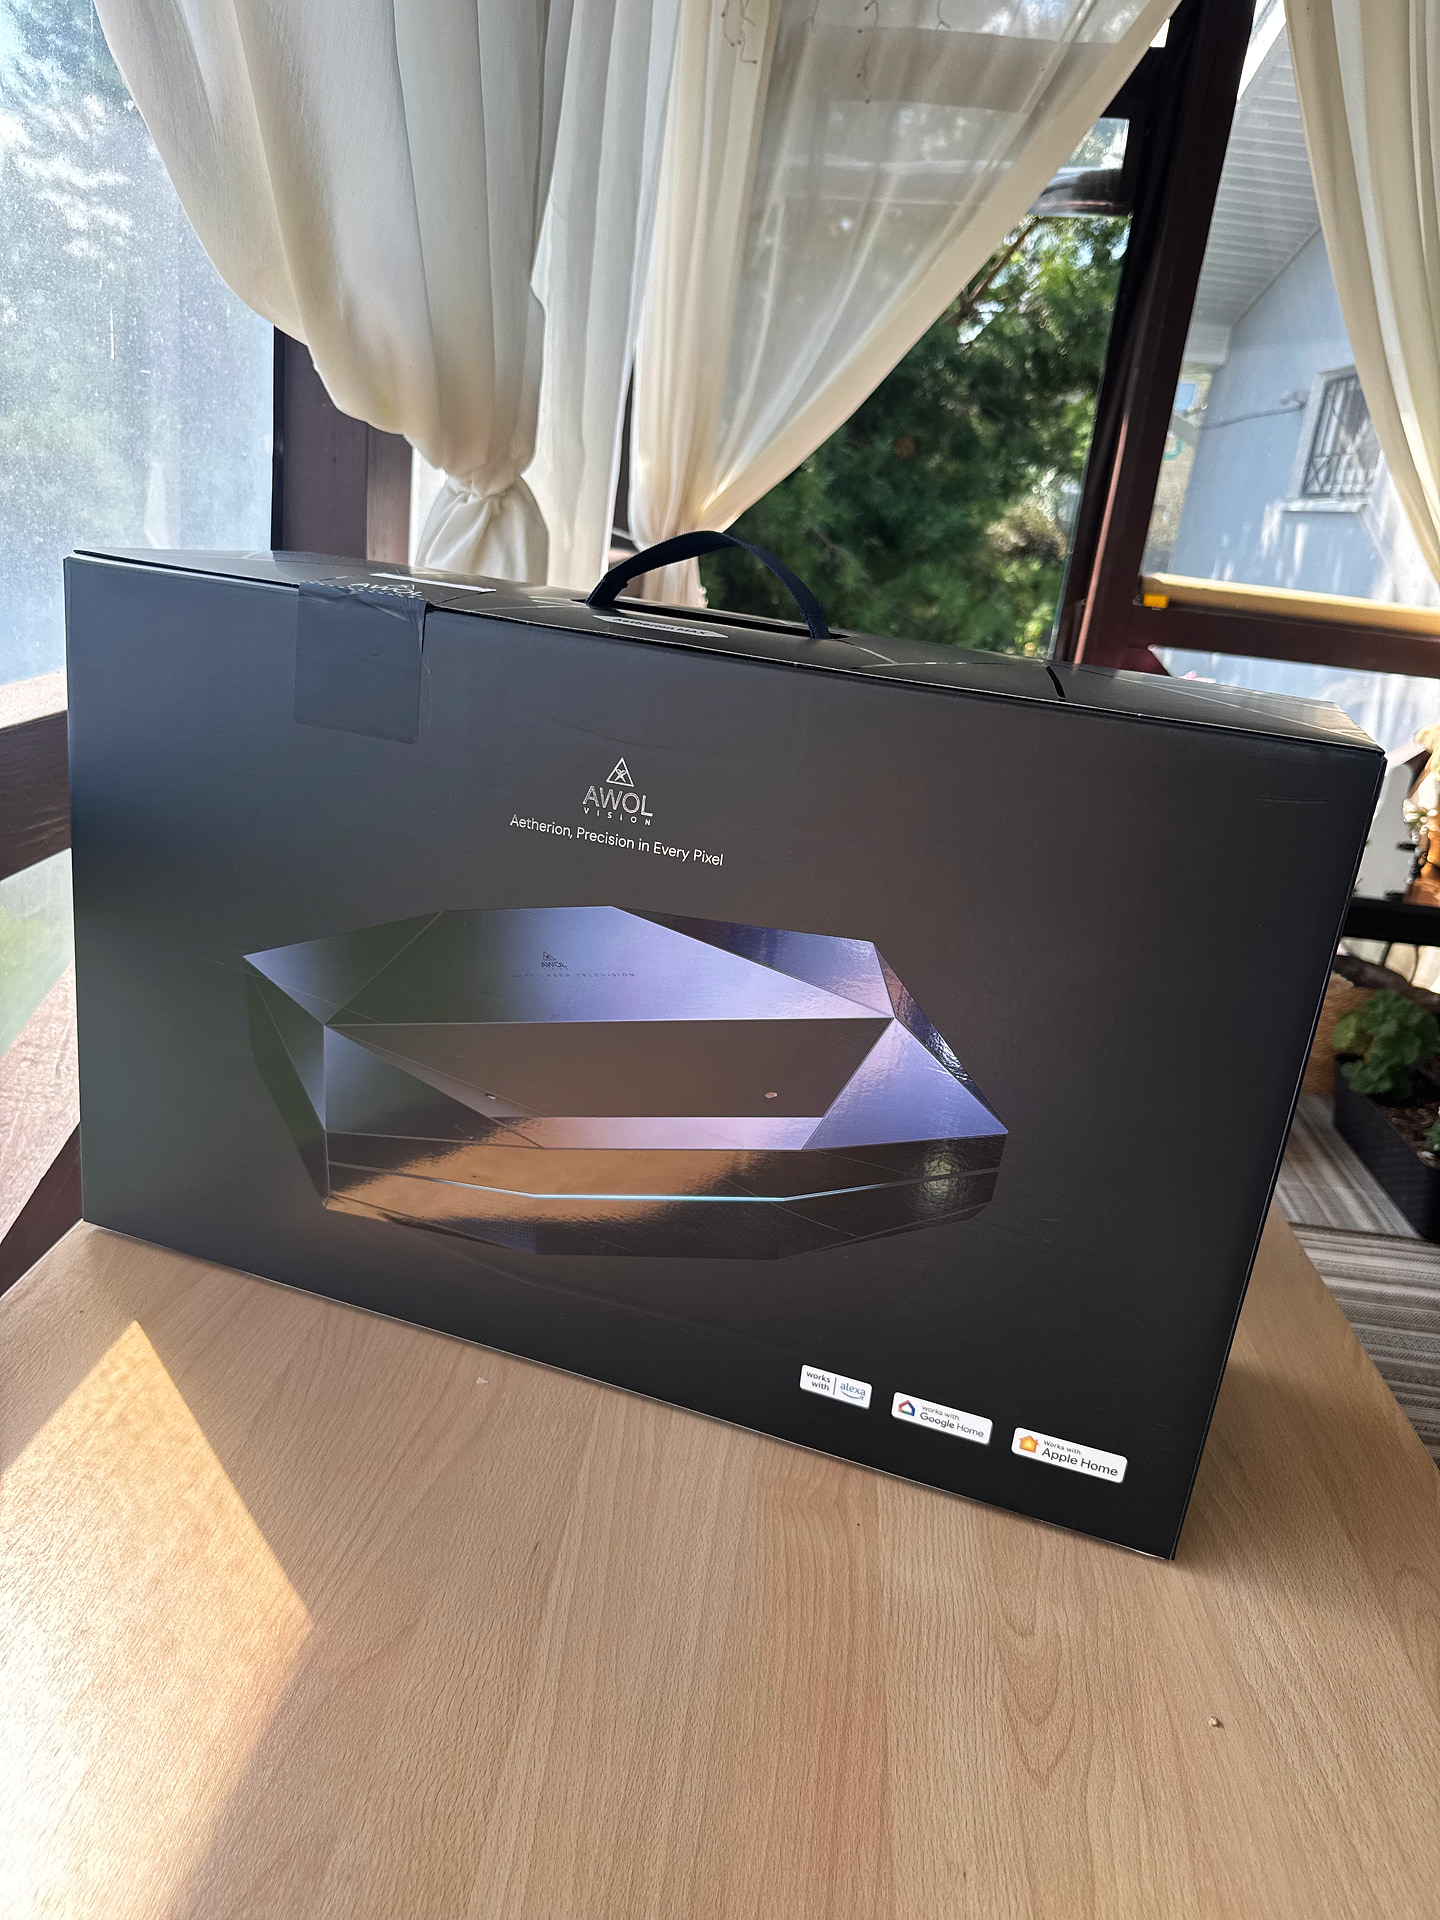
The projector arrived in a plain double-wall cardboard box printed with the brand name and a line drawing of the projector. It looks modest, but it does its job perfectly: everything inside sits snug and nothing shifts. The projector crossed from one continent to another in it without a scratch.
The shipping box measures 70×28×52 cm, the black inner box 65×21×40 cm, and the whole parcel weighs 15.2 kg. The box is wide and flat, closer to a TV carton than the usual cube, because a UST chassis is low and wide and the packaging follows its shape.
The projector itself weighs 8.75 kg, with a chassis measuring 562×323×139.5 mm. That leaves almost 6.5 kg for the two boxes, the foam, the cover, the glasses, and all the cables. That’s a lot of packaging.
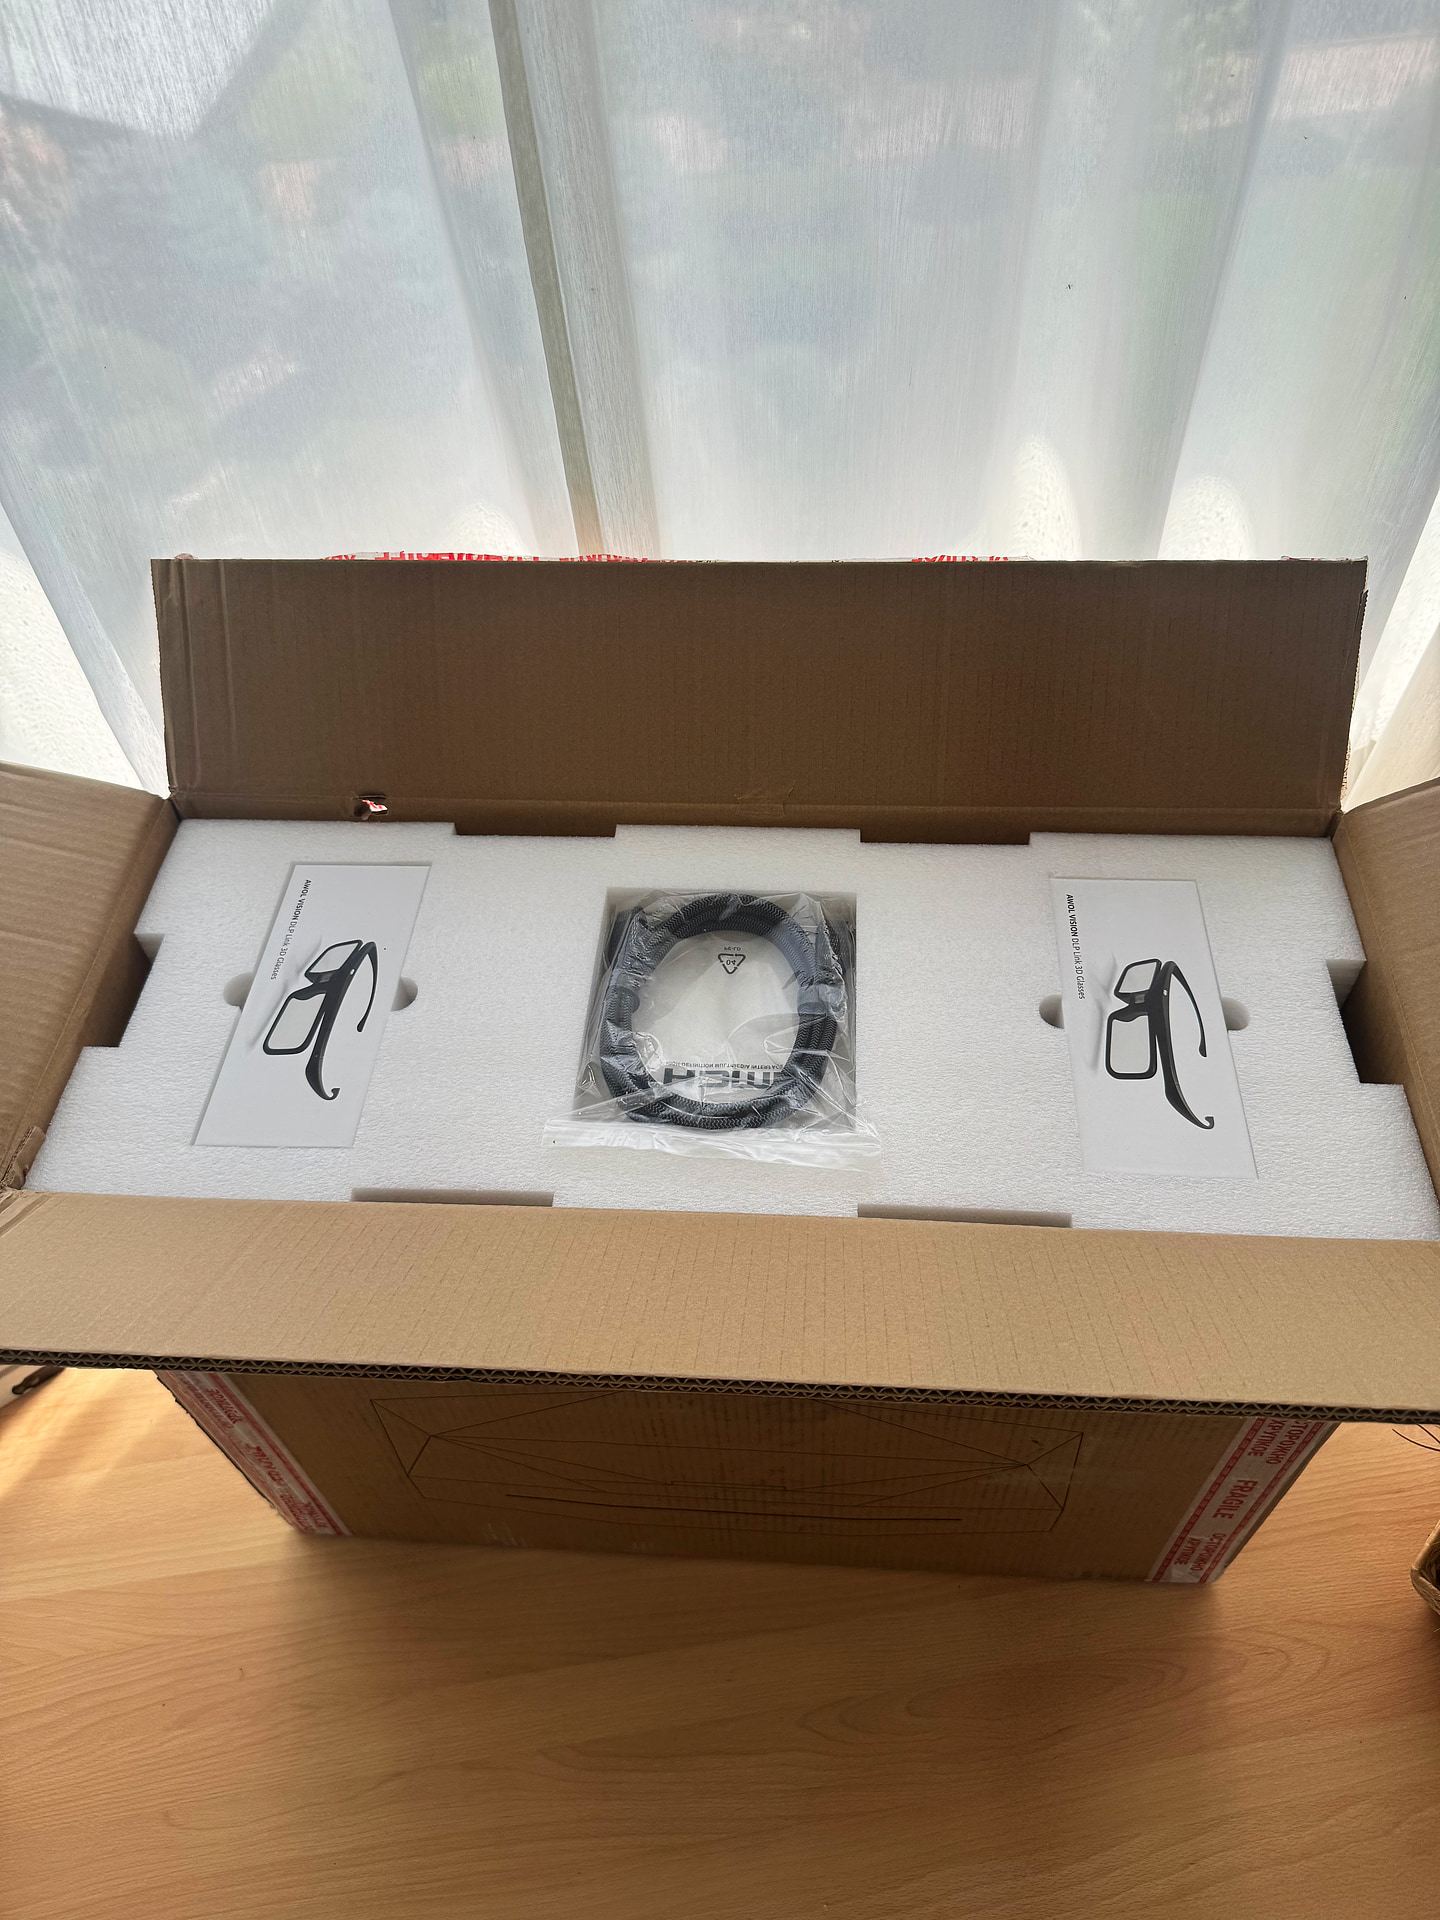
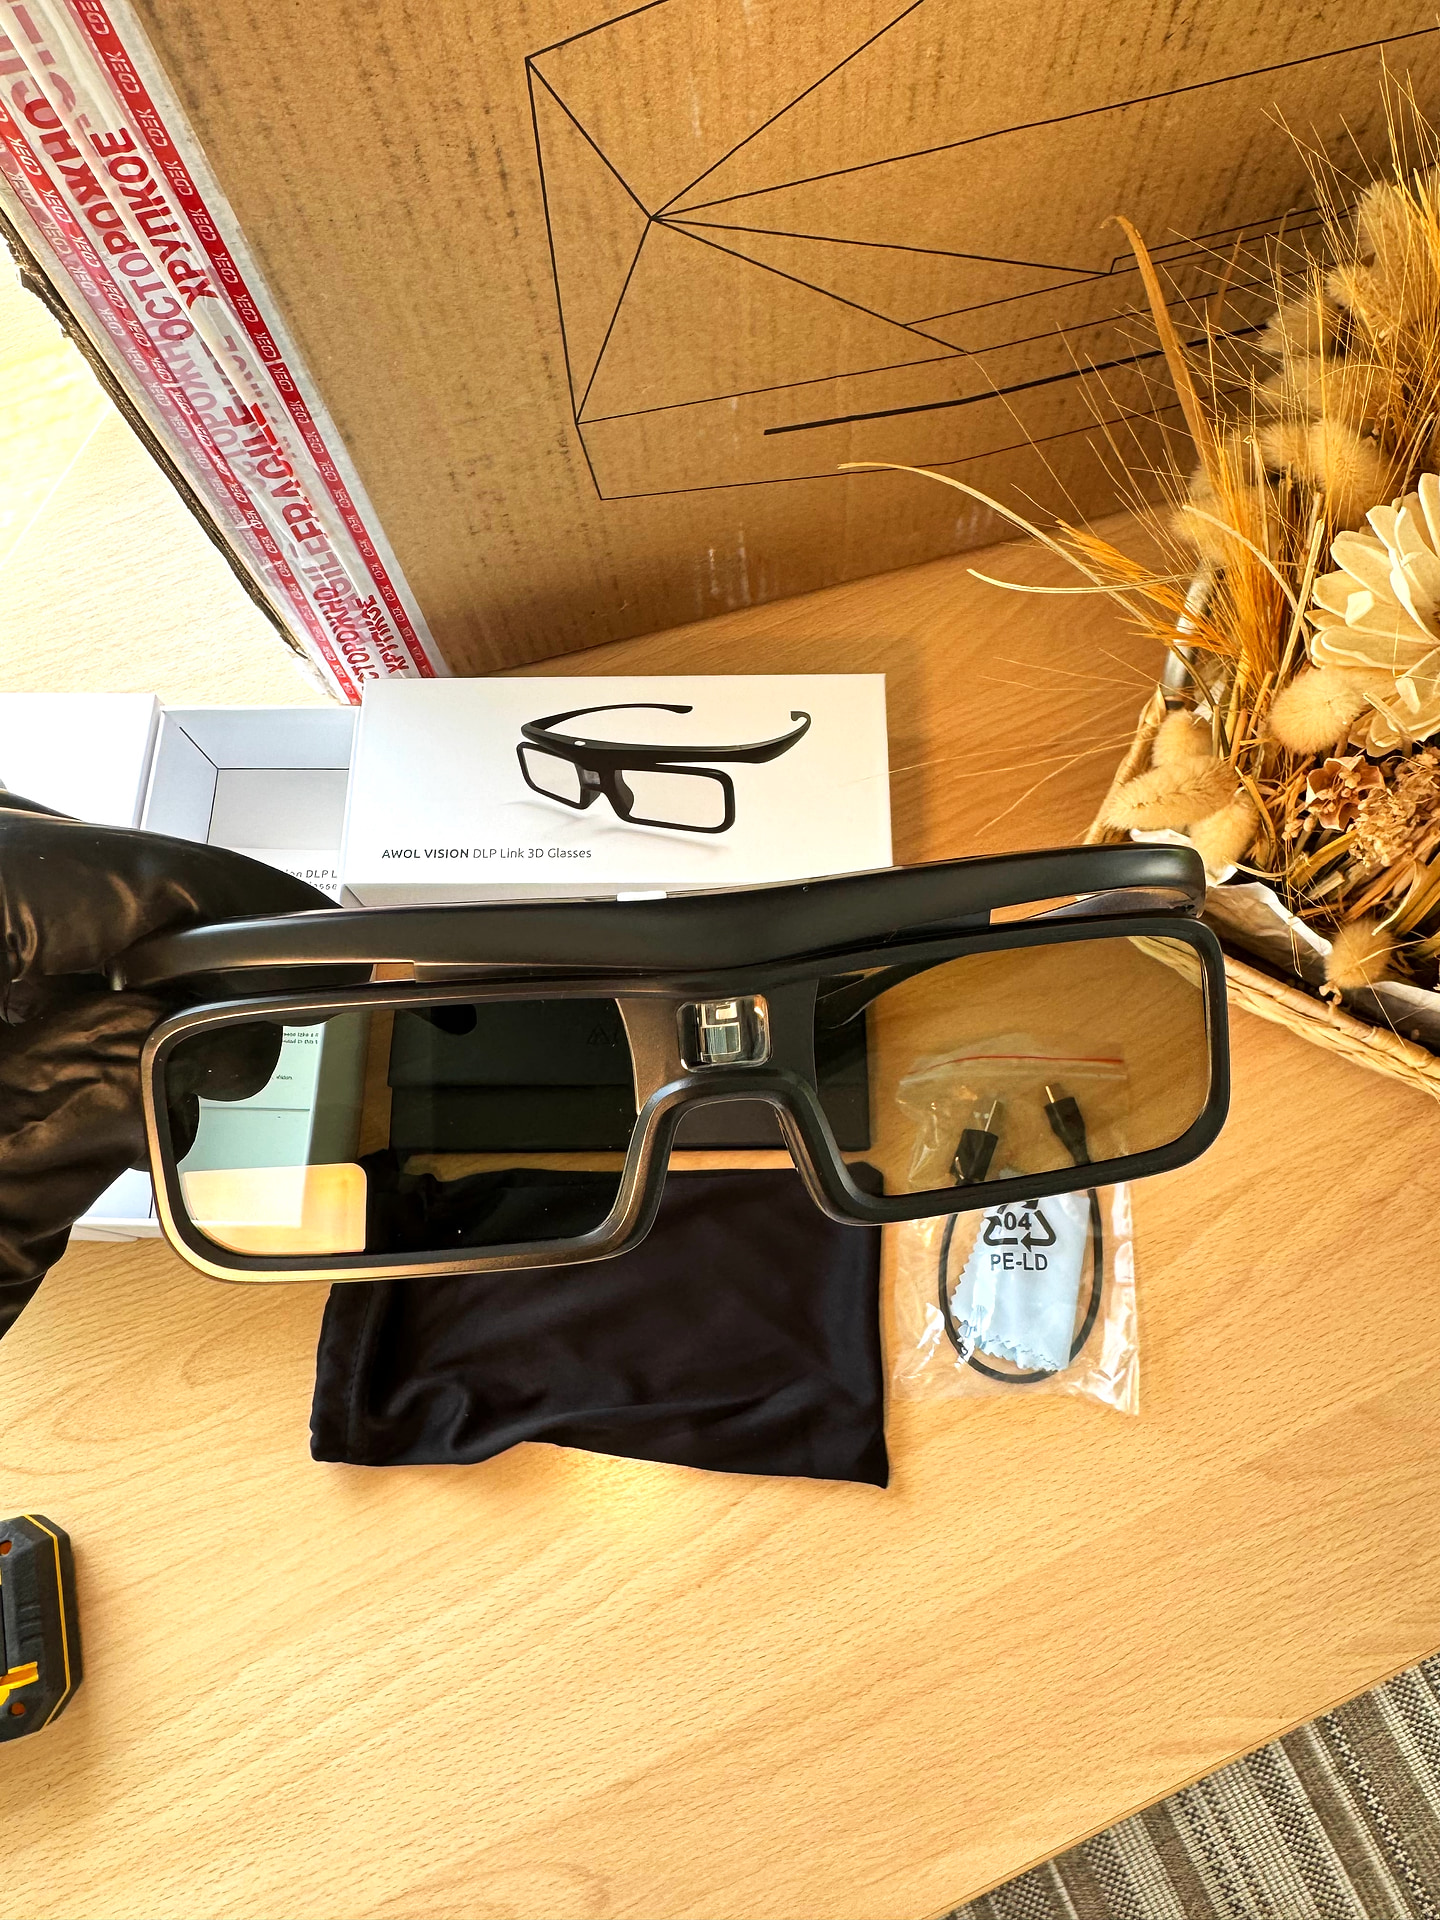
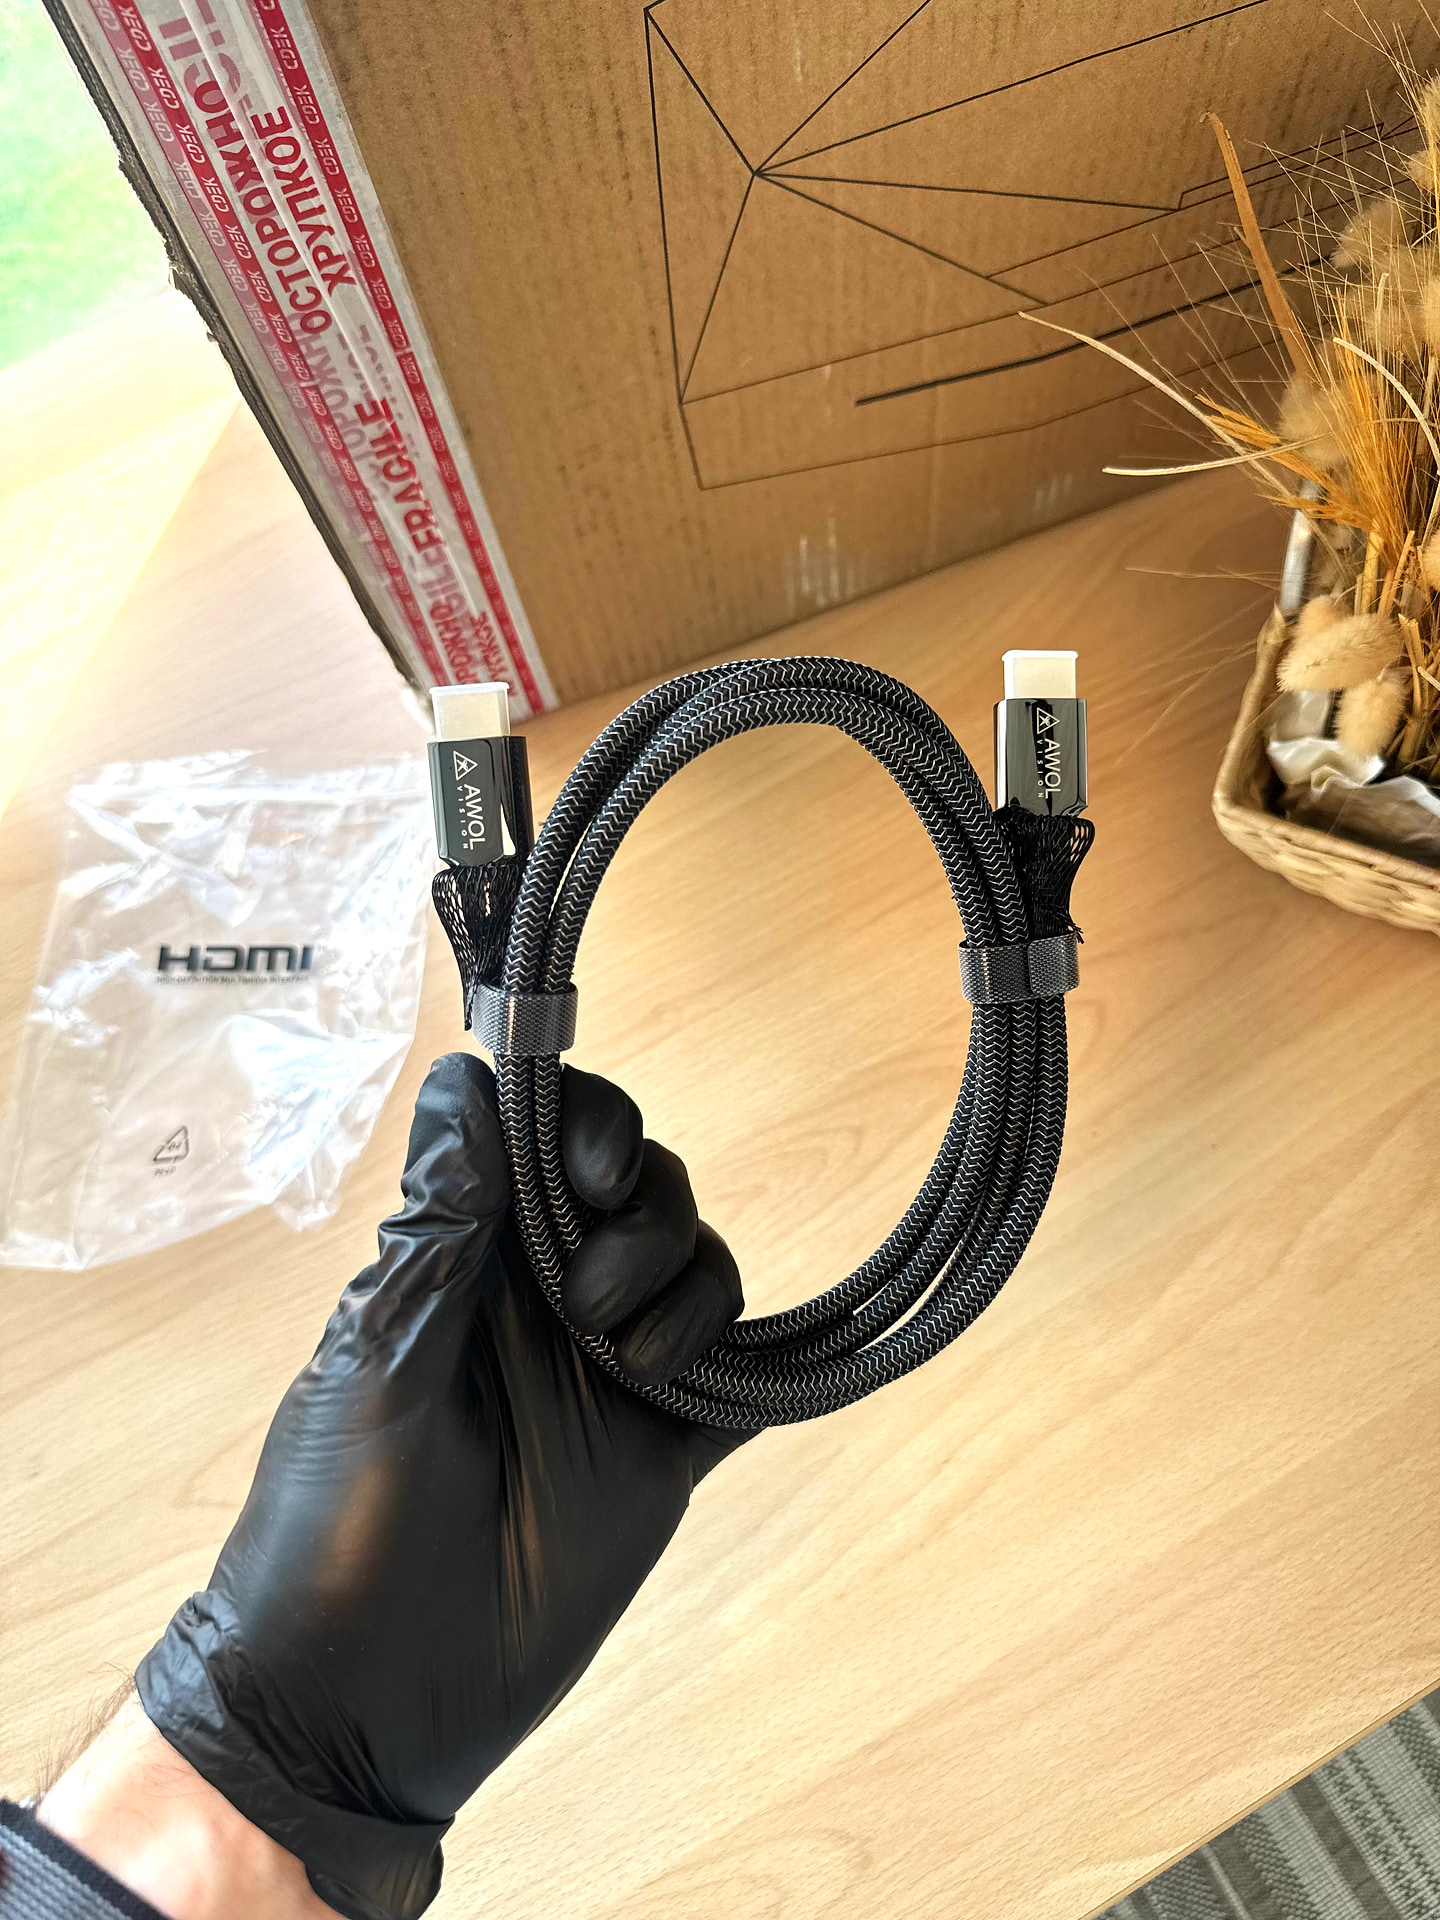
The top foam layer is a separate tray with three compartments holding two boxes of AWOL VISION DLP Link active 3D glasses and a bagged, braided AWOL-branded HDMI 2.1 cable. They sit one level above the retail box for a reason: these extras were exclusive to the Kickstarter version. Neither the glasses nor the cable is part of the retail package, so retail buyers will pay around $80 for two pairs of glasses and will need to bring their own HDMI cable. Then again, 3D glasses in this class are almost always a separate purchase (if the projector supports 3D at all), so that’s nothing unusual.
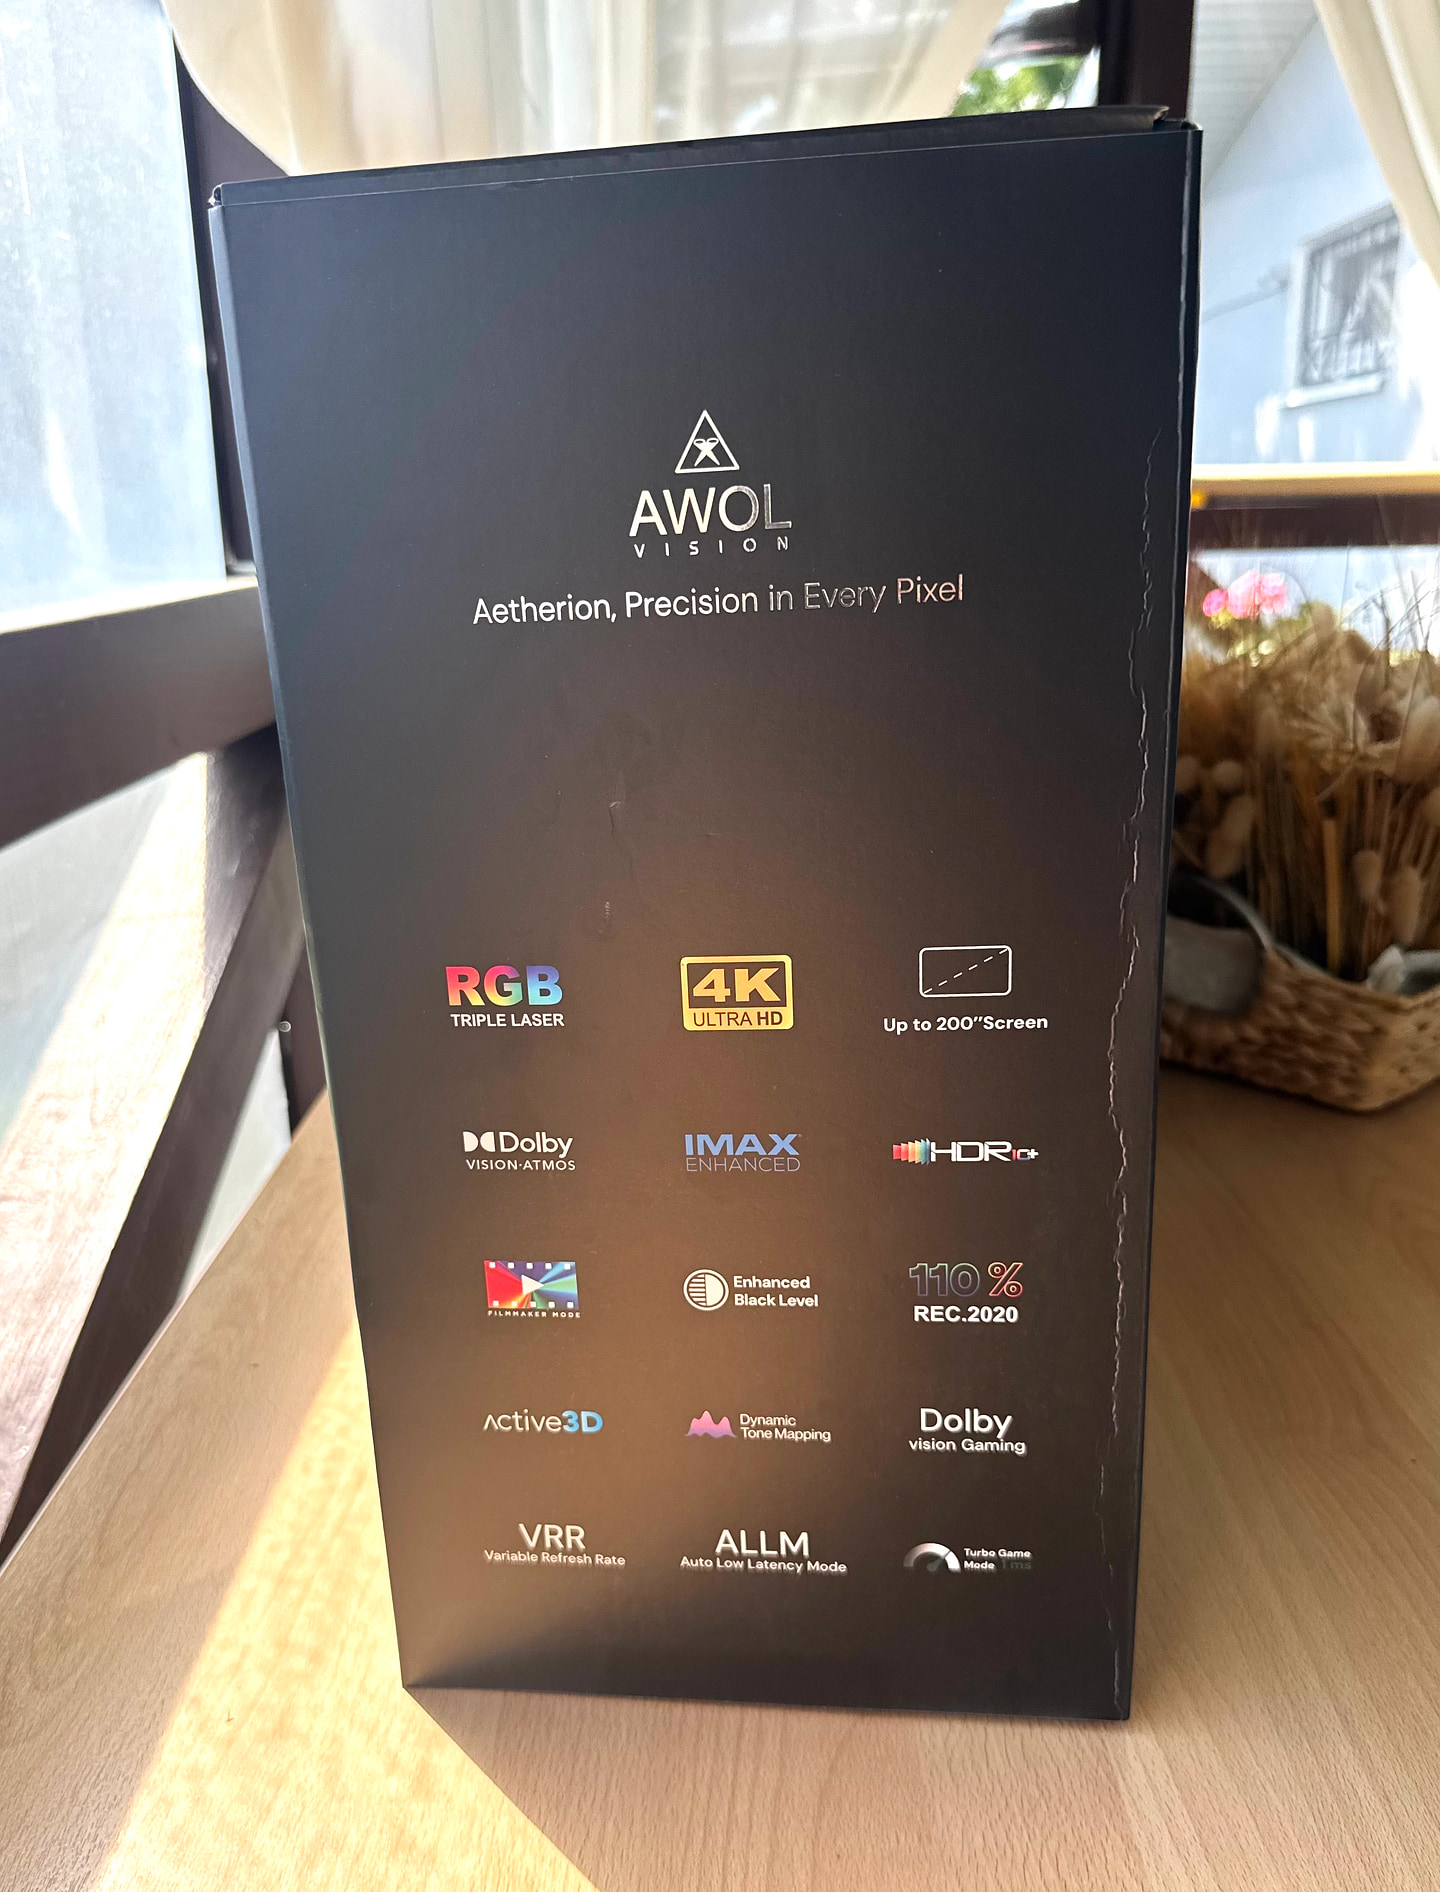
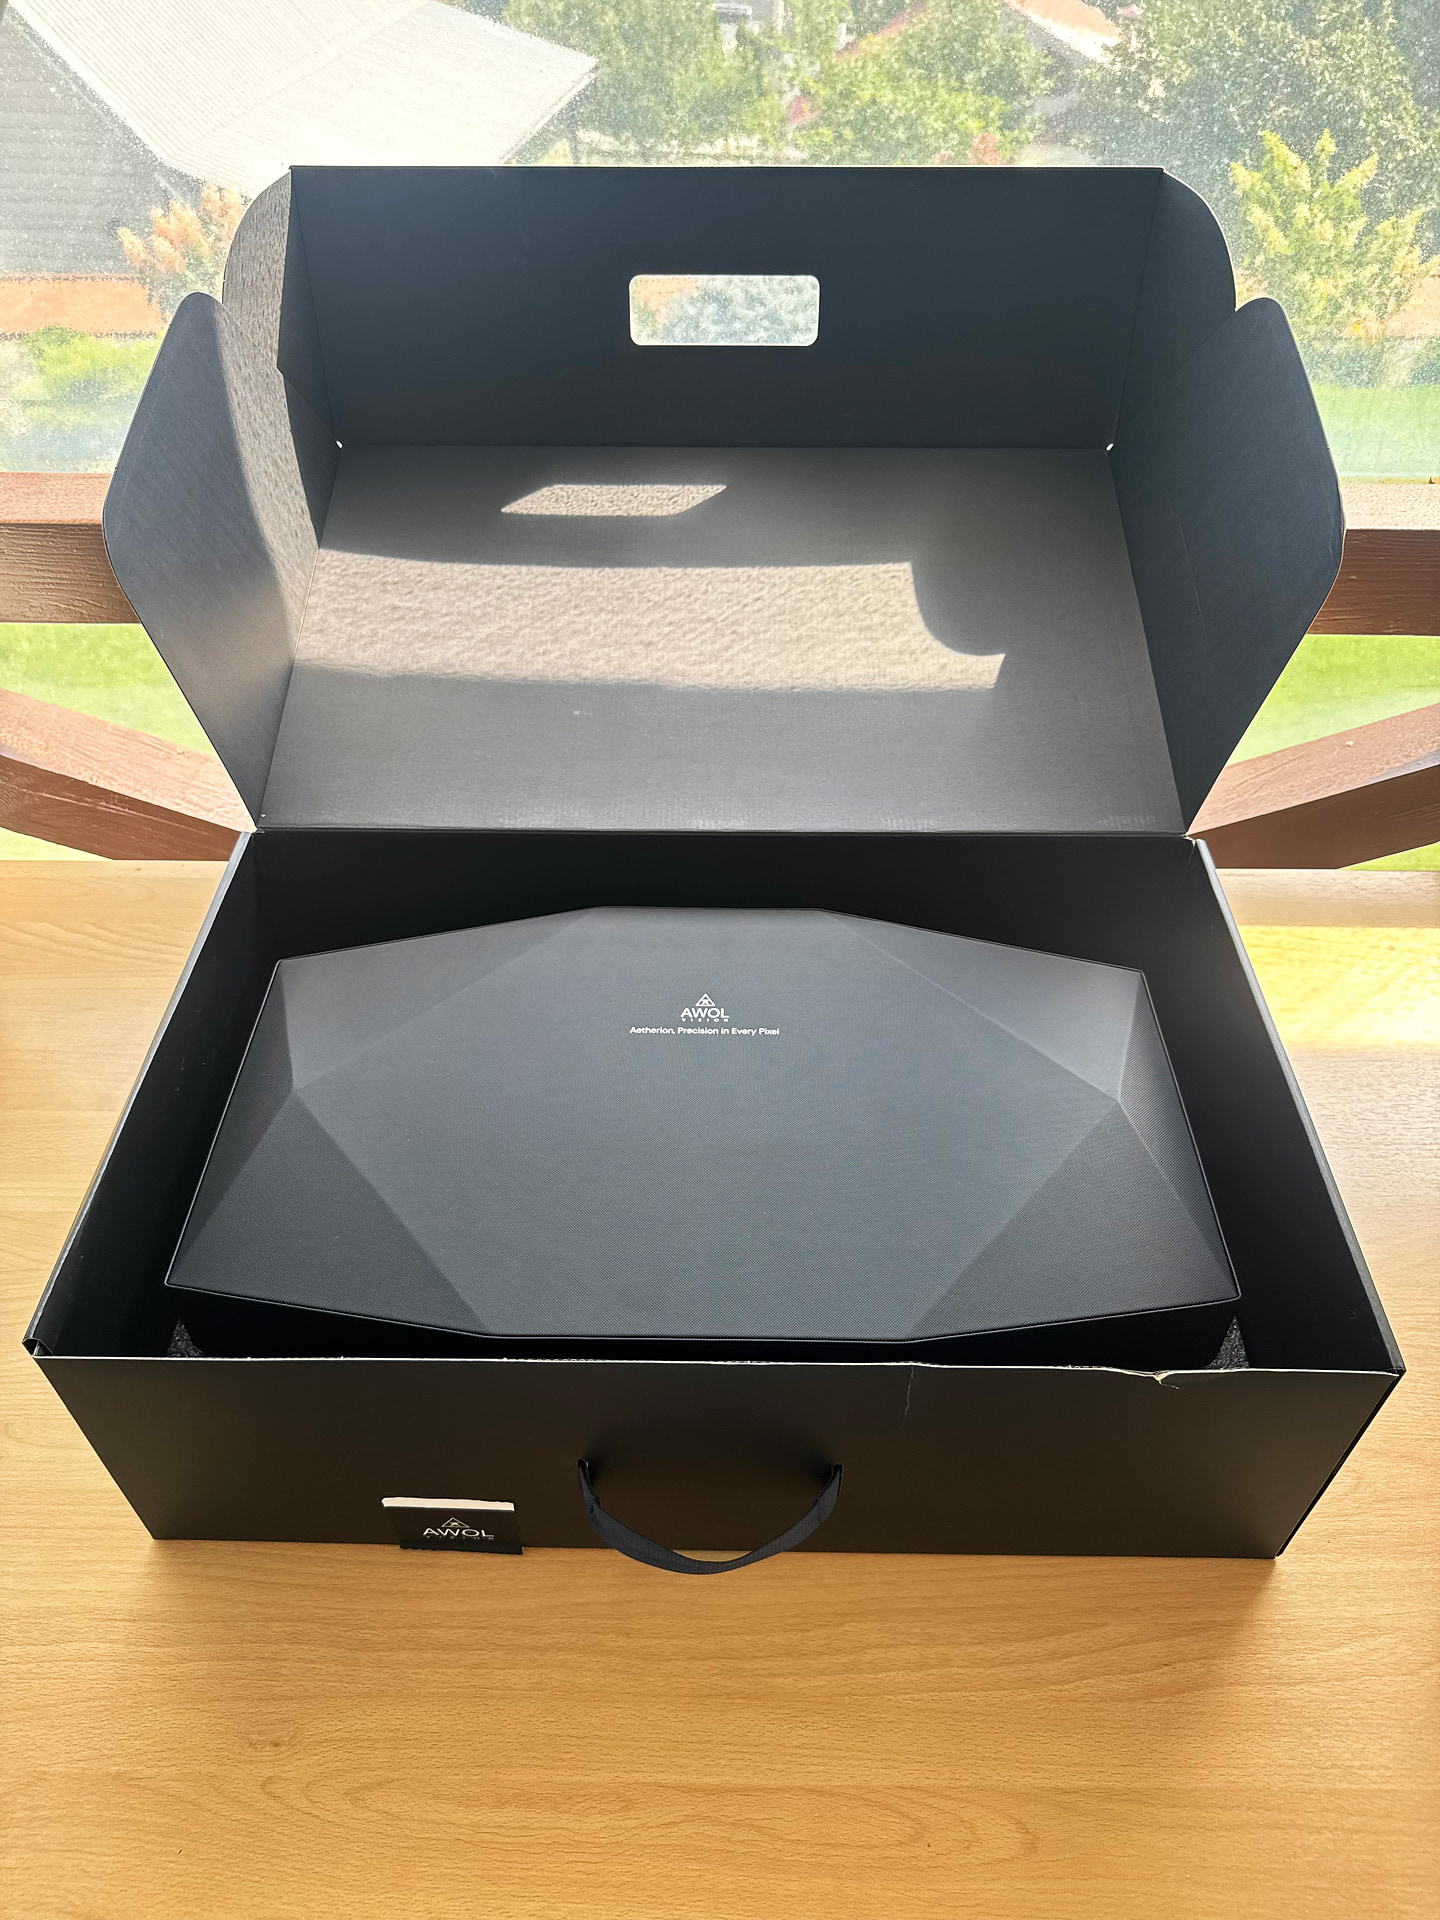
Beneath the tray is the retail box: matte black, with a fabric carry handle and the spec list printed on the end panel: RGB Triple Lasers, 4K UHD, screens up to 200 inches, Dolby Vision, IMAX Enhanced, HDR10+, REC.2020, Enhanced Black Level, Active 3D, Dolby Vision Gaming, VRR, ALLM. It’s a fair summary of what the projector can do.
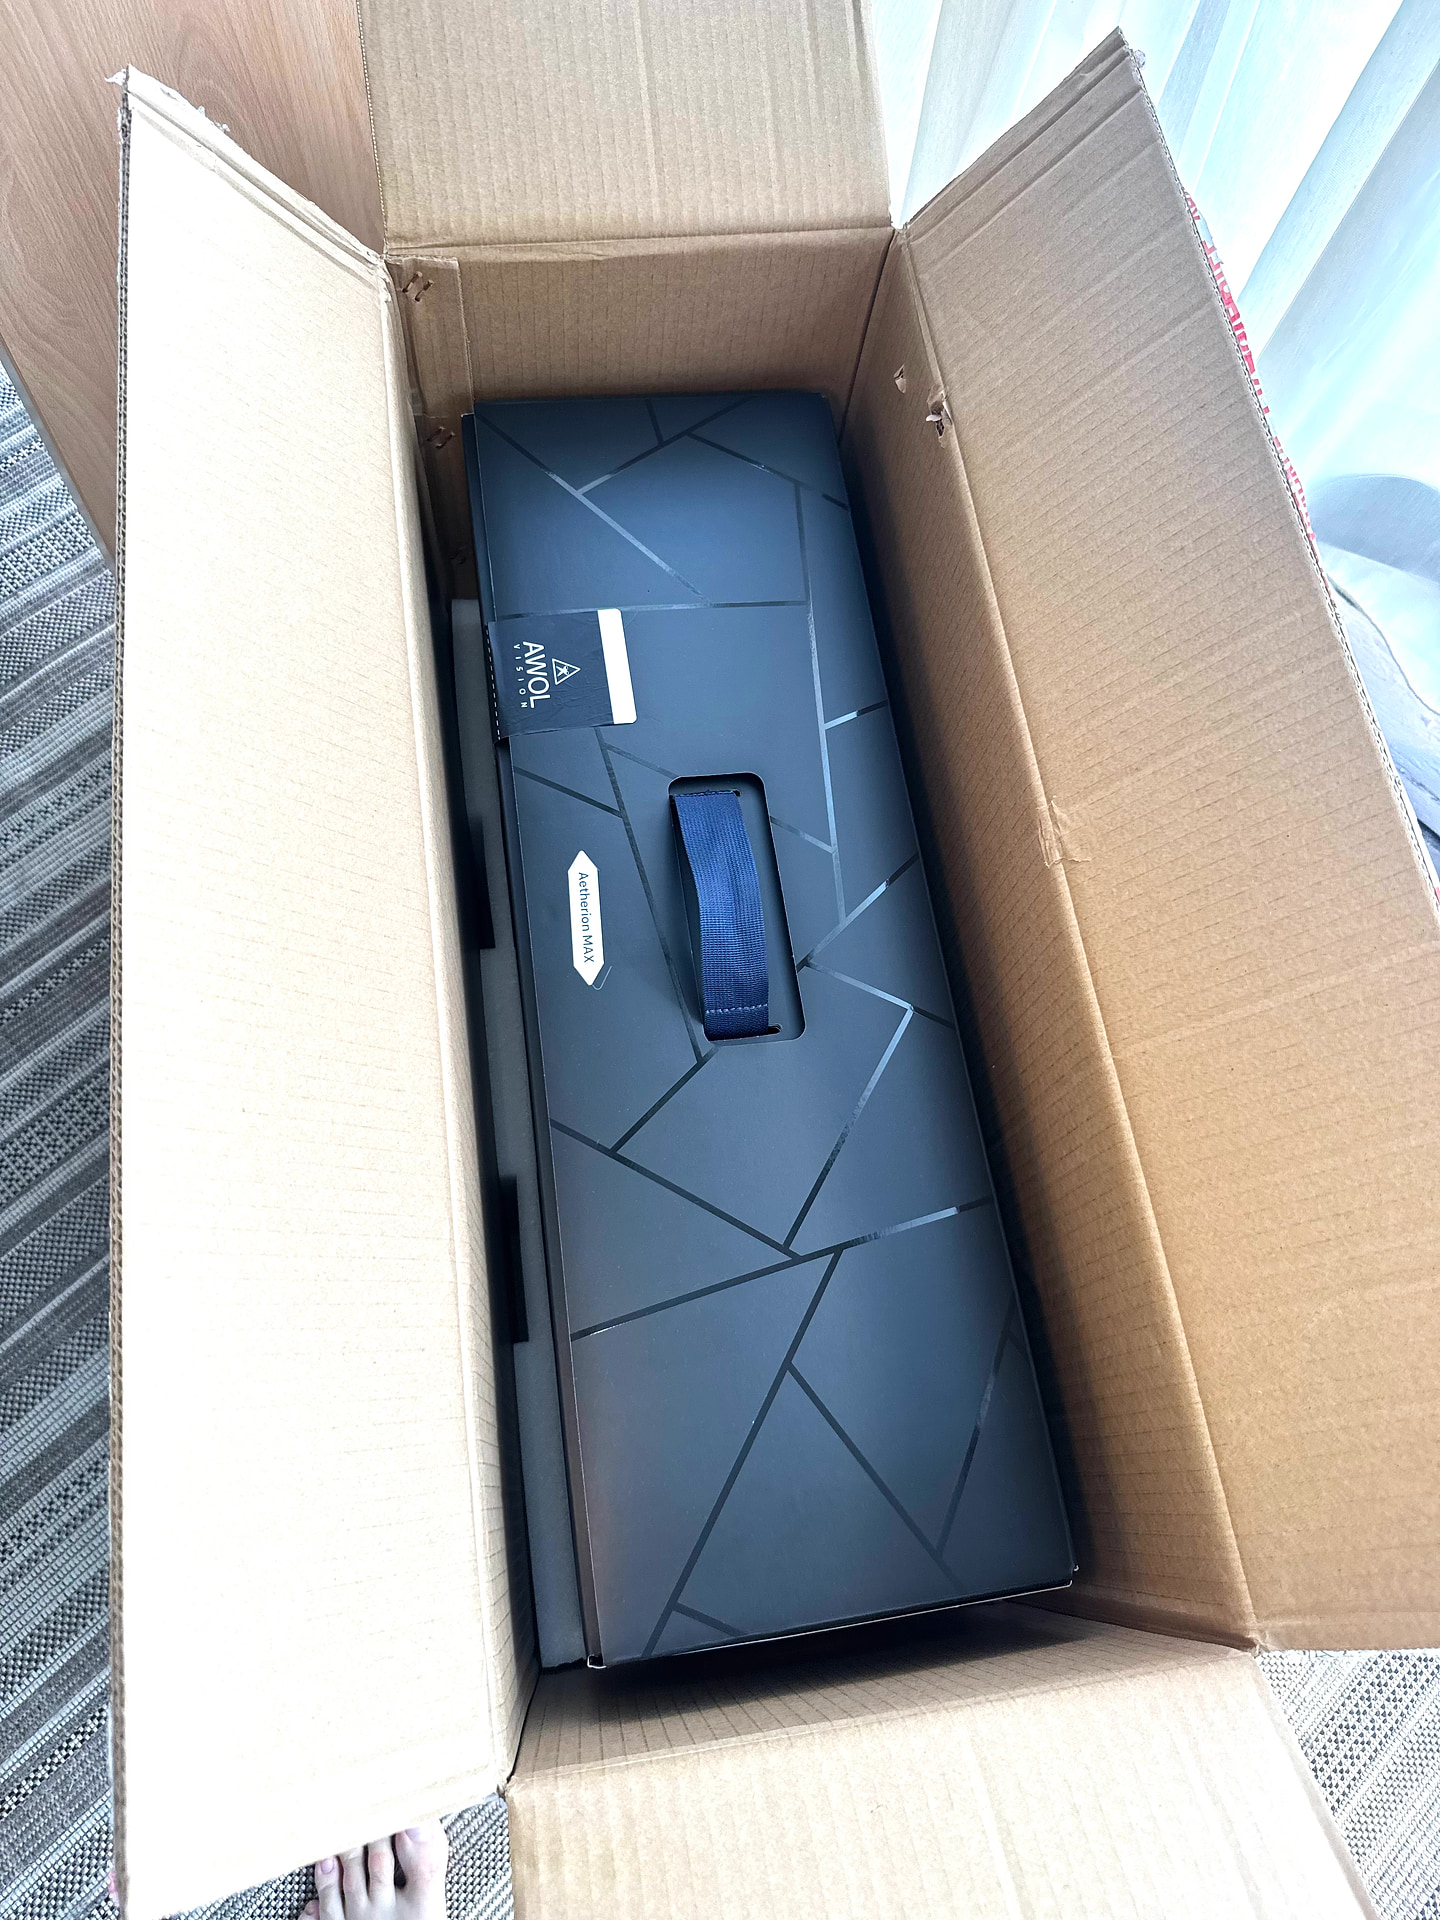
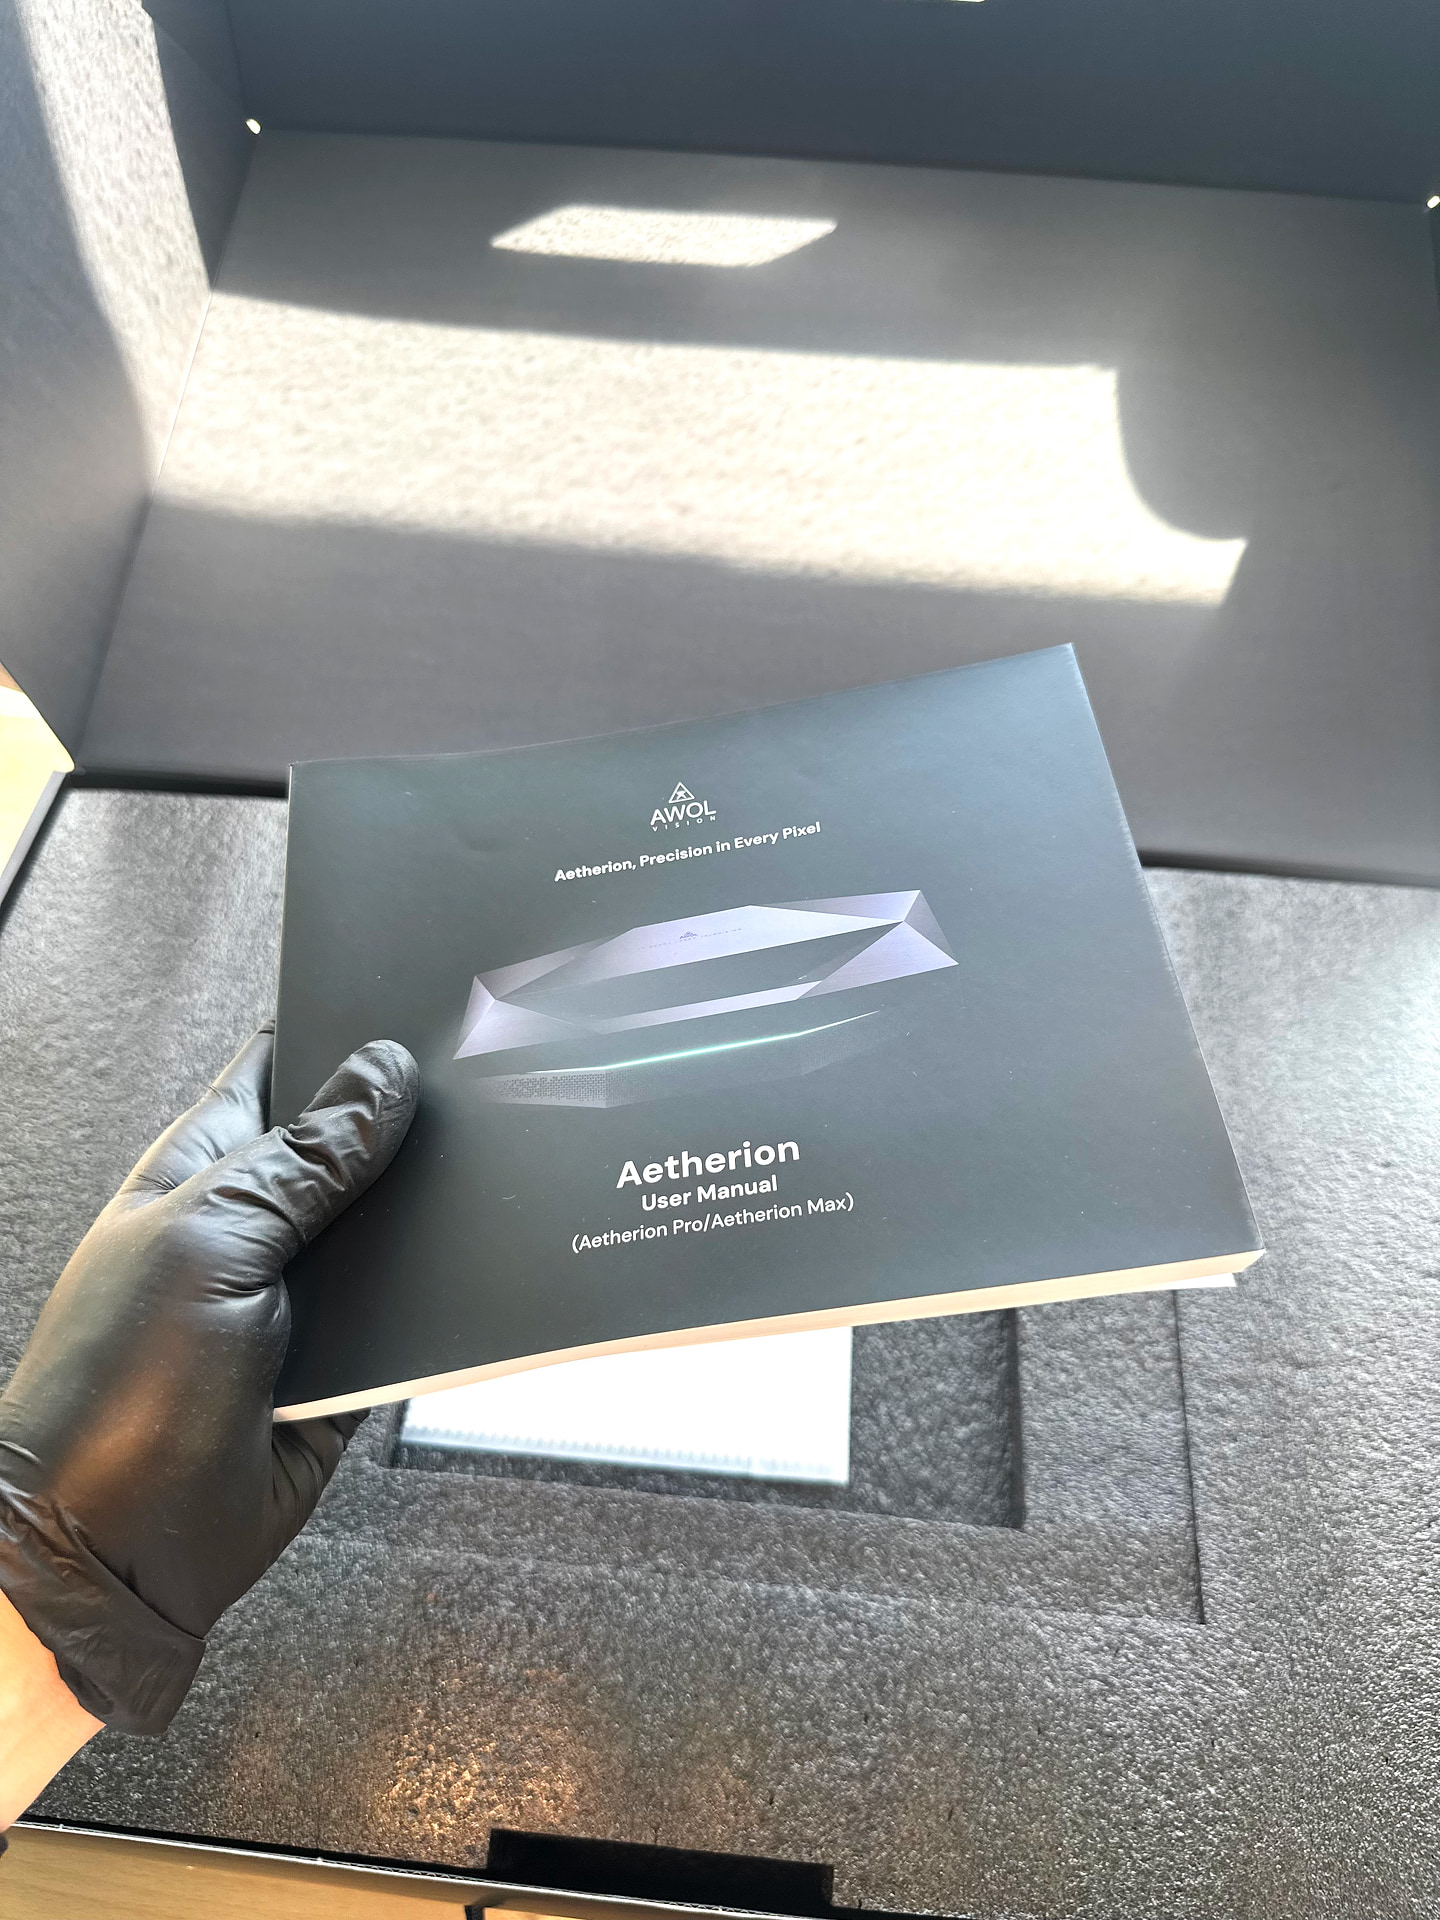
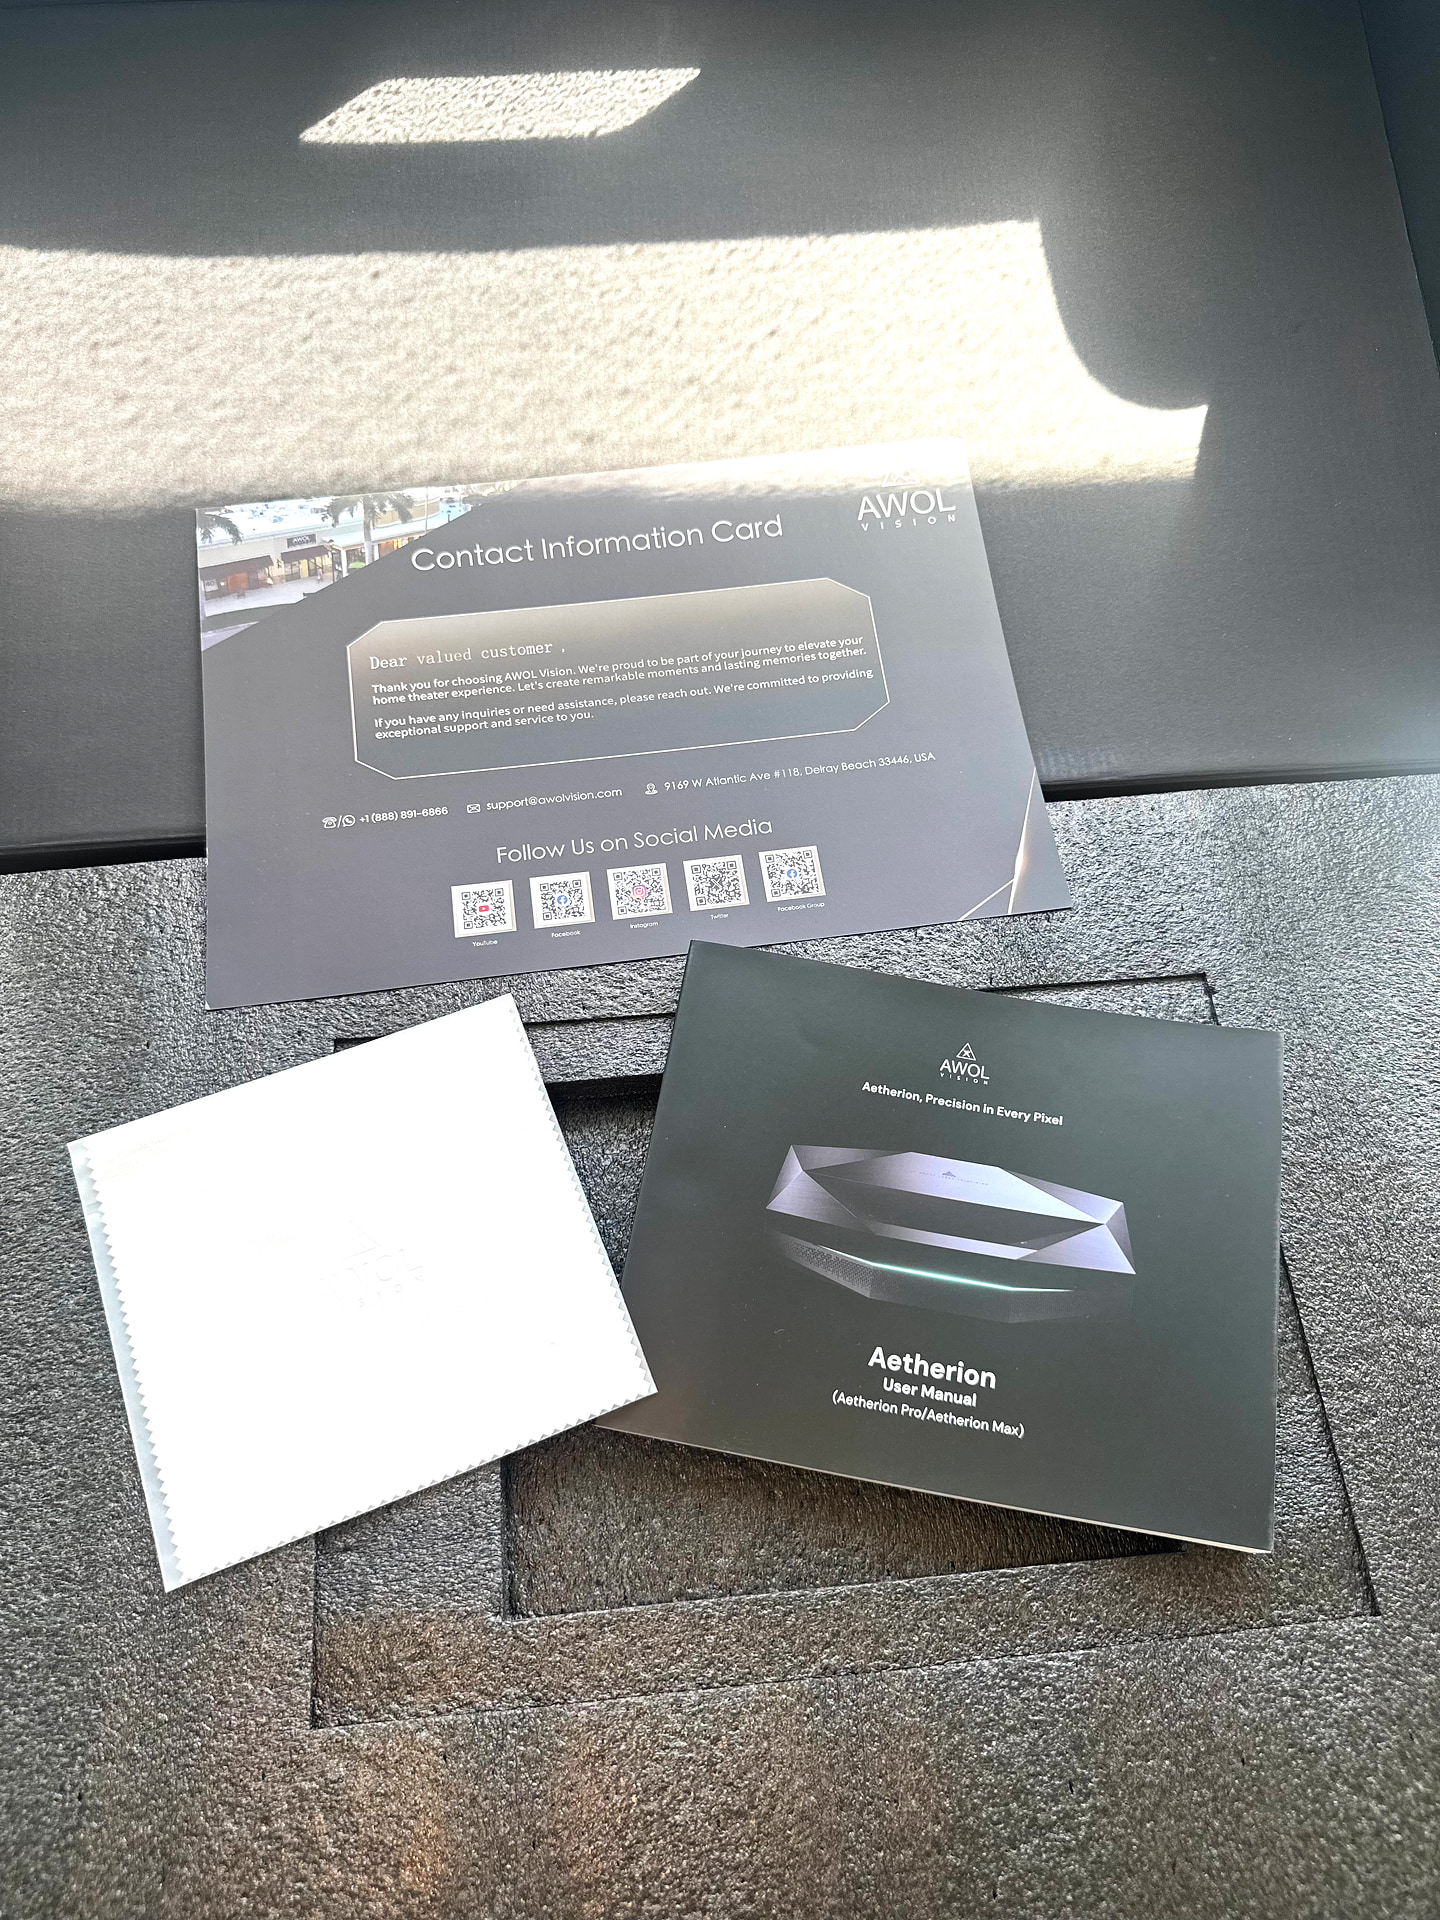
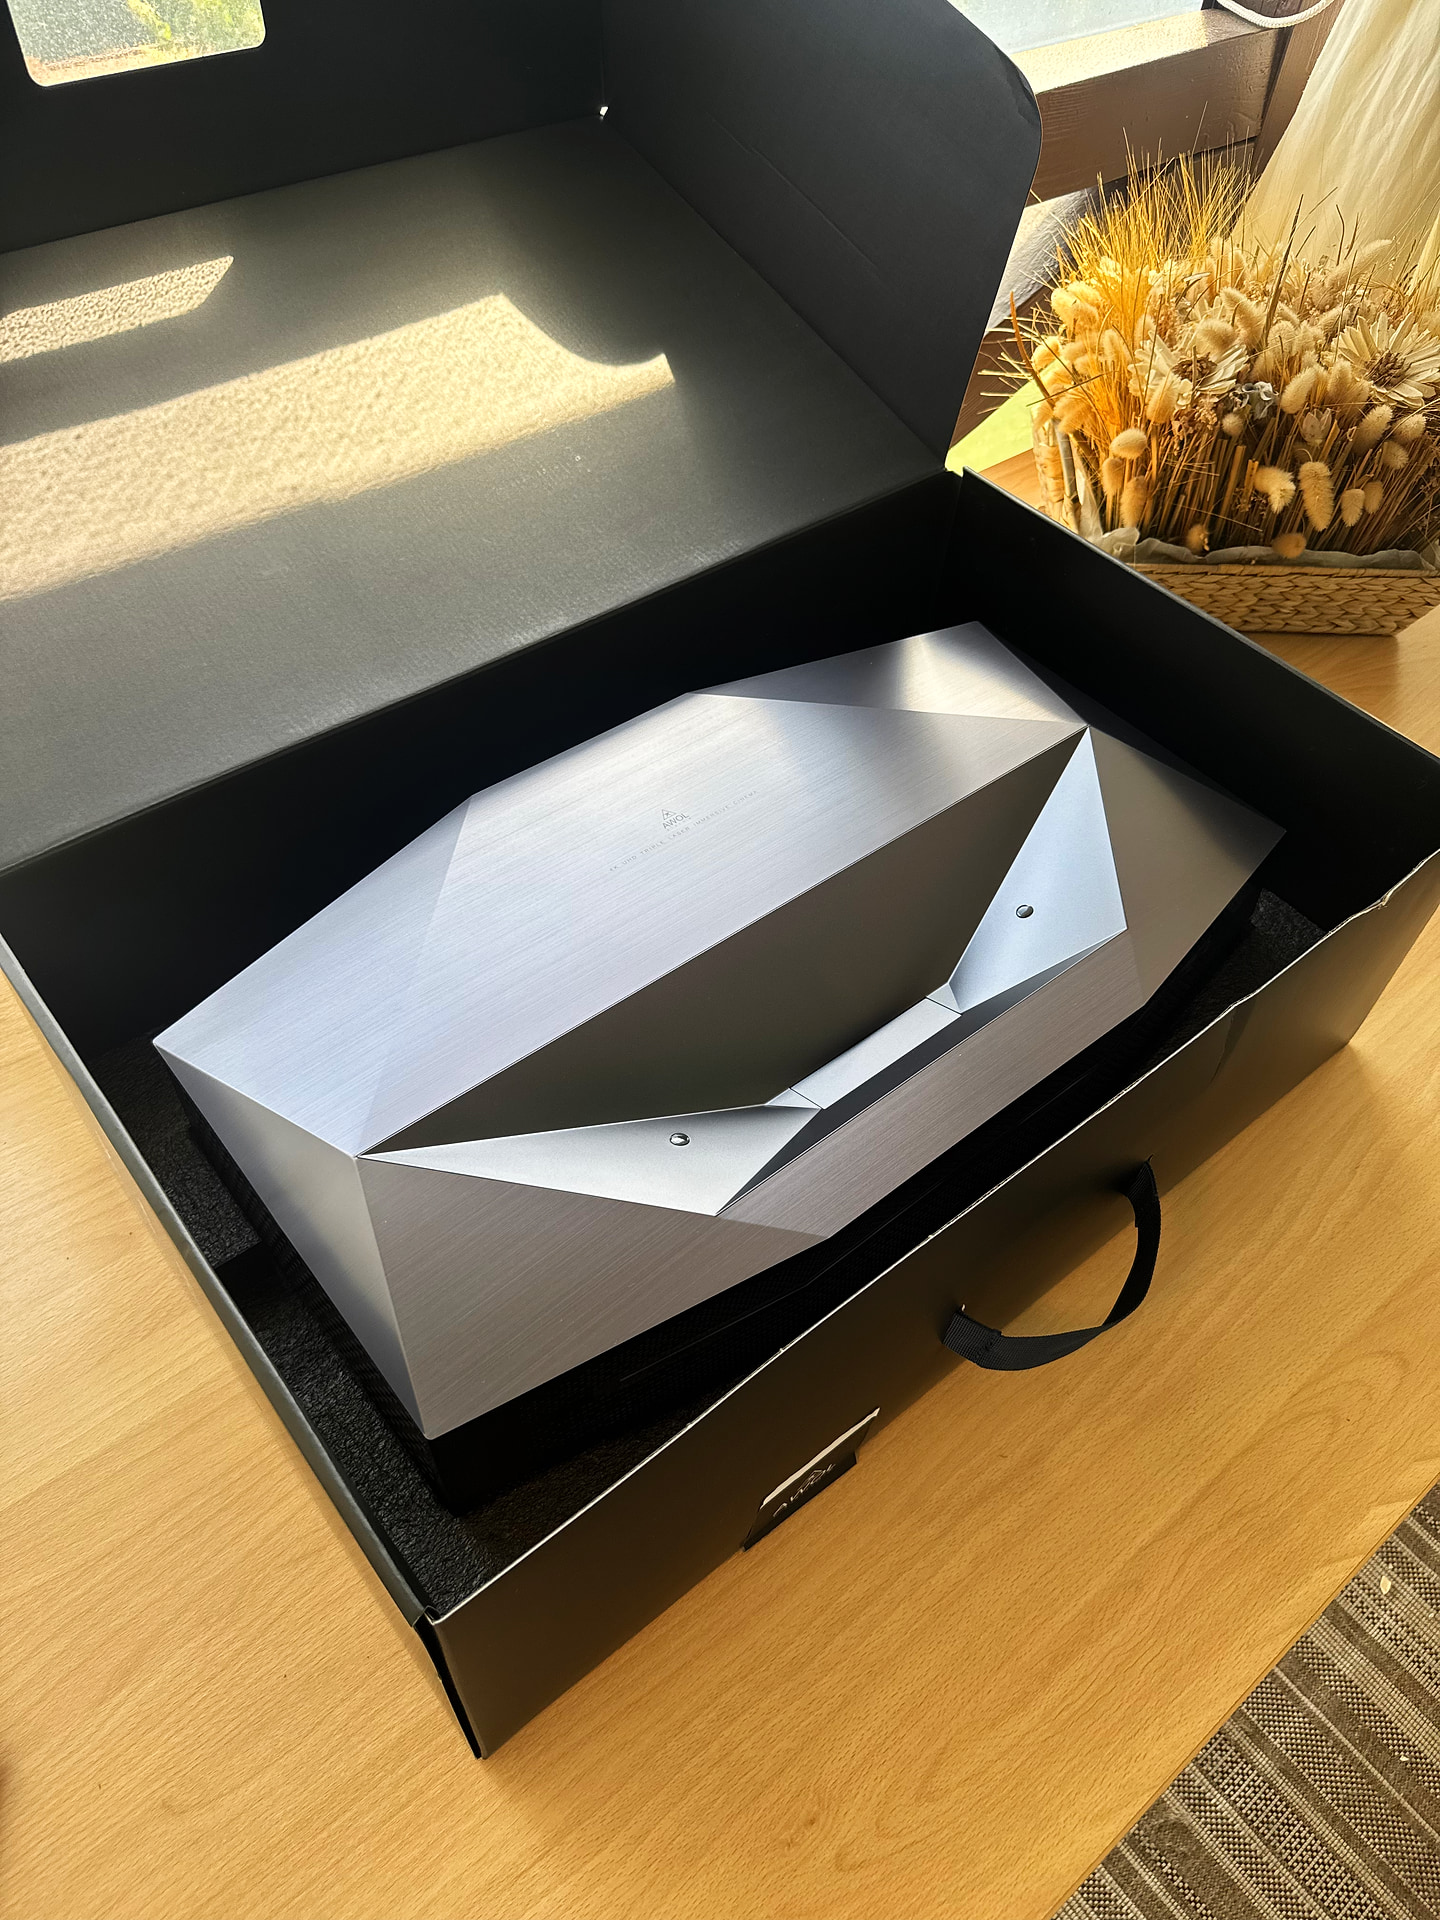
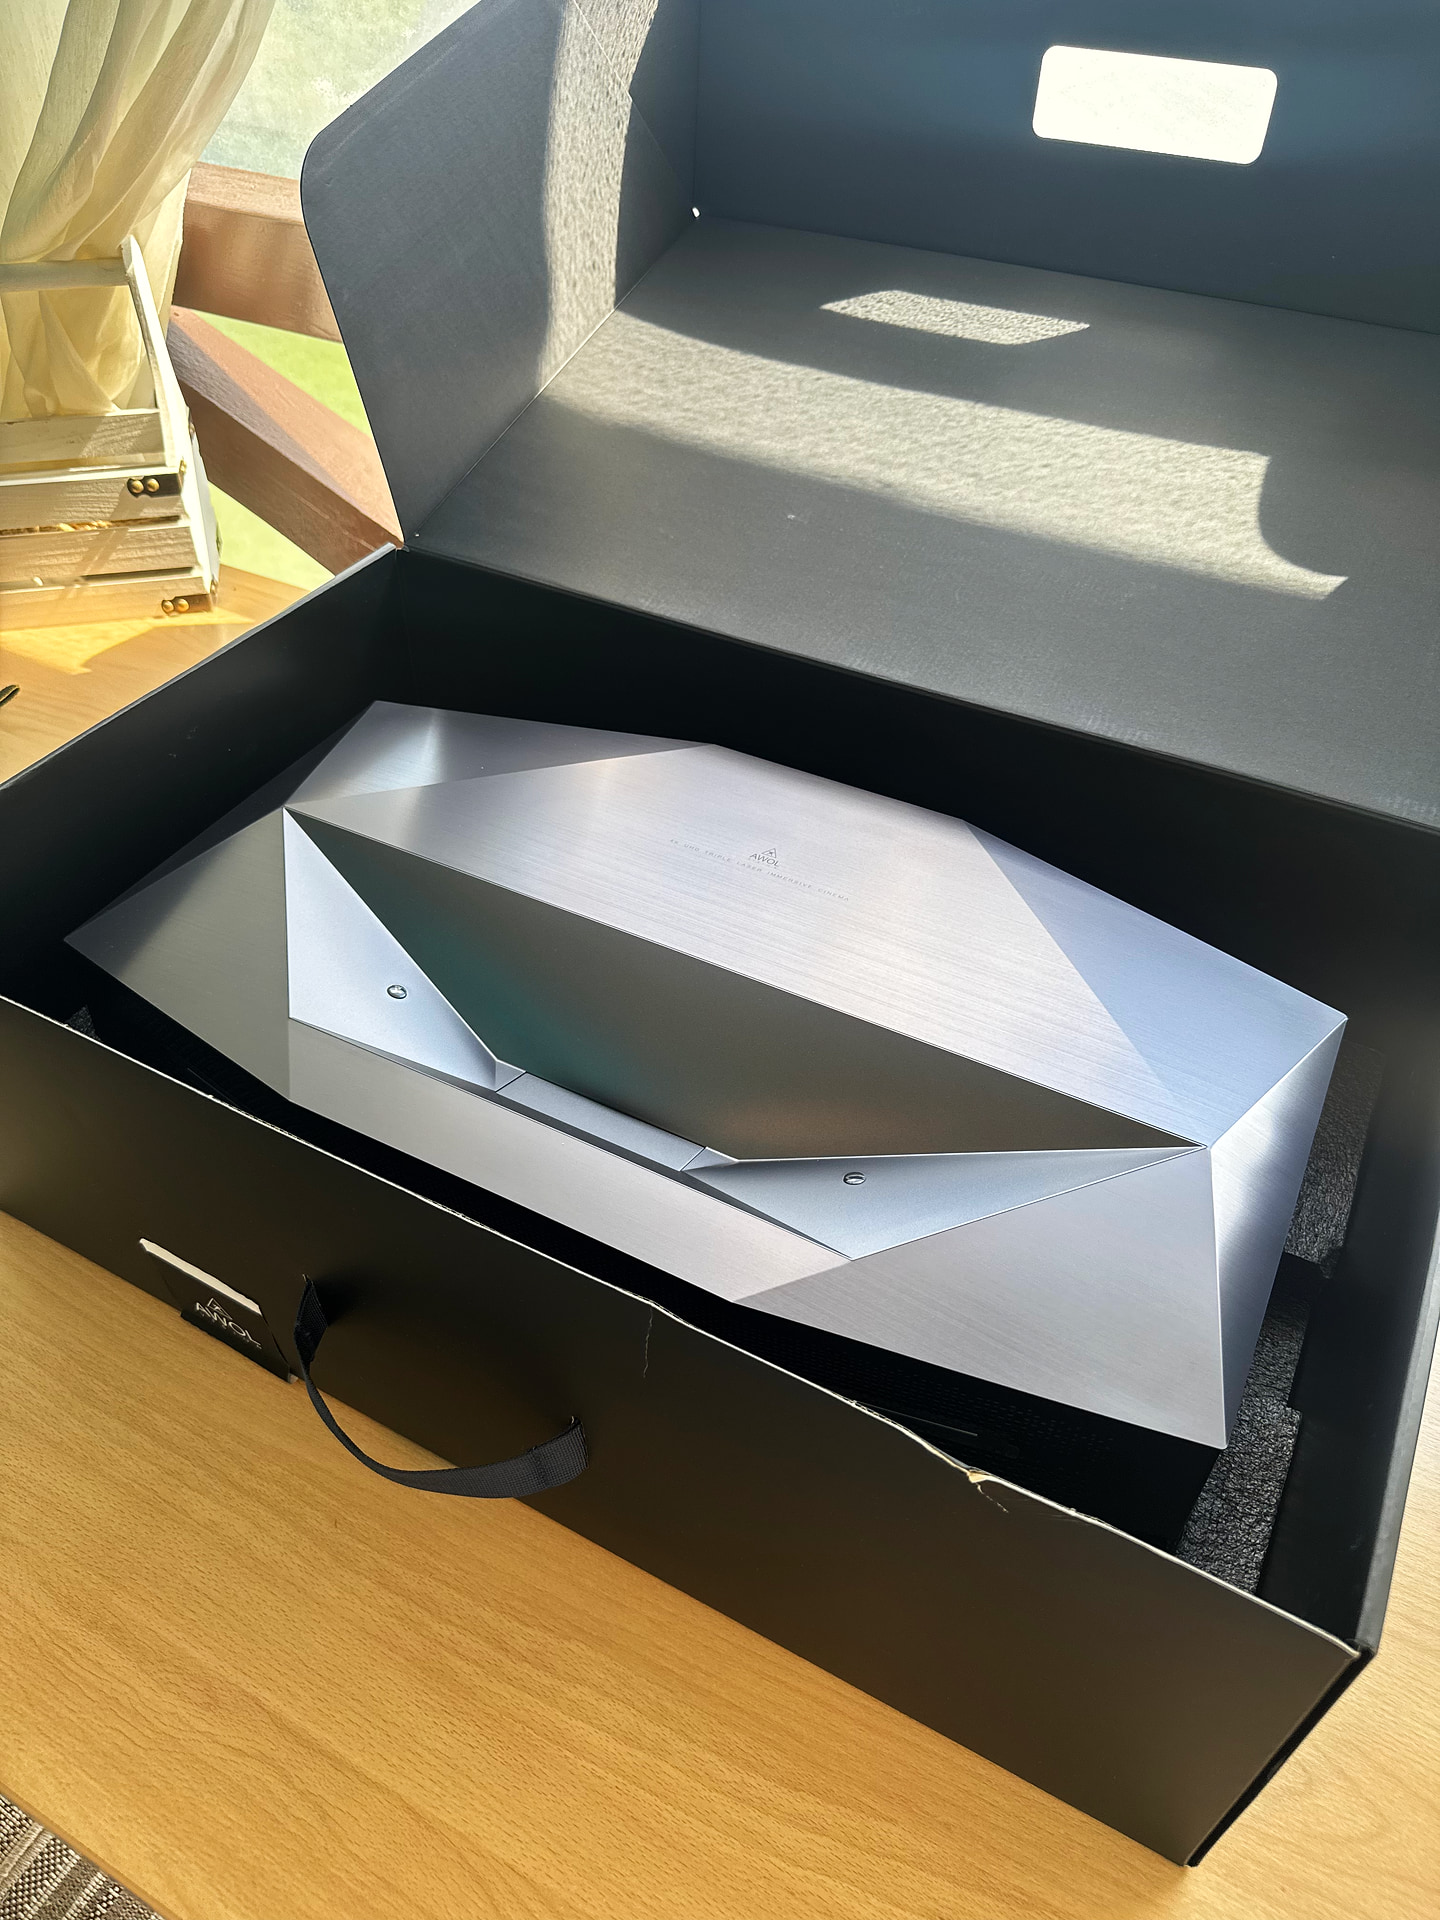
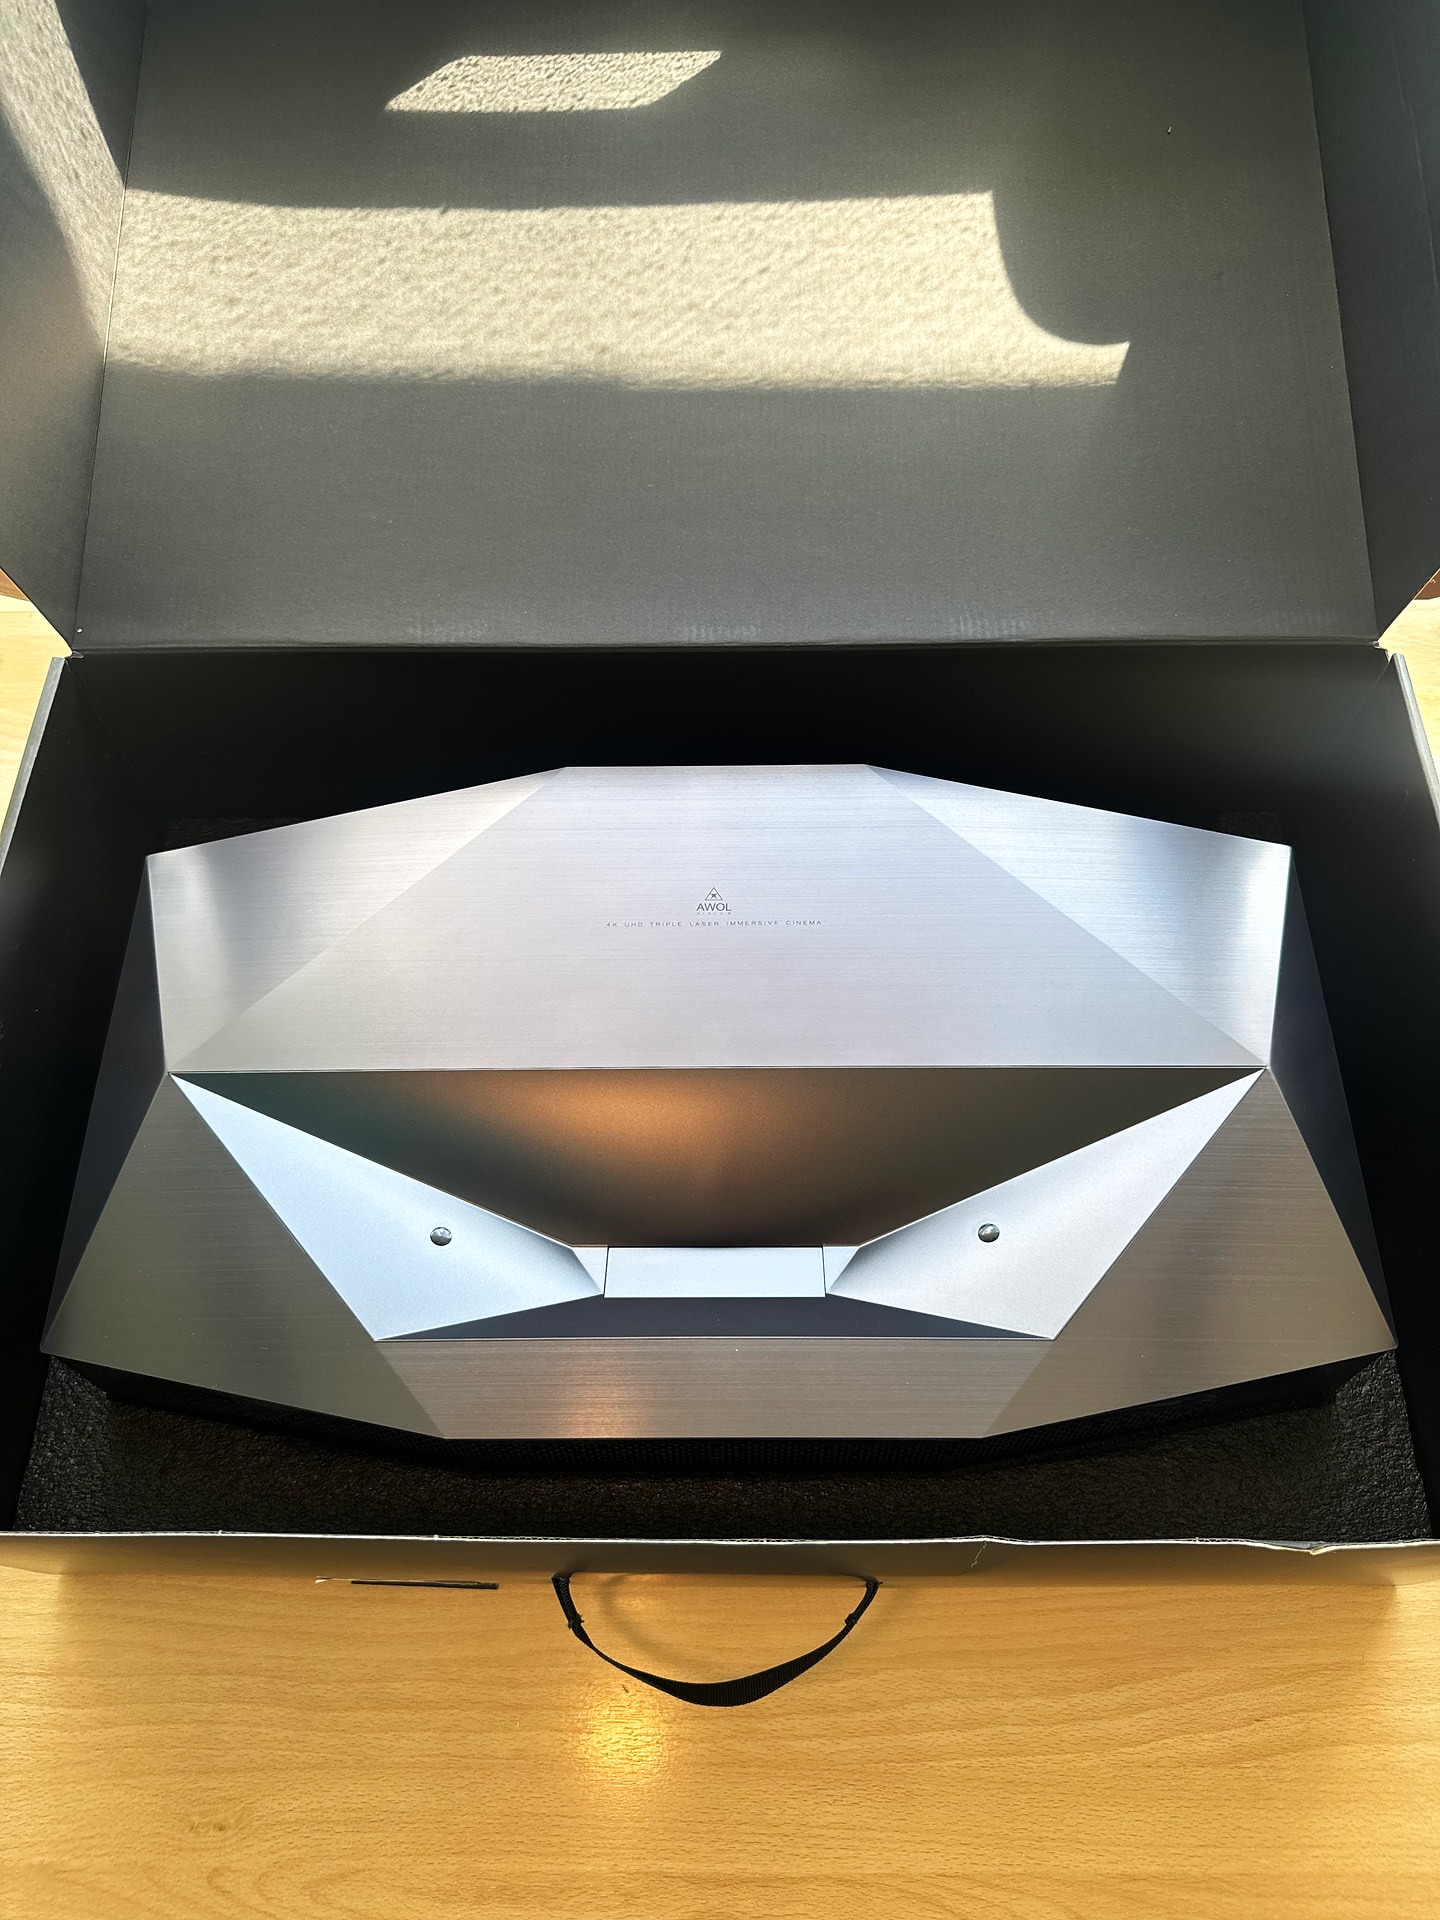
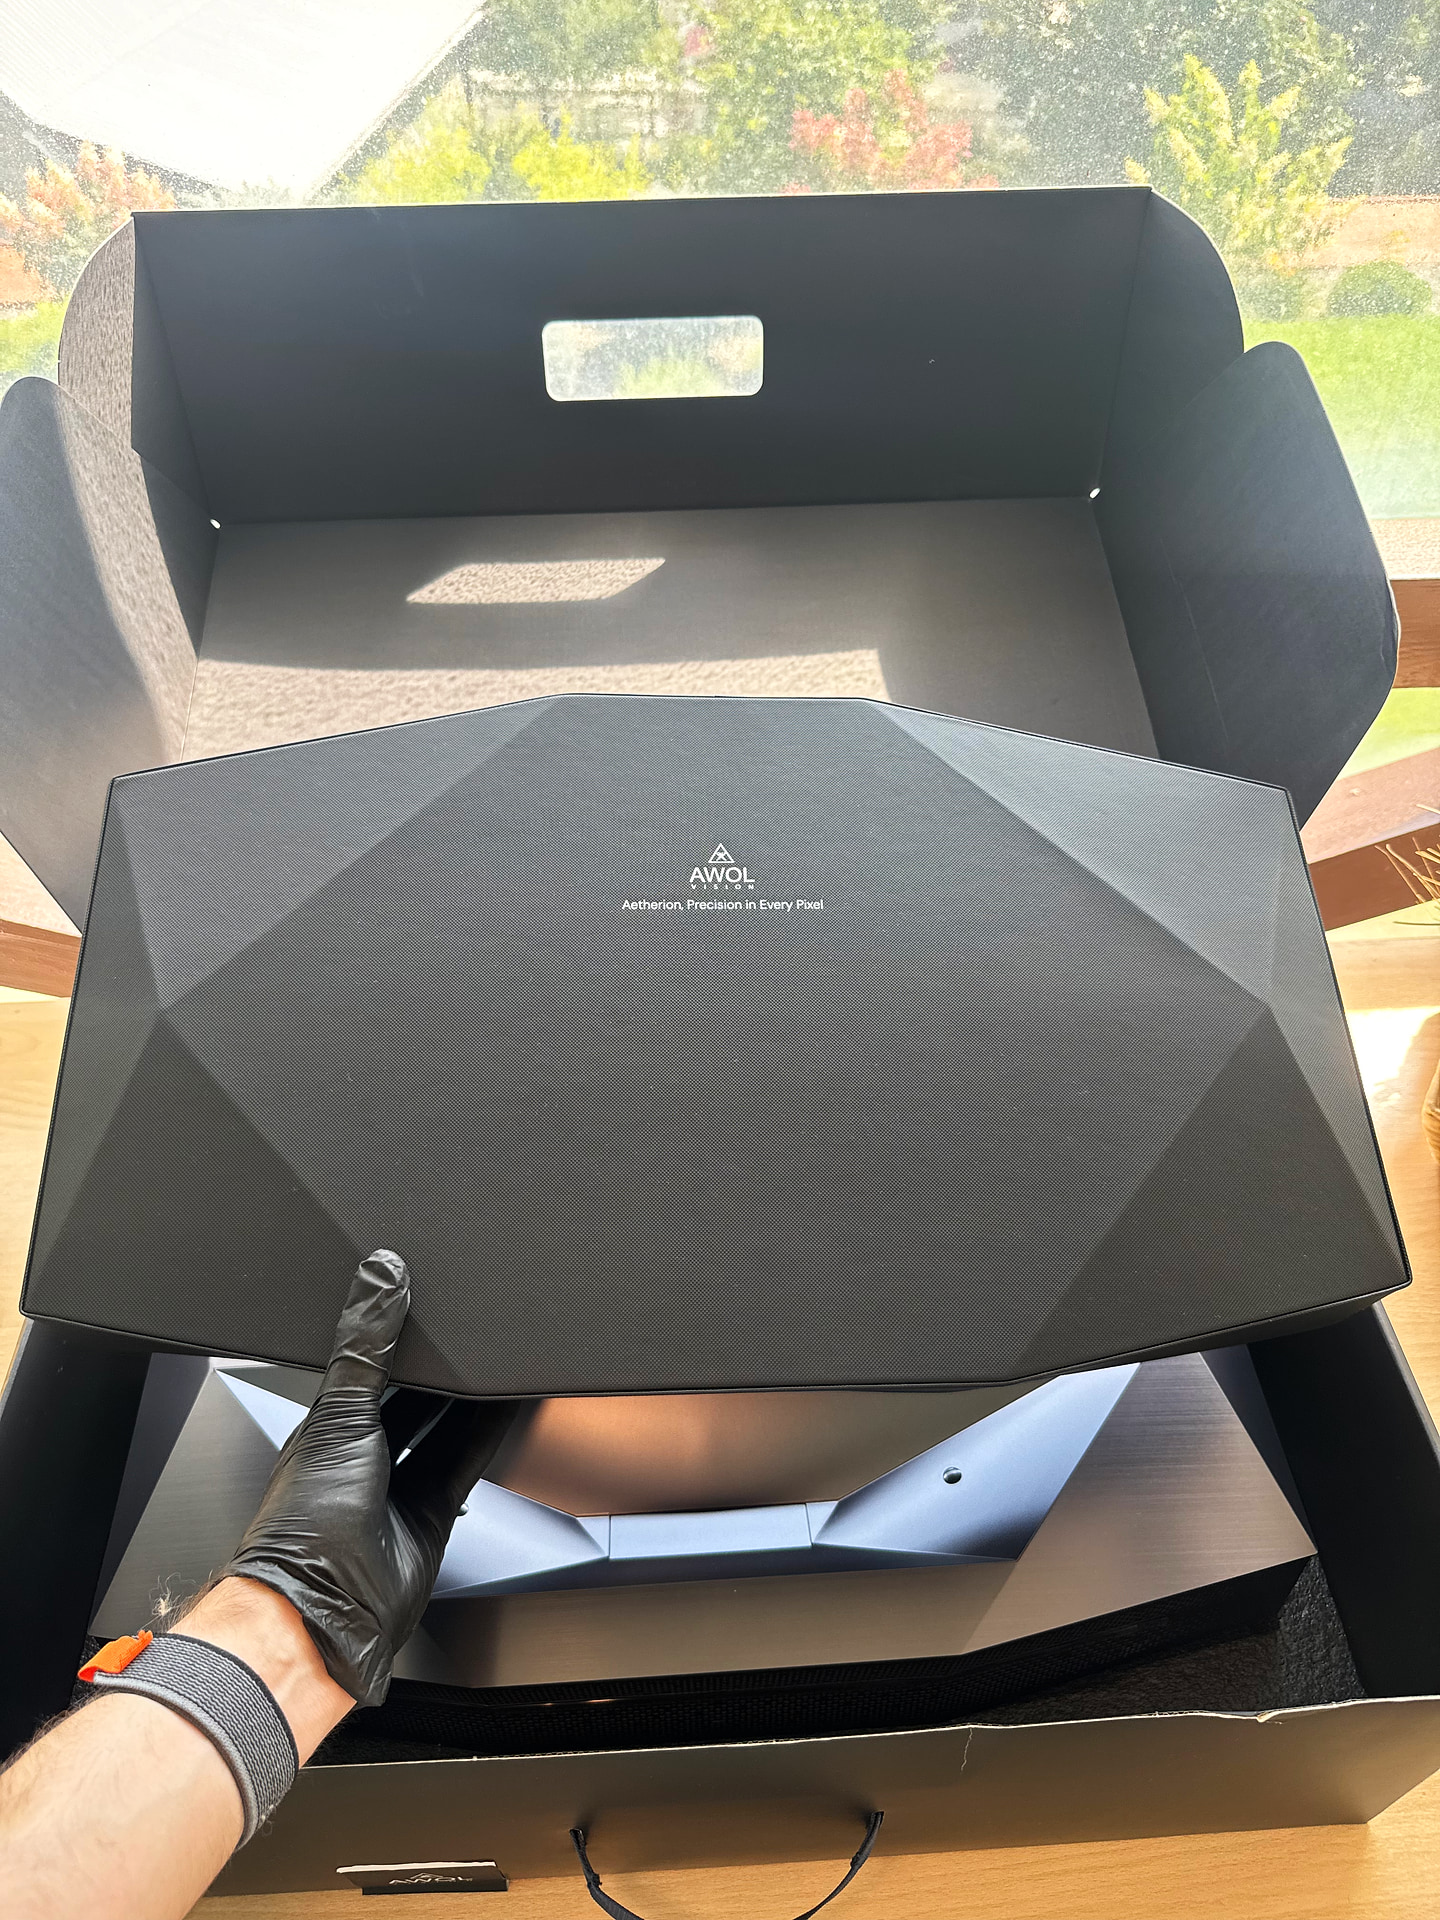
Under the lid, the documents come first: a user manual (shared by the Aetherion Pro and Aetherion Max), a Contact Information Card with the warranty, and a microfiber cleaning cloth. Beneath them is the hard dust cover, and under that, the projector itself.
Dust Cover
The hard cover sitting on top of the projector in the box is a proper accessory in its own right. It has a matte black finish, a faceted shape that follows the chassis silhouette, and the AWOL logo with “Aetherion, Precision in Every Pixel” in the center. It sits on the projector like a lid with no latches, held in place by its own weight and shape. The inside is lined with a soft fabric to protect against scratches.
It’s a small thing, but on a UST it matters more than you might think. On a regular long-throw projector the lens points horizontally, and dust settles on it slowly. On an ultra-short-throw, the exit window faces straight up at the ceiling and is recessed into a deep well that is hard to blow dust out of. The motorized shutter only helps so much: while the projector is off, the glass is covered, but dust keeps settling on the shutter itself and in the well around it, and some of it still ends up on the window when the projector turns on. Over time it builds into a layer that behaves like any scattering obstacle in the optical path: it adds veiling glare across the whole image, plus rainbow halos. That eats into the very contrast many people buy this projector for. The cover is a simple way to keep dust down and curious pets off the projector.
Design & Build
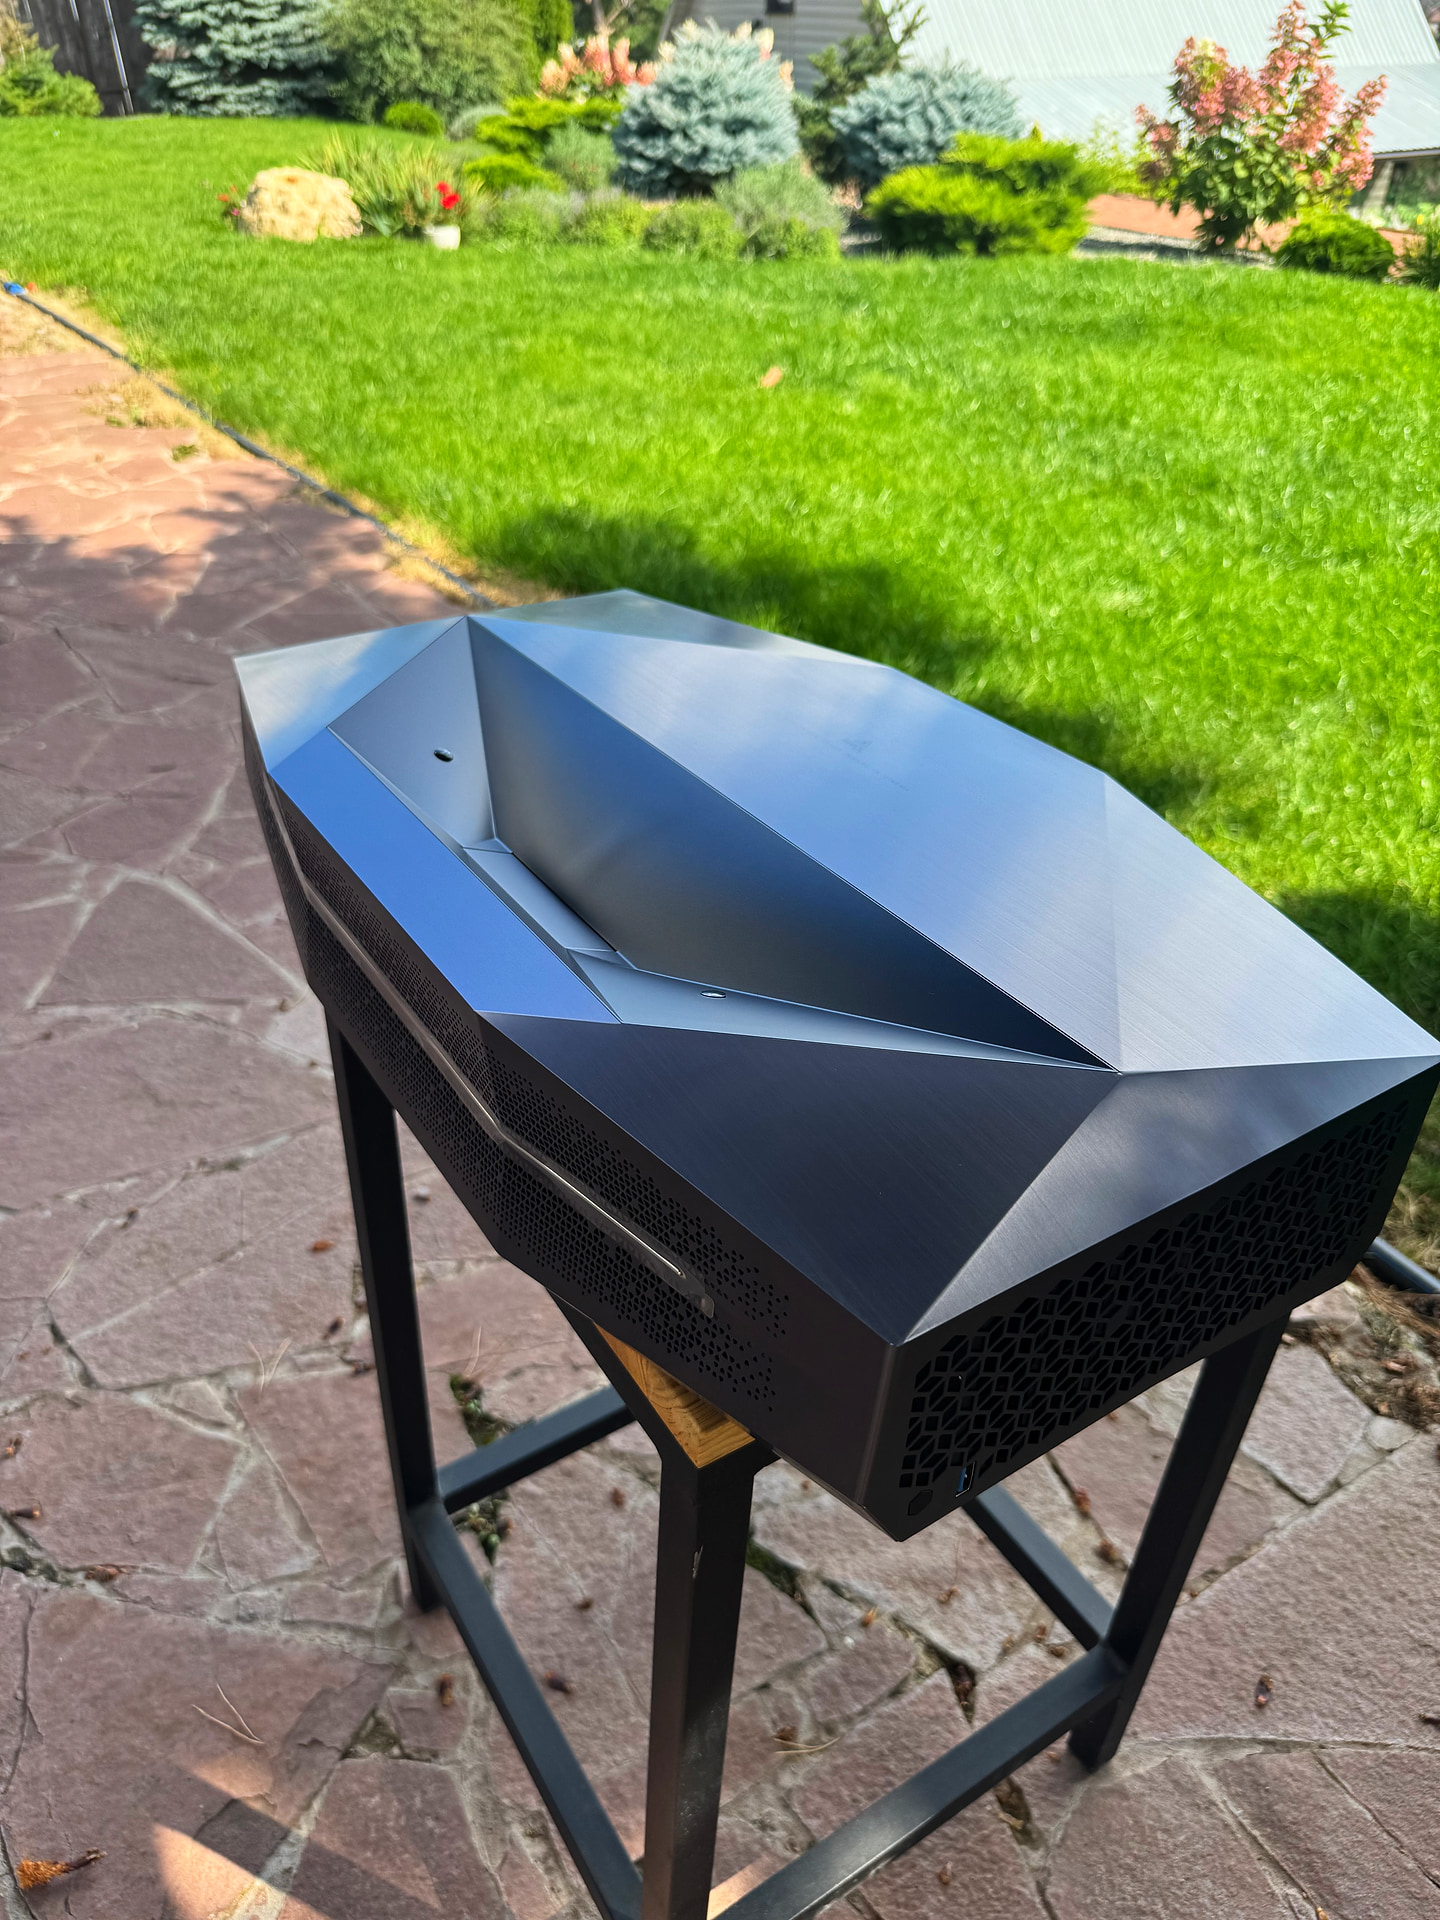
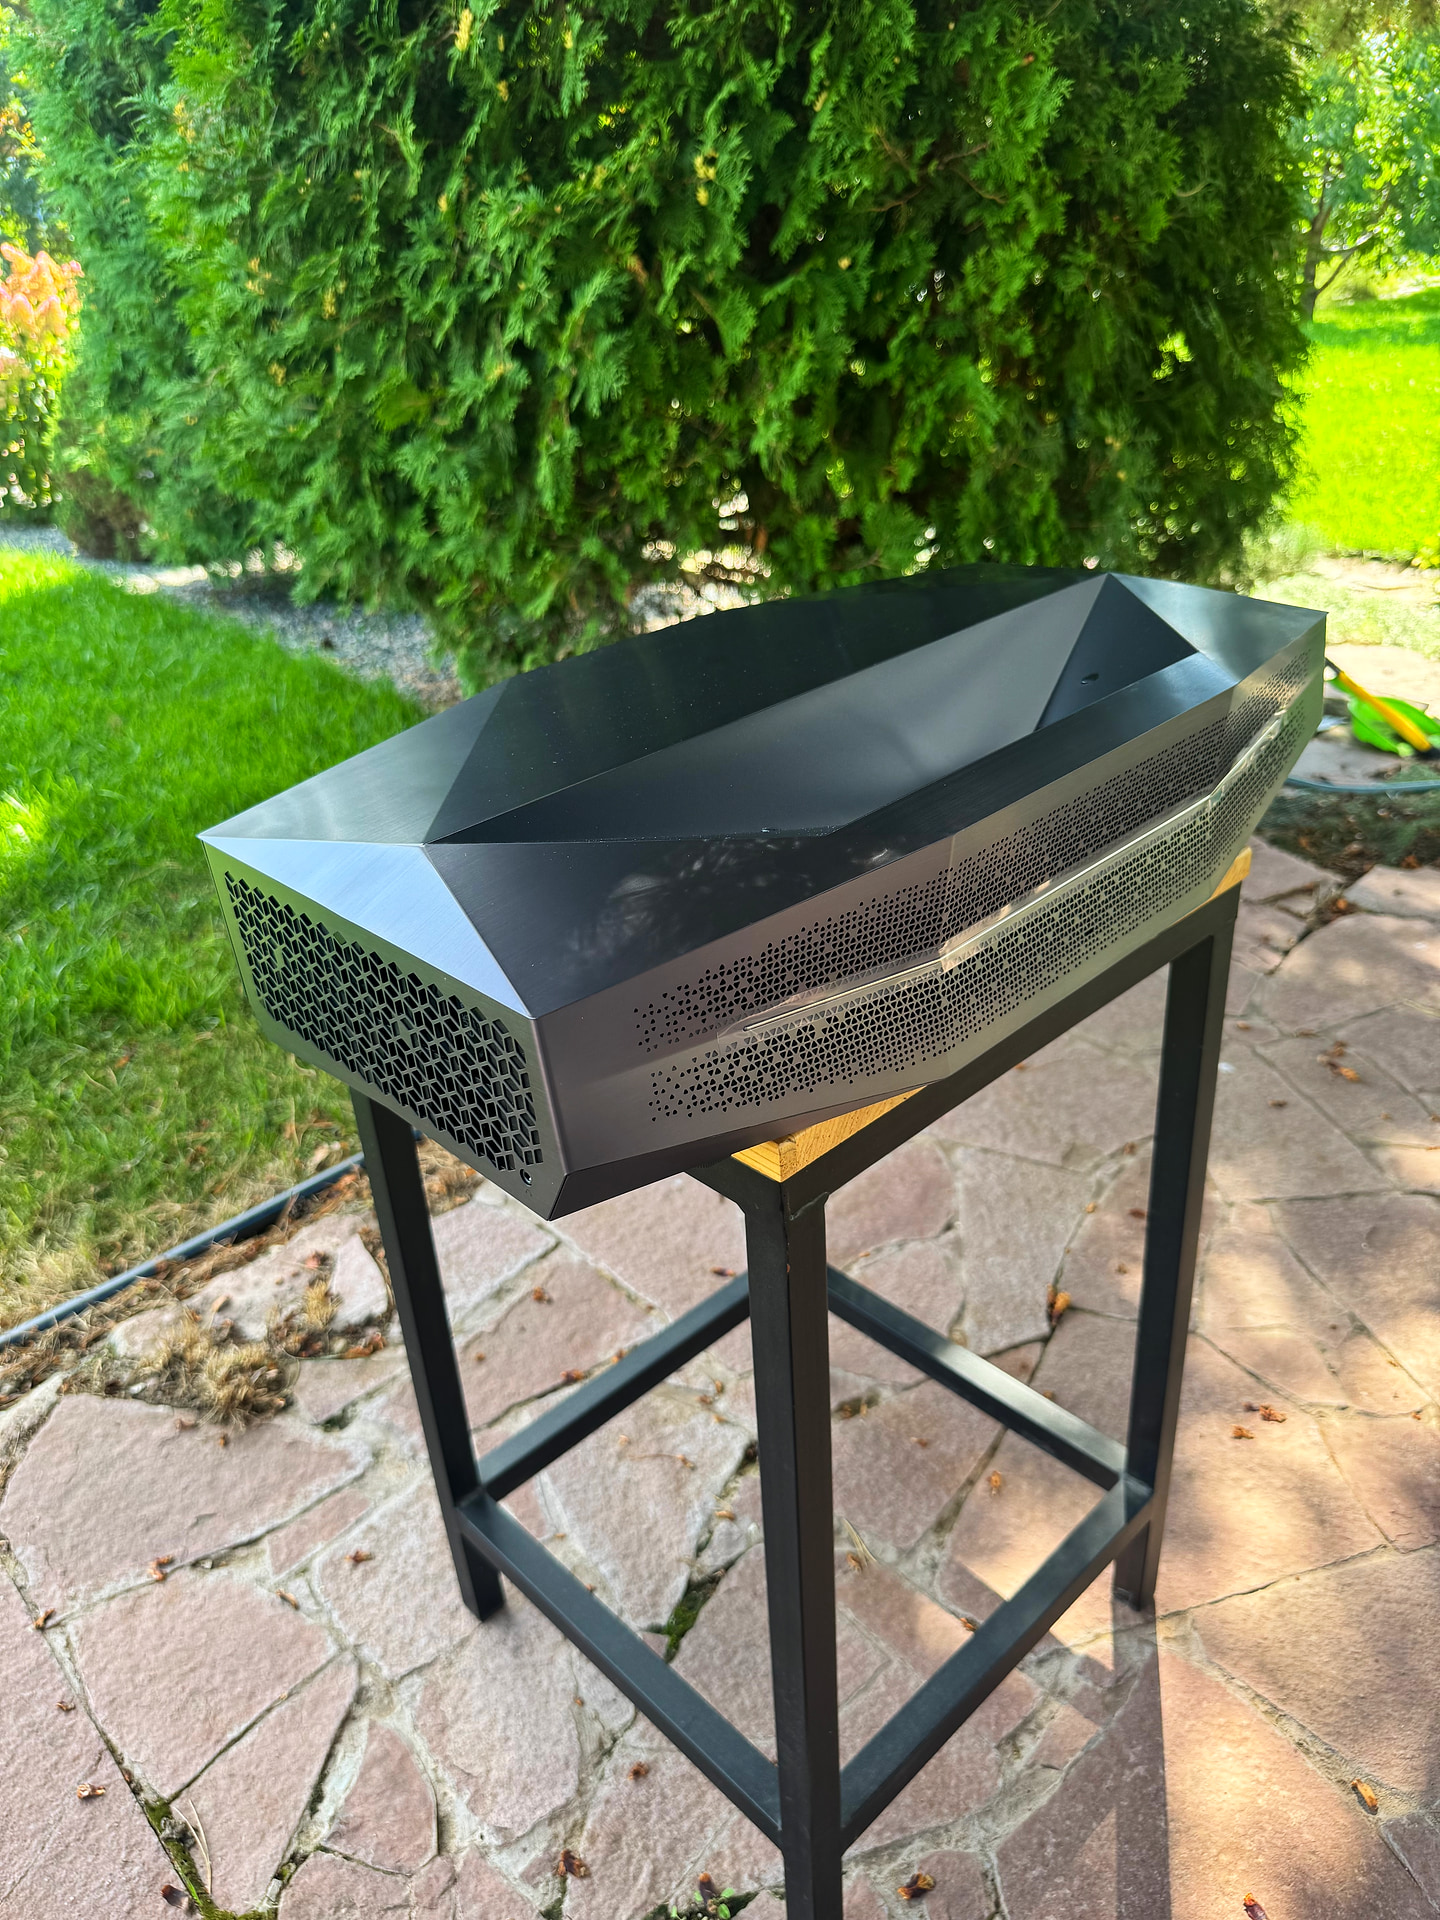
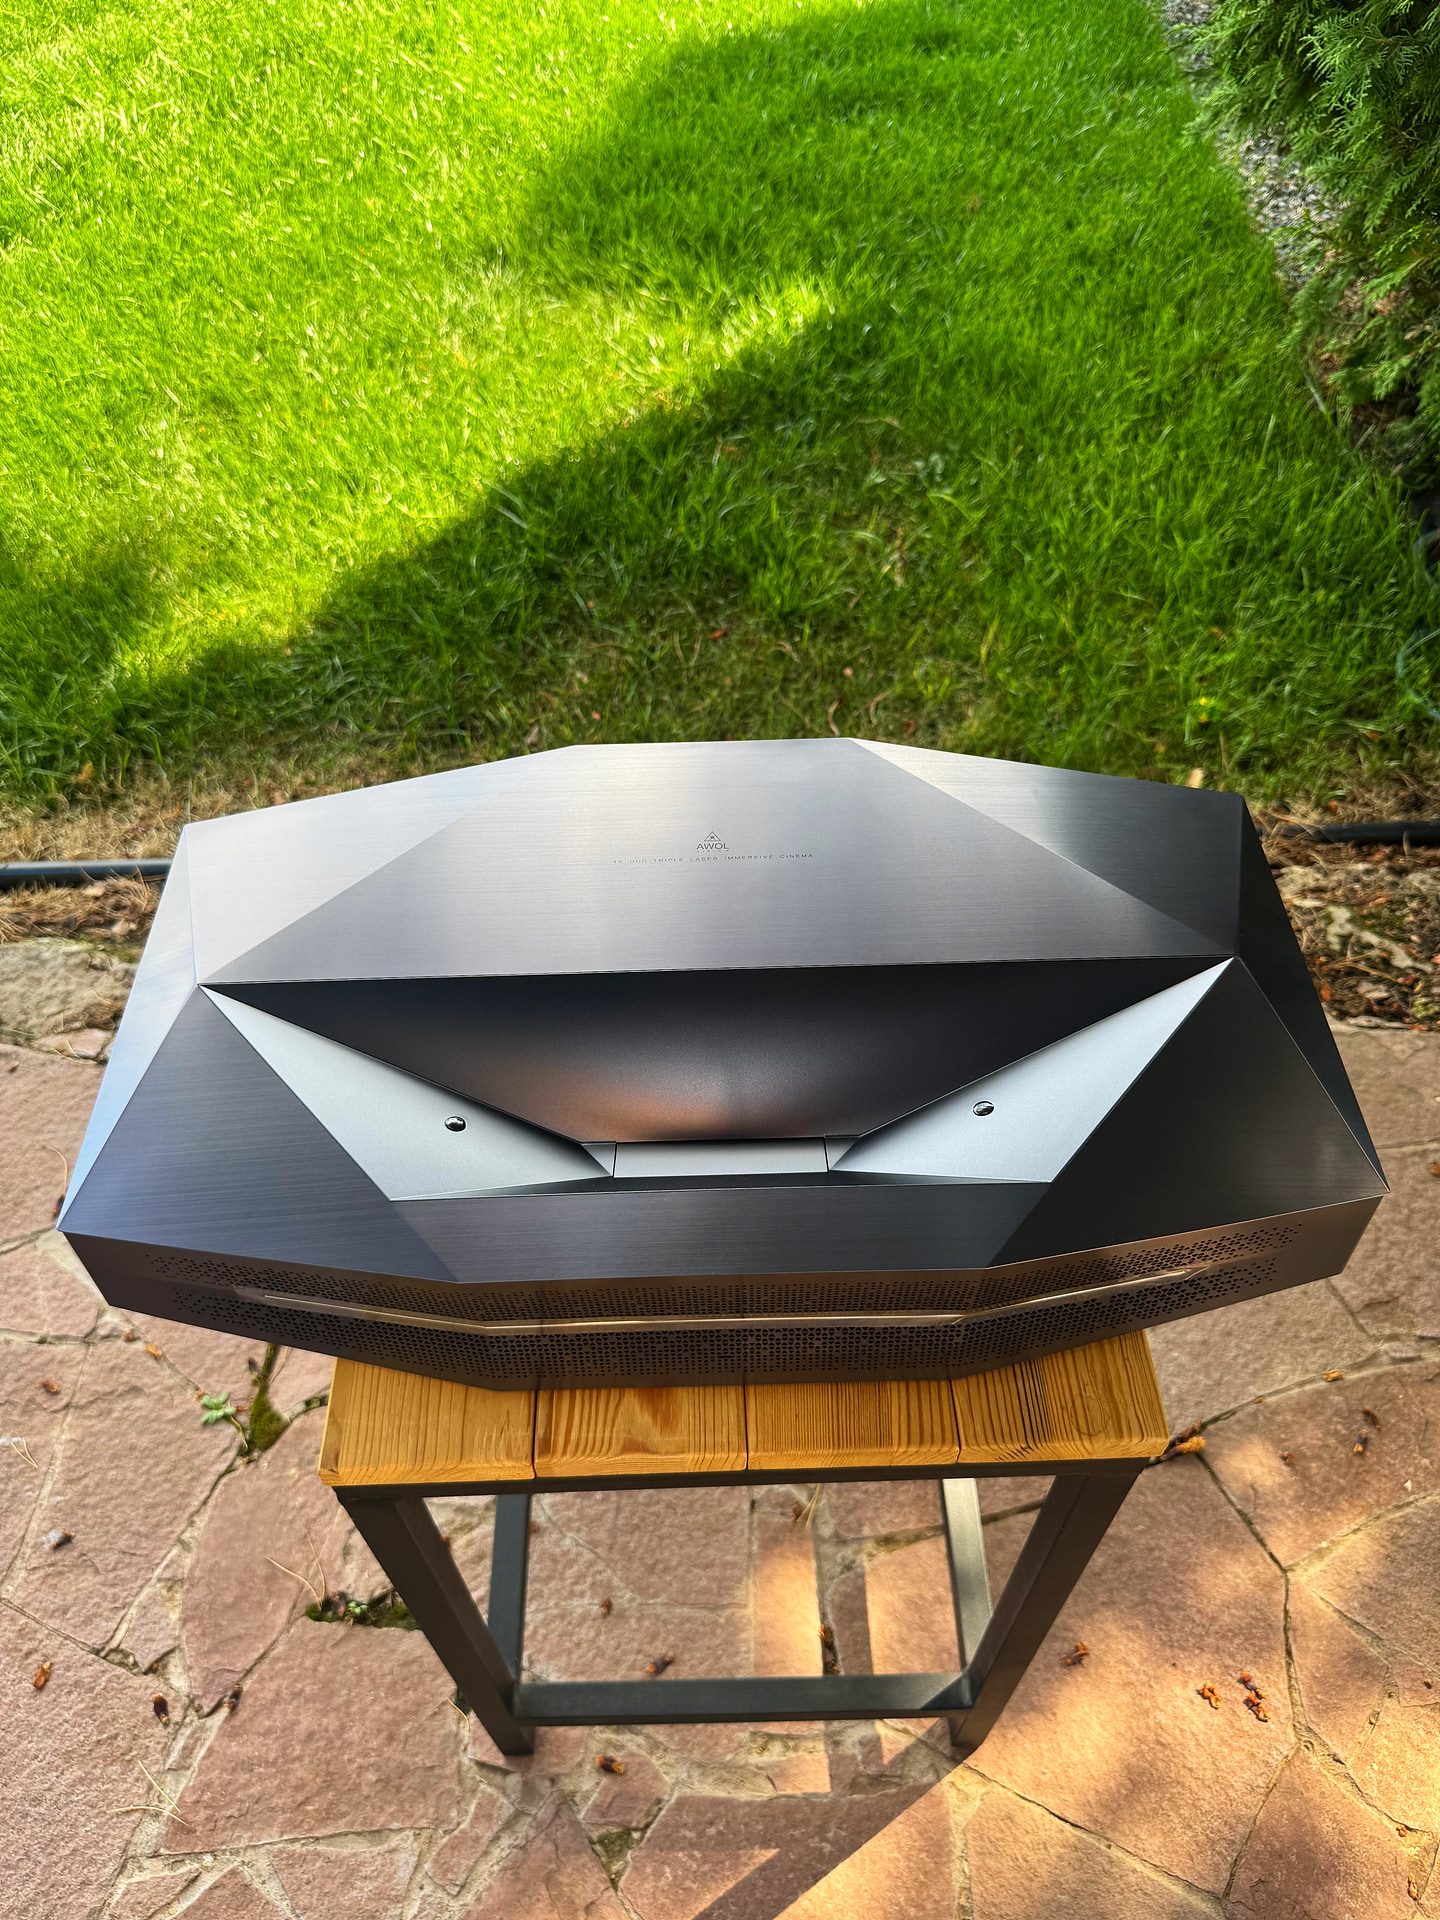
It makes a striking first impression. The chassis is faceted, dark graphite, all large flat planes and sharp edges; the top panel is brushed, engraved with the AWOL logo and the tagline 4K UHD TRIPLE LASER IMMERSIVE CINEMA. There’s a bit of the futuristic Cybertruck about it. Panel fit is flawless, with no visible gaps, and the chassis doesn’t creak or flex under pressure. Design and build quality are among this projector’s strongest points.
A deep V-shaped well takes up the center of the top panel. The lens window sits at the bottom of it, behind a motorized shutter that closes when the projector is off and opens automatically at power-on. Two sensors sit on the inner slopes of the well, one of them a PIR sensor that shuts off the laser when a child or pet gets into the beam.
A sleek grille wraps around the lower perimeter of the chassis and looks like one continuous ventilation strip. It’s actually two different assemblies with different perforation patterns (more on that in the airflow section).
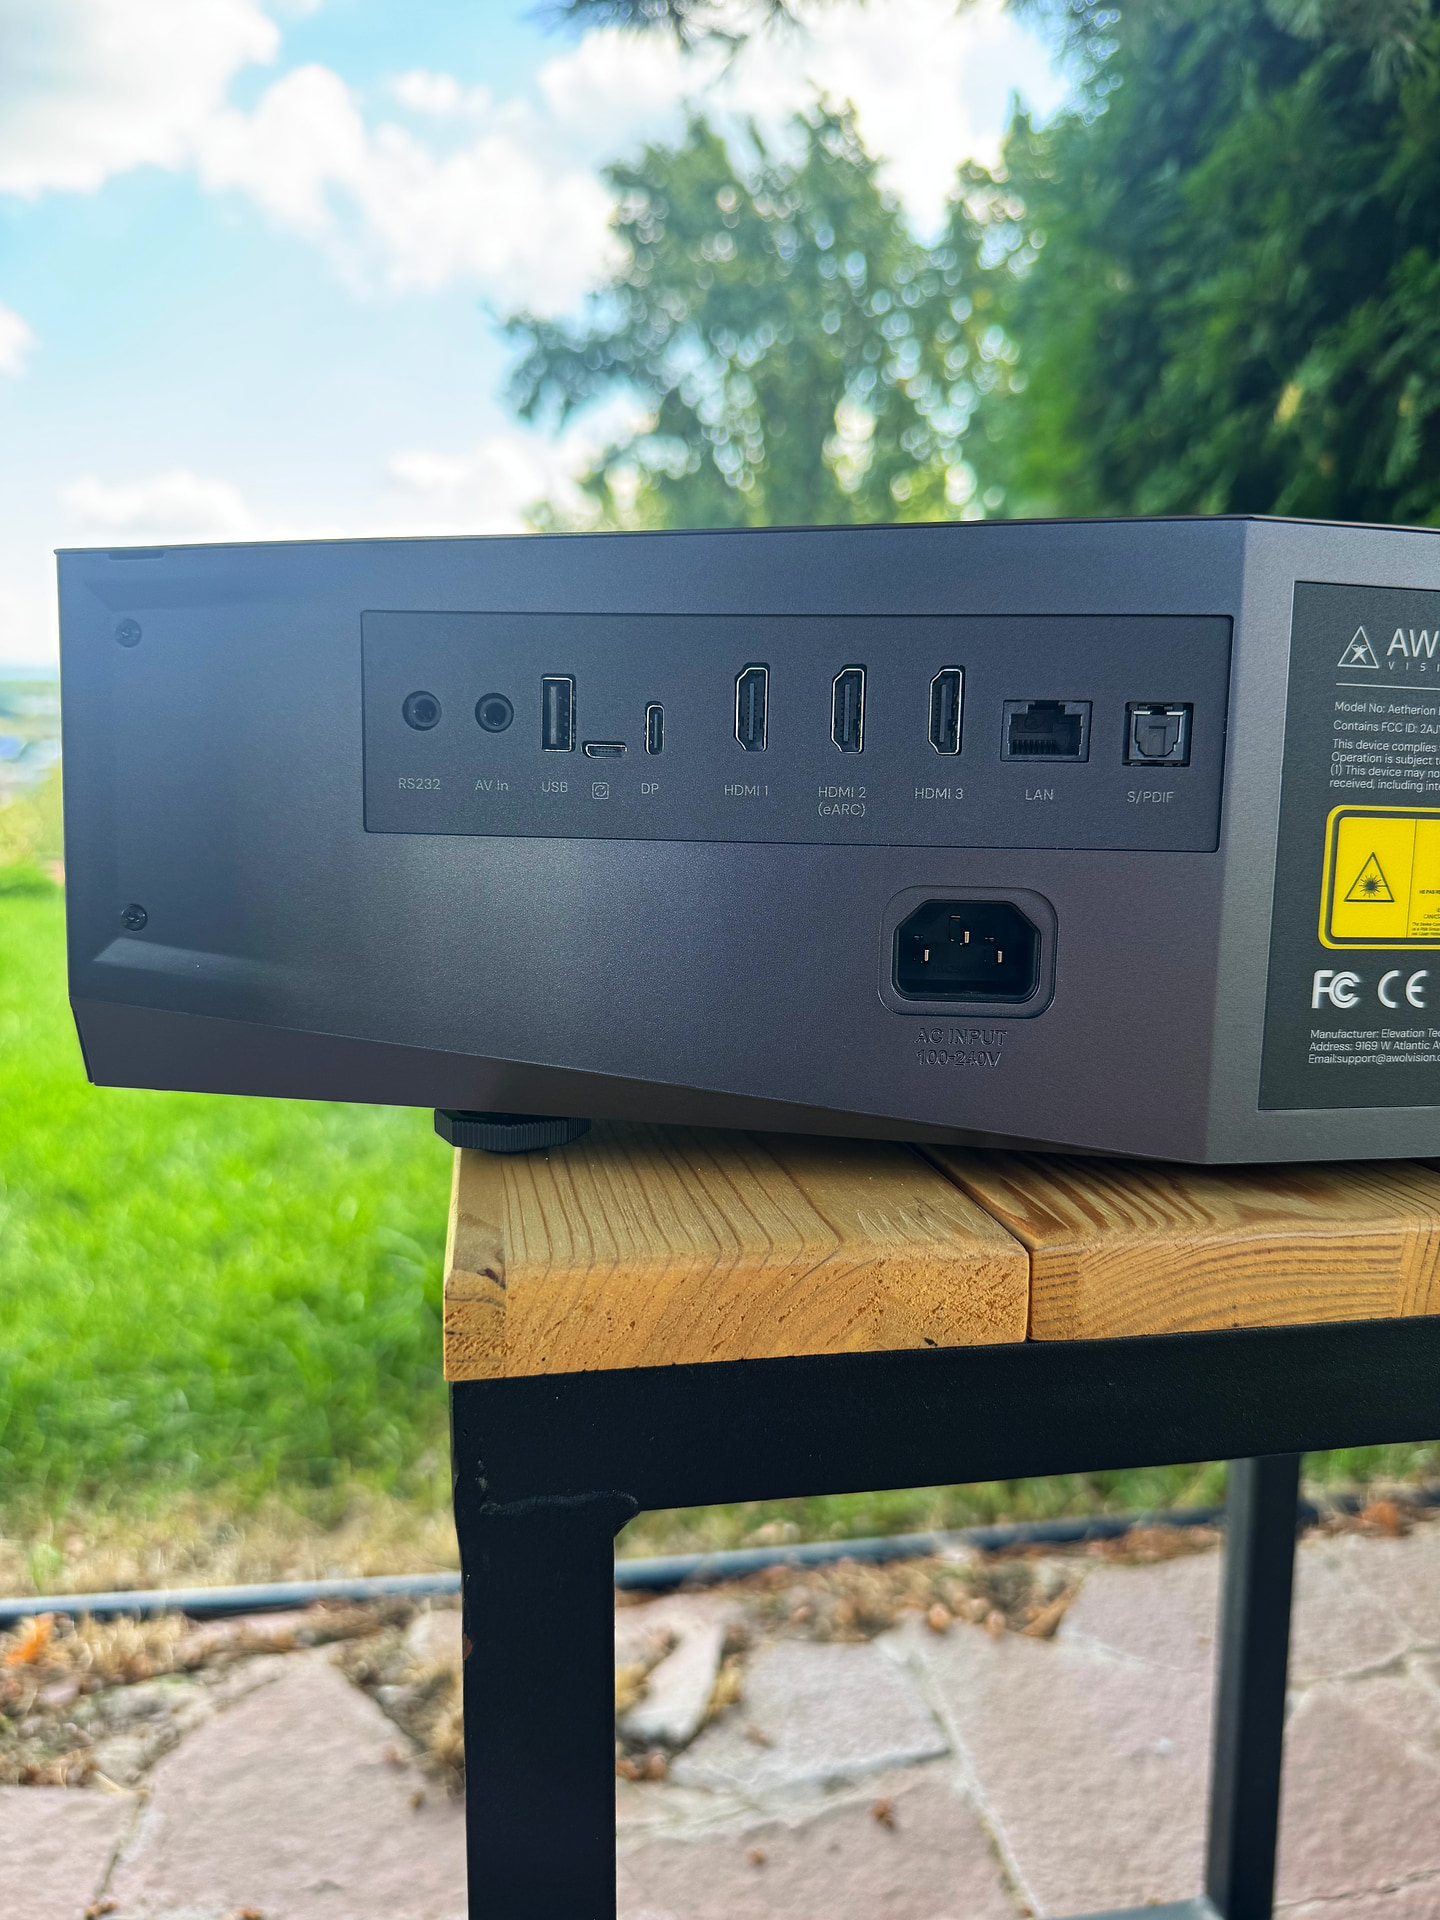
The rear panel carries the main ports. From left to right: RS232, AV in (a mini-jack for composite), USB-A 2.0, a service micro-USB, DisplayPort over USB-C, three HDMI 2.1 ports (the second with eARC), LAN, and optical S/PDIF. Below them is an IEC C14 power inlet.
That last item deserves a closer look. The Aetherion’s power supply is built in. There’s no external brick; you plug in an ordinary computer power cord. Flagship triple-laser DLPs mostly run off an external power supply of three to four hundred watts, and that brick then has to go somewhere, be hidden somehow, and still get air, because it runs hot and heats everything around it. The Aetherion doesn’t have that problem. For a device that lives on a narrow console under the screen, where every cable is on display and every centimeter counts, that’s a real advantage. The flip side is that an internal supply needs beefier cooling, which adds bulk and noise.
Three HDMI inputs on a UST are another plus. In this class the projector is usually the center of the system, and a game console and a player quickly take up two inputs. eARC, though, is only on the second port, so a soundbar or AV receiver has to go there. The DisplayPort was a pleasant surprise. I can’t recall a competitor offering one, and it’s a big convenience when hooking up a gaming PC or a laptop.
Airflow & Placement
The Aetherion breathes across its width. The vents are on both short sides, where the large diamond honeycomb cells are the actual air openings. The rear panel has a recessed port bay, the power inlet, and a rating label, but not a single vent.
The fine perforation along the long front edge has nothing to do with cooling. Behind it are the speakers and the IR receiver, and a chrome strip with RGB LED Lightstream lighting runs along its middle.
The sides with the vents also carry everything you need quick access to: the power button with a status LED and a USB 3.0 port on one side, and a 3.5 mm jack on the other.
Now for the numbers that actually matter here. The manual calls for 20 cm of clearance on each side and 15 cm at the back. Twenty centimeters per side on a 56.2 cm wide chassis means at least 96 cm of free space across. That’s width, not the depth people usually worry about with projectors, and width is exactly what a media console under the screen tends to lack.
The two grilles look identical, and you can’t tell intake from exhaust in photos. With the projector running, the difference is obvious. Viewed from the room, hot air blows out on the left, and the right side is the intake. Keep that in mind, because the two clearances serve different purposes. On the right, the projector needs clean, cool air, so don’t put anything there that produces heat. On the left, it needs room for that air to escape, so don’t put anything there that dislikes being heated: vinyl records, a game console, and certainly not another fan-cooled box that would start sucking in the projector’s exhaust.
Accessories & Remote
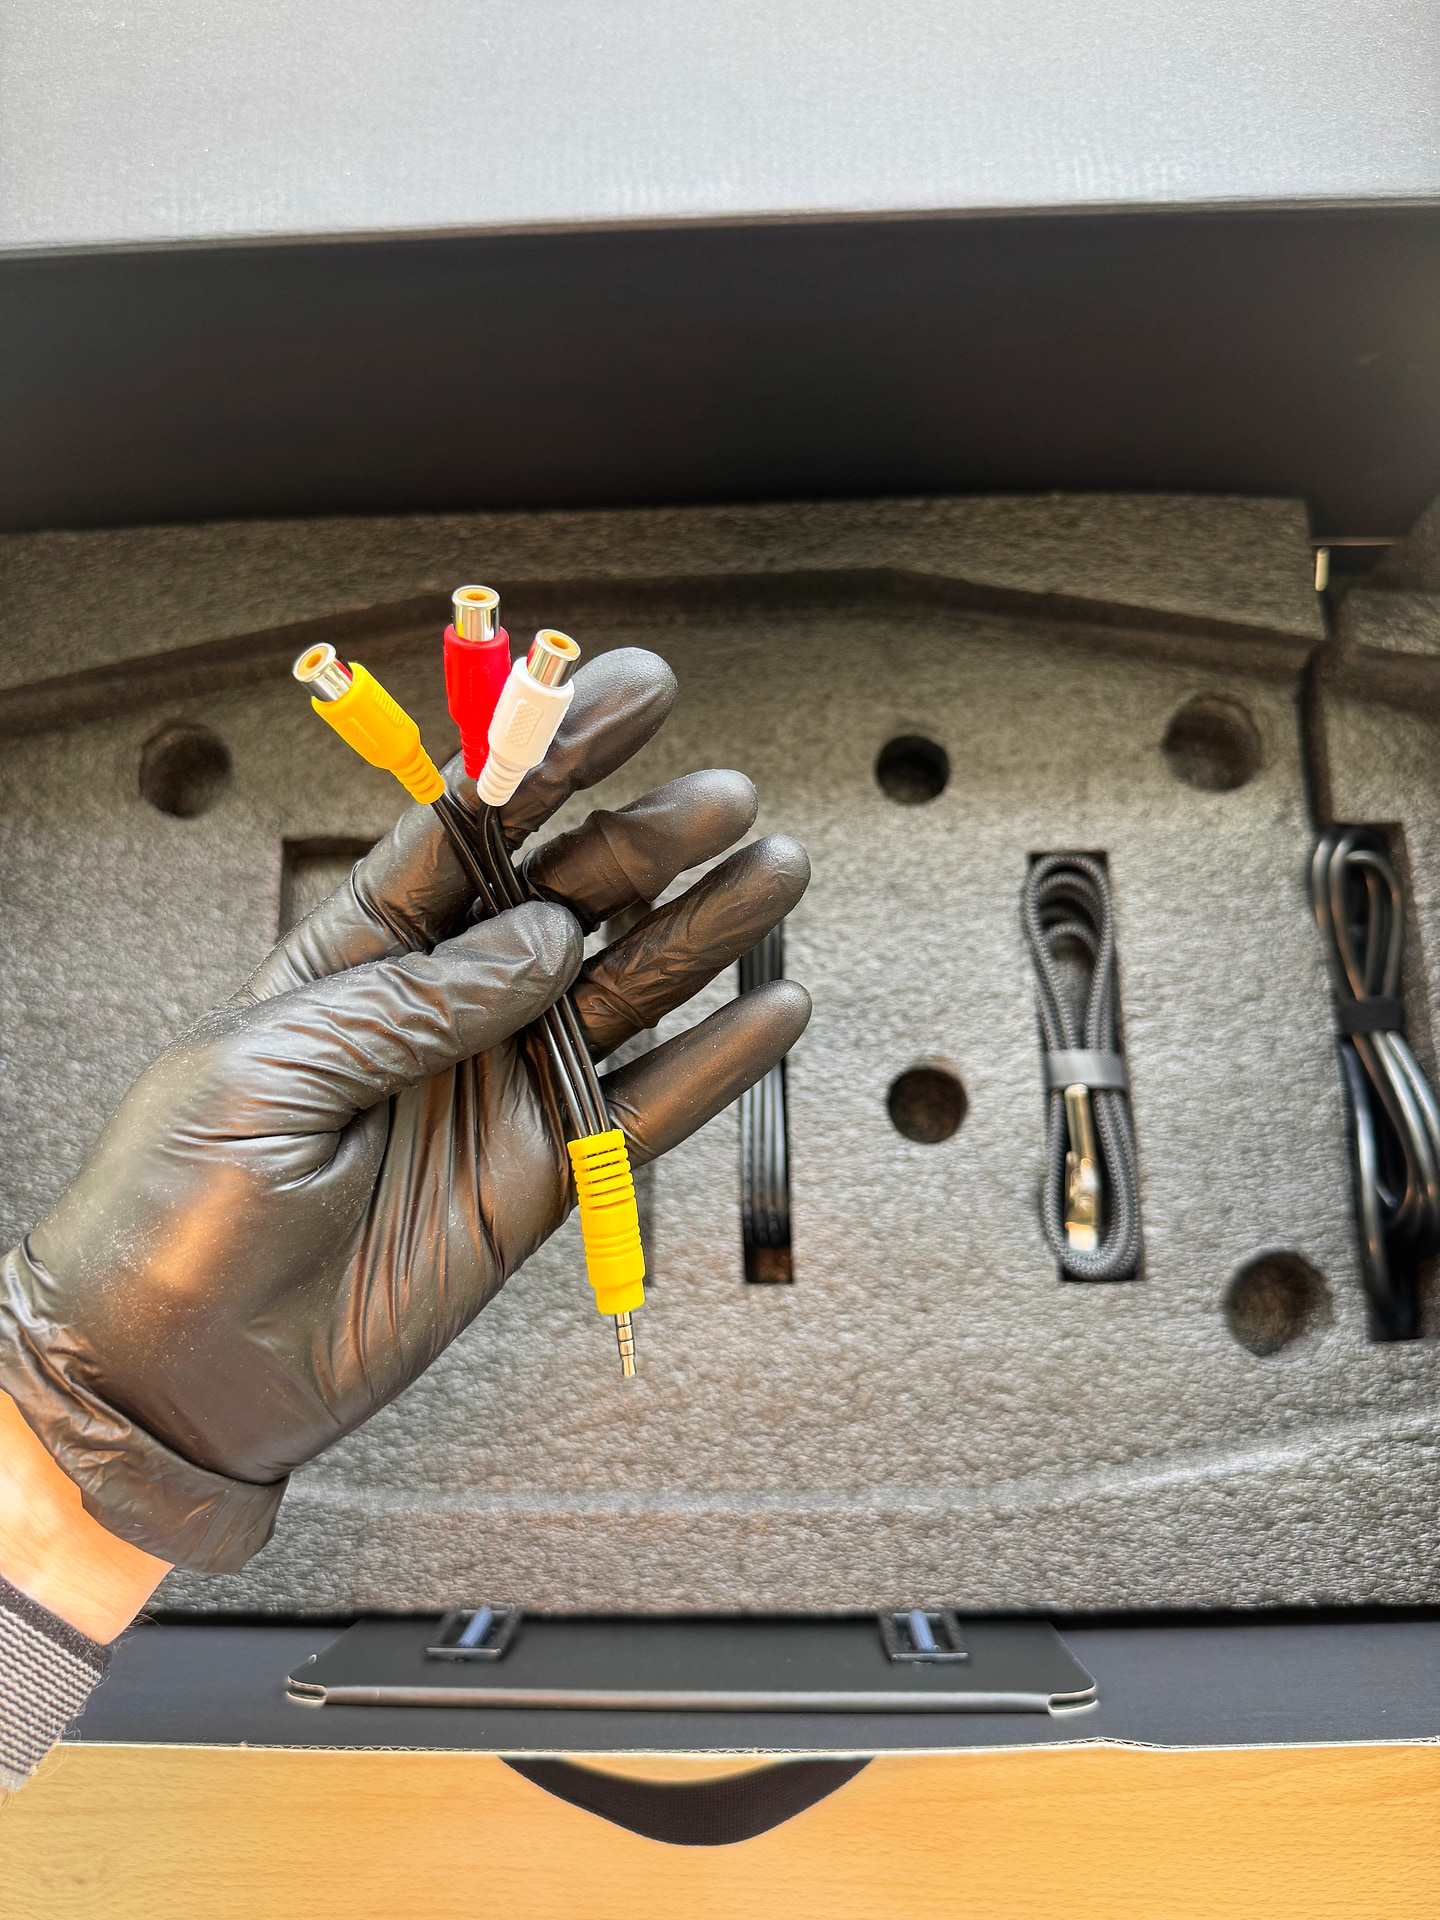
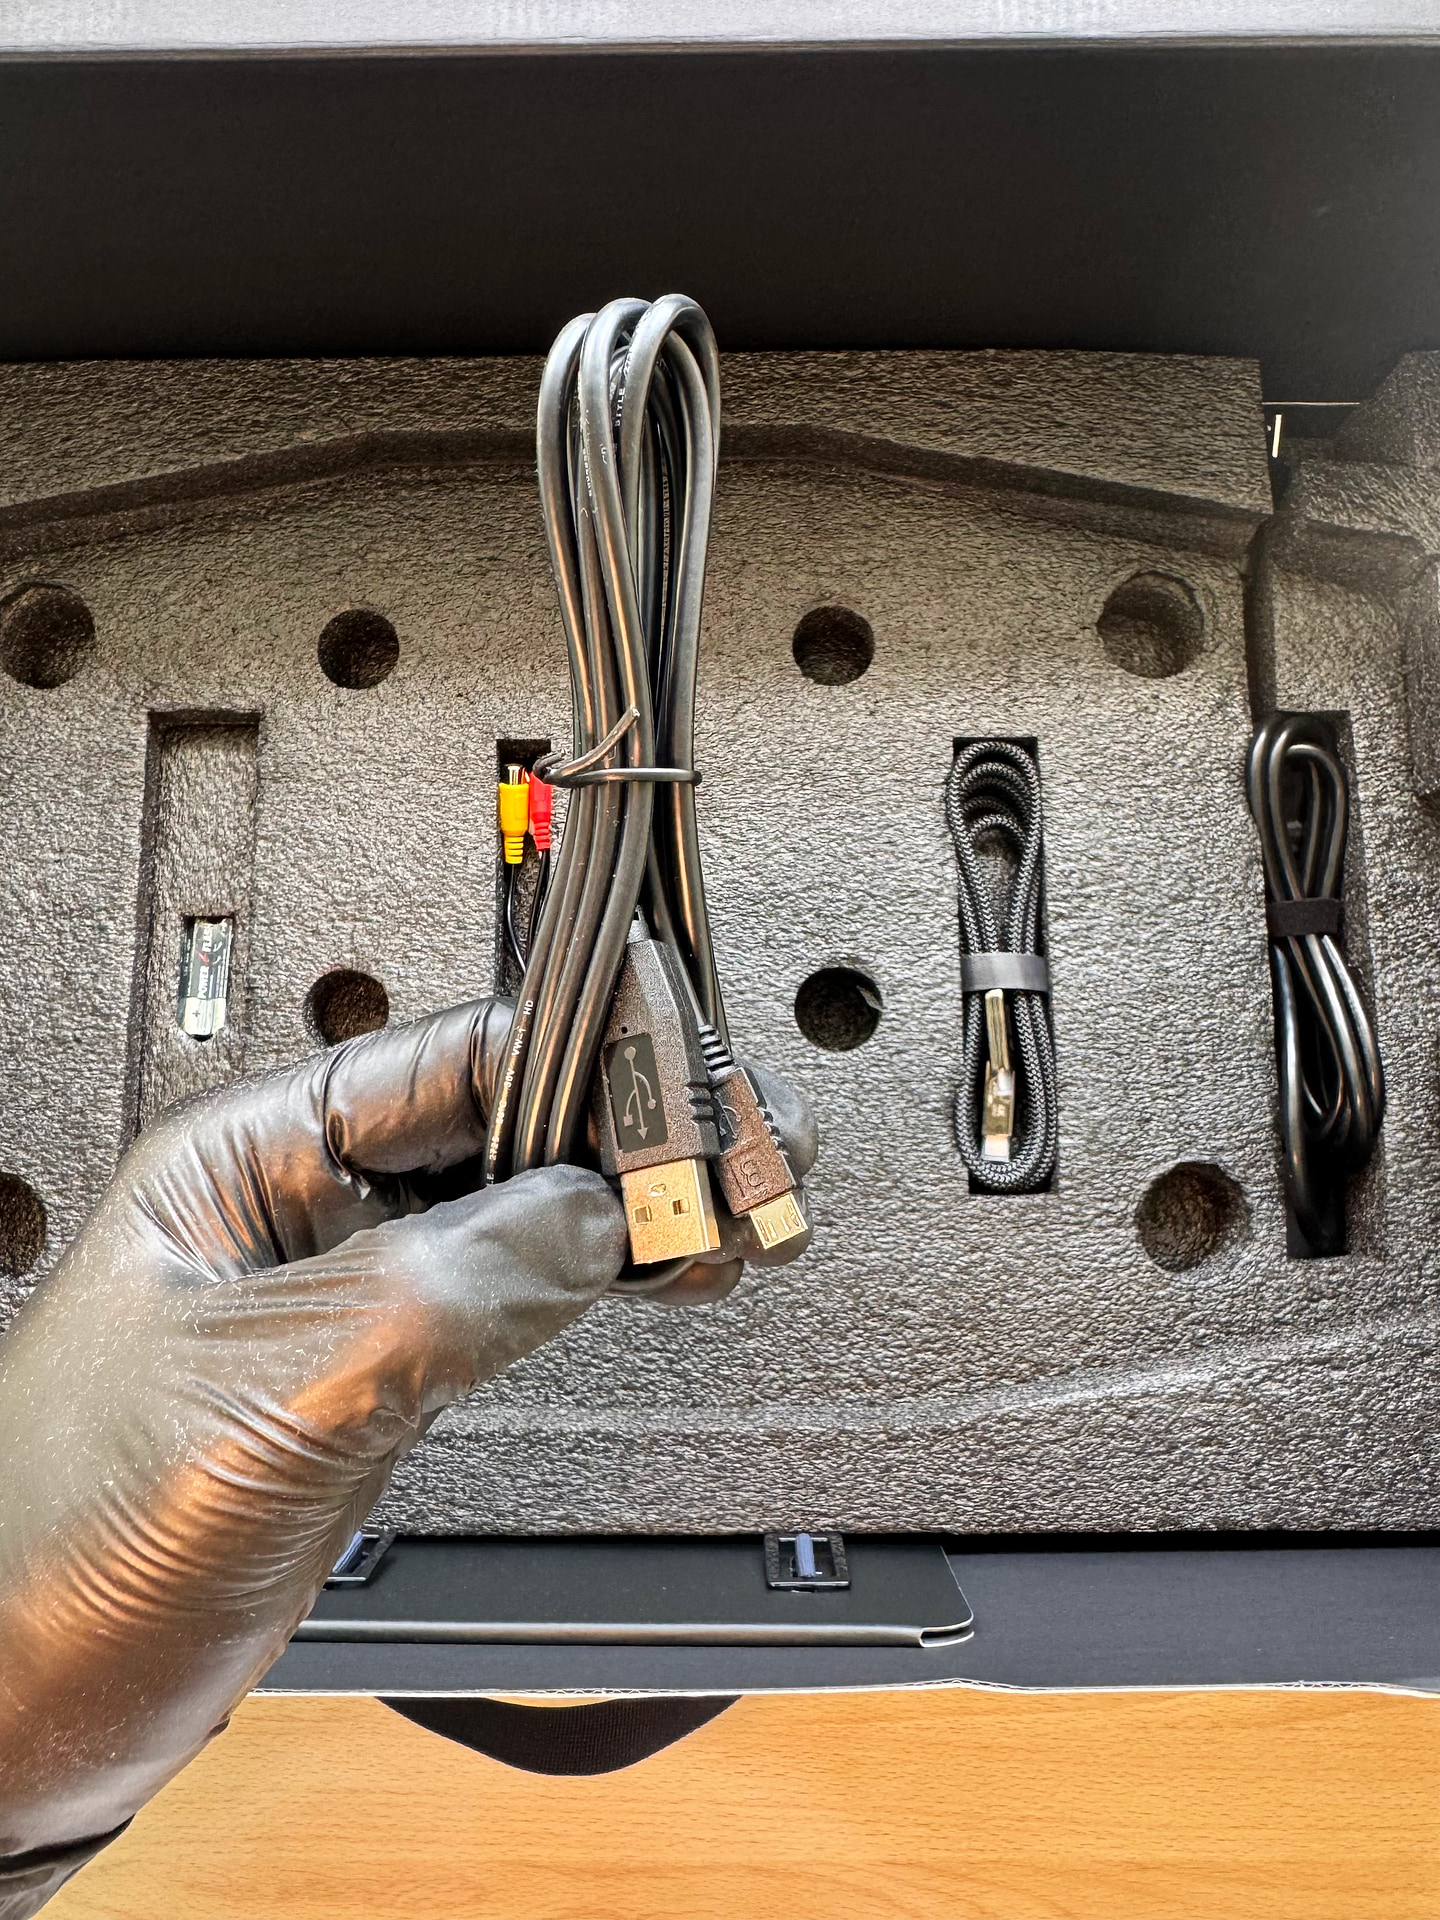
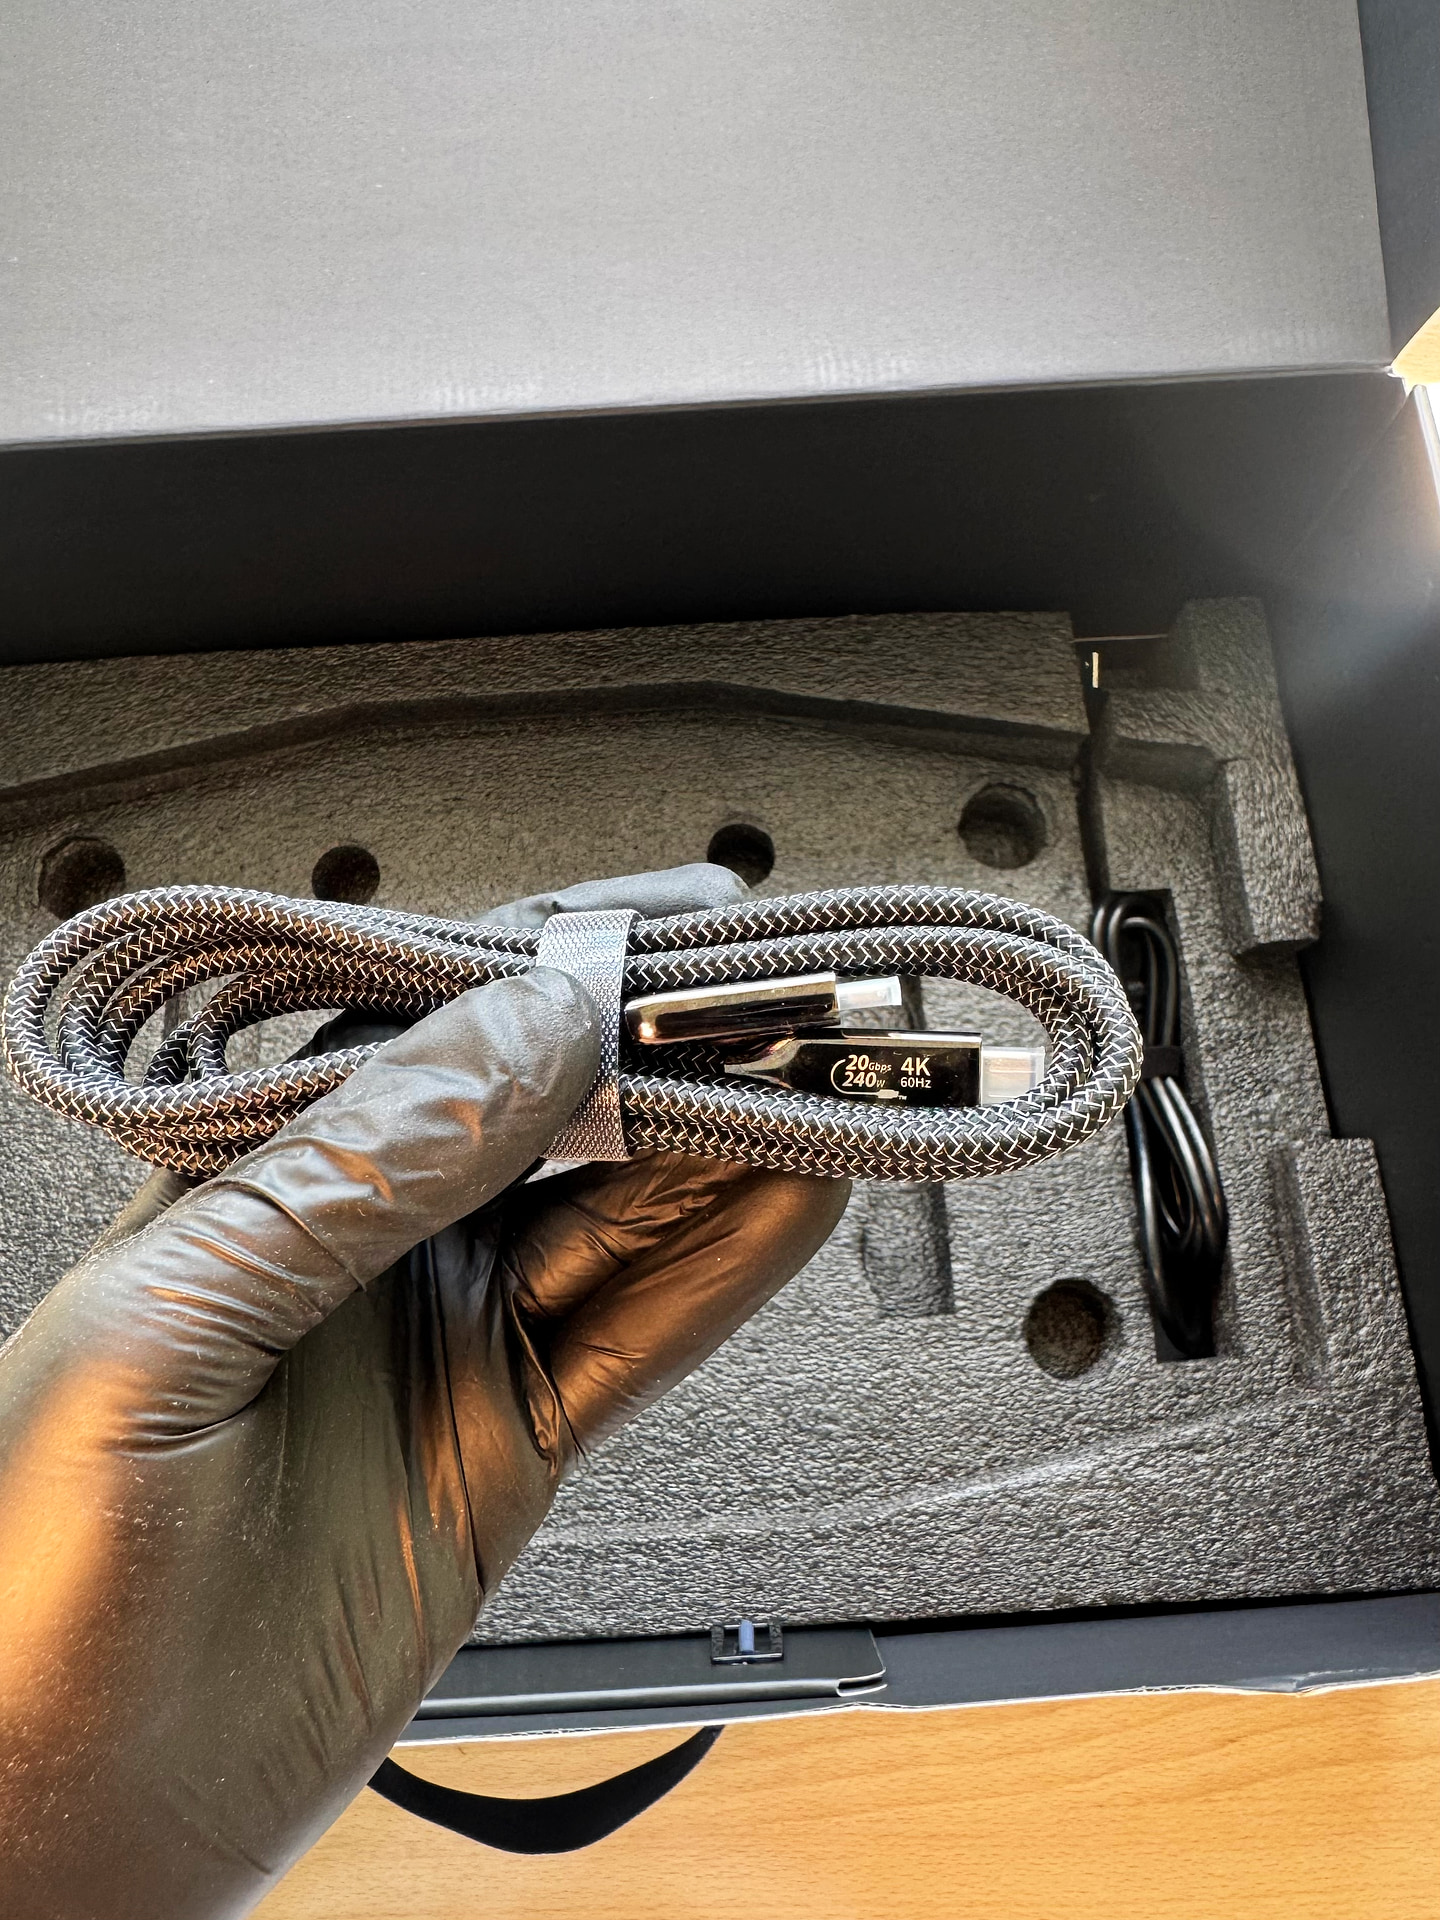
The accessories come in a molded-pulp tray beneath the projector: the power cord, an AV breakout from mini-jack to three RCA plugs (yellow composite plus a stereo pair), a braided USB-C cable rated for 20 Gbps, 240 W and 4K at 60 Hz for that DisplayPort input, a USB-A to micro-USB cable for the service port, the remote, and two AAA batteries for it. That’s the entire retail bundle. The DLP-Link glasses (each pair in its own box with a microfiber pouch) and the braided HDMI cable were a bonus for Kickstarter backers.
It’s a good bundle for the segment, minus an HDMI cable in the retail box, and HDMI is the main input. Including a cable for the DisplayPort is a nice touch. Manufacturers usually leave you to buy everything beyond HDMI yourself, but here you get a proper full-bandwidth USB-C cable rather than a charge-only one.
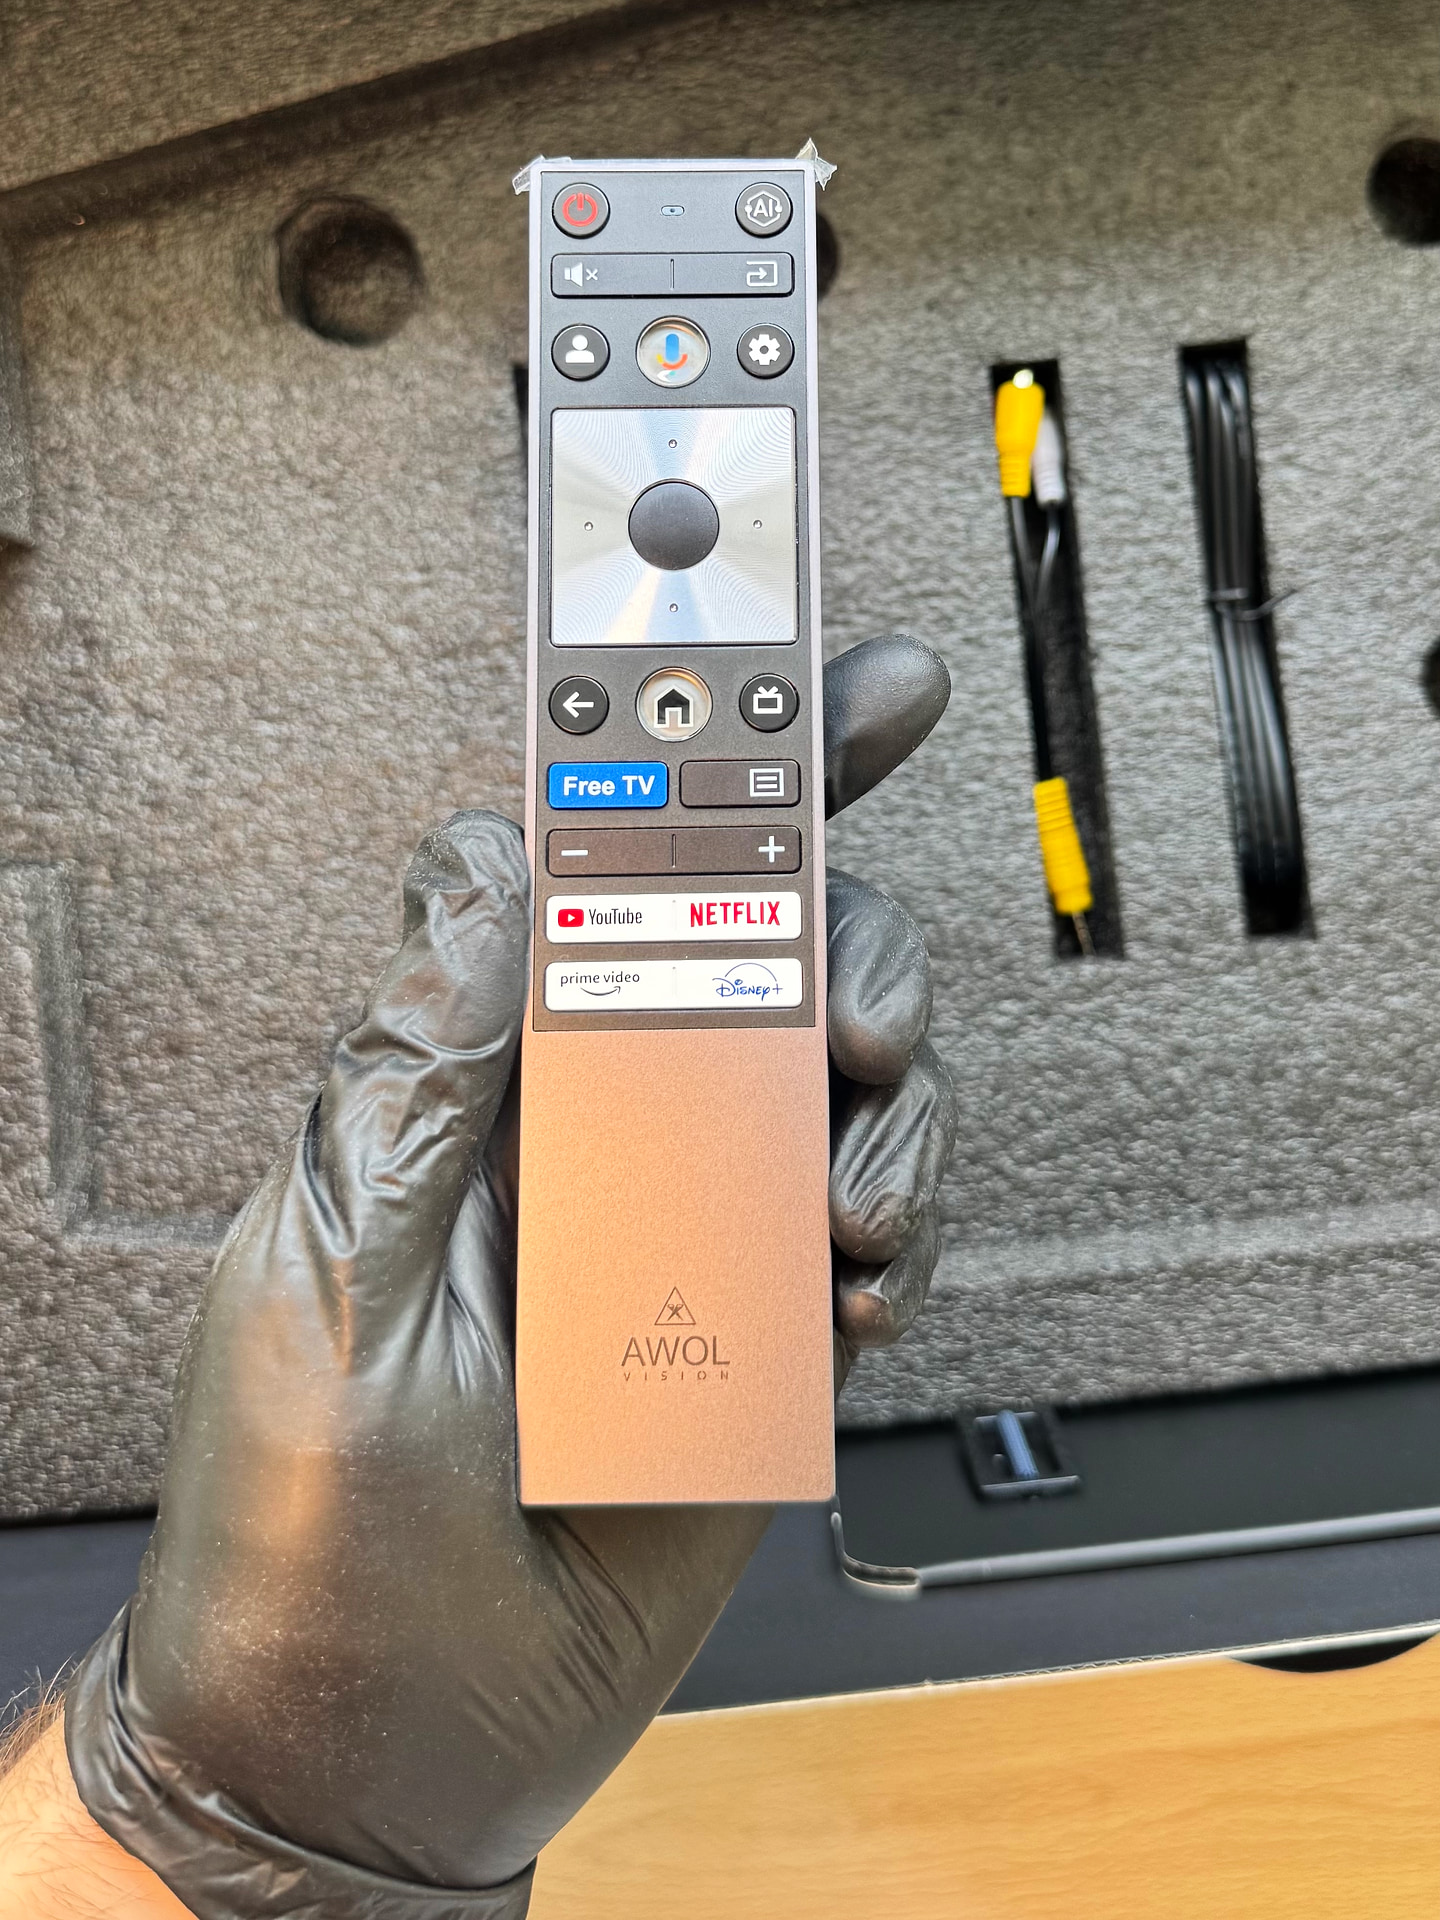
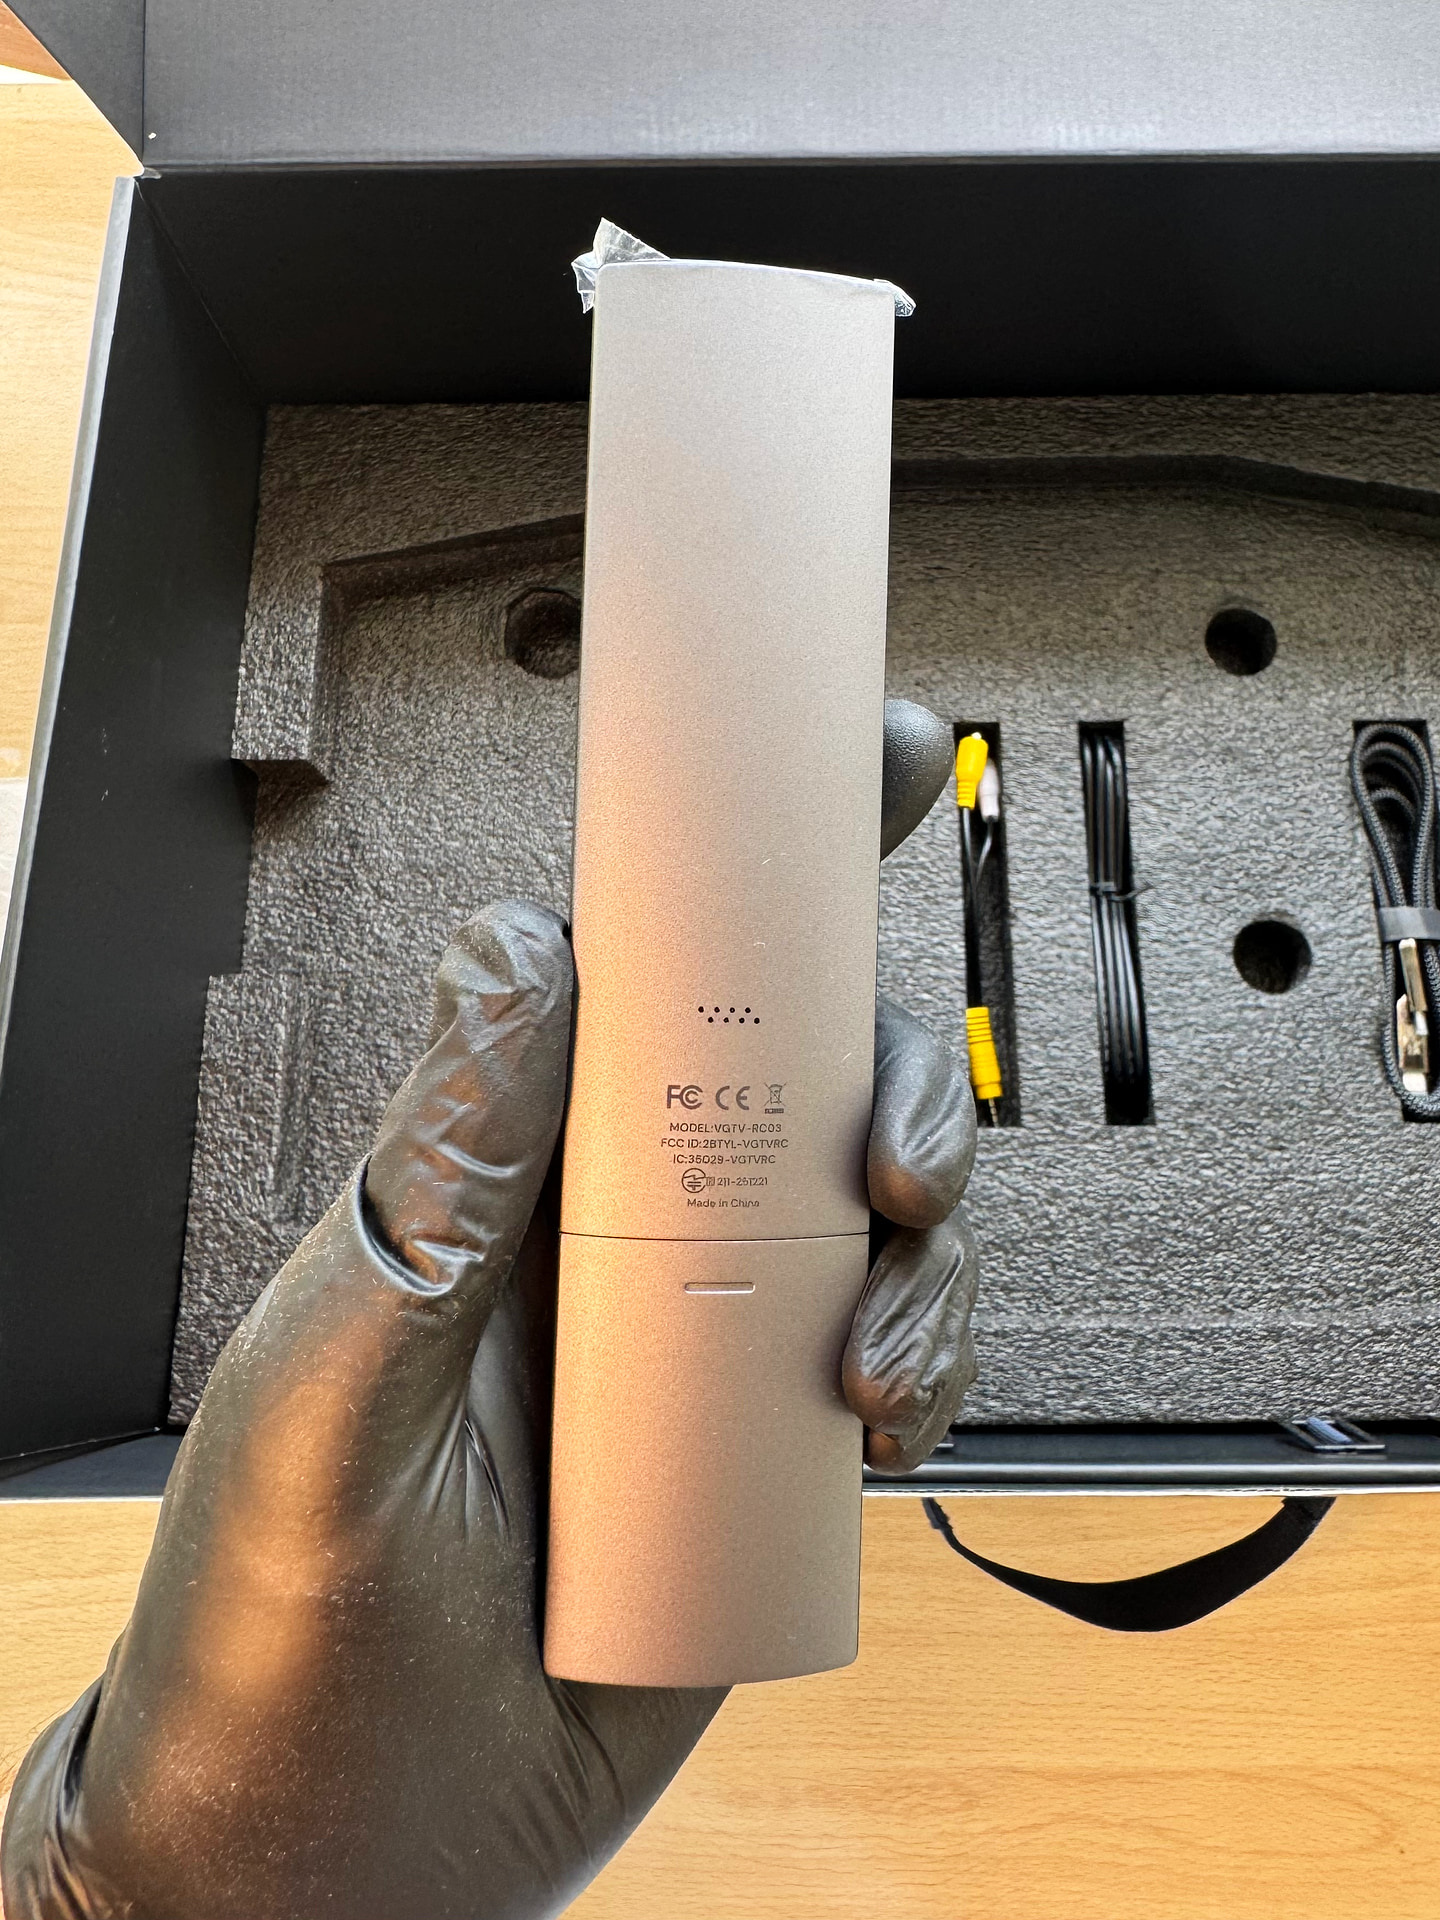
The remote, model VGTV-RC03, is made of champagne-colored aluminum, and this is one of those cases where the metal actually feels like metal: the weight is right, the edges are clean, and nobody would mistake it for a plastic toy. The bottom third has no buttons at all, only a flat surface with an engraved AWOL VISION logo, and that’s where your hand goes.
The layout is pure Google, the same as any Google TV remote. At the top are power and a dedicated AI button, with mute and input selection below them. Next comes a row with profile selection, the microphone, and the settings cog. The center is a large navigation pad with a concentric brushed finish and a recessed OK button, with Back, Home, and TV below it. Further down are a blue Free TV button, Menu, a volume rocker, and four app shortcuts: YouTube, Netflix, Prime Video, and Disney+. What it badly needs is programmable buttons for your own presets, so you don’t have to dig through the whole menu every time to reach the setting you want.
There is a backlight, but only on some buttons. The whole segment does this, and I still don’t understand why manufacturers skimp on it. Backlighting the remaining buttons costs pennies, and the dark is exactly where you use a projector.
To be blunt, this is the very same remote as Valerion’s, not a lookalike, down to the layout, shortcut placement, and backlight pattern. There are exactly two differences: the logo on the bottom panel and the color. The Valerion remote is two-tone black and silver; AWOL’s is solid champagne. Anyone already familiar with Valerion projectors will have nothing to relearn.
AWOL also sells its ThunderBeat wireless speaker system separately, and it pairs with the projector. It comes in 4.1.2 and 4.2.2 versions, plus a standalone subwoofer. The projector itself can act as the center channel in such a system.
Setup: Throw Distance, Image Size, Alignment
A throw ratio of 0.2:1 means that for a 100-inch screen you’ll need 48 cm from the wall, projector depth included, 56.2 cm for 120 inches and 68.6 cm for 150 inches; the rated image size range is 80 to 200 inches. The second figure in the table matters more: the bottom edge of the image sits 43.6 cm above the projector’s base at 120 inches and 52.4 cm at 150. Add the height of your stand and you’ll know where the bottom of the picture actually ends up. For your exact screen size and aspect ratio, pick them in the calculator below.

Lining up a UST is a special kind of fun. You have to move the projector in every plane, ideally with a spirit level in hand. It has four adjustable feet, which let you adjust height and tilt in two axes simultaneously. The stand has to be rigid, though. With more than eight kilograms on four points, a thin tabletop will sag, and the geometry will drift after you’ve finished setting up.
There’s no lens shift, and that’s not a complaint aimed at the Aetherion specifically. Almost no home UST has it, because the geometry is highly off-axis and moving the lens without wrecking convergence at the edges is really hard. The only notable exception in recent years is the 2017 Sony VPL-VZ1000ES, which cost $25,000 and is built on entirely different technology. AWOL itself will be next, with its high-end LuxVision model shown at IFA in fall 2026. With the Aetherion, physical positioning is all you have.
So align it by moving the chassis, not through the menu. Digital keystone correction on a UST noticeably eats into sharpness, so it’s best kept as a last resort.
Ceiling mounting is supported. There are four M6×15 mm threaded holes on the bottom, the mount should be rated for 10 kg or more, and image flipping is under Laser Settings → Projection Mode. AWOL itself recommends calling in an installer, which is good advice, since aligning a UST on the ceiling is even harder than on a stand.
The screen has to be hung carefully too, because any installation flaw shows up in the image immediately. My advice hasn’t changed: go for a fixed-frame screen if you can, because even the best retractable screens often suffer from waviness despite their tensioning systems. And if there’s any ambient light in the room, look at CLR or Fresnel screens. Keep in mind that a Fresnel screen is demanding to install in its own right. An error in height or centering darkens the edges, and no projector setting can fix that.
First Power-On
You can turn the projector on in two ways: with the remote or with the button on the right side of the chassis.
The Aetherion Max starts up almost instantly. First the Lightstream animation kicks in, with the light strip around the chassis glowing white and sweeping from the edges to the center and back. At the same time, the protective lens shutter slides open. It shuts down just as quickly, without a long full-screen logo farewell.
On my unit, the shutter moves with a distinctive and fairly loud motor noise. Then again, the shutter on the JVC DLA-X9000 sounded exactly the same, so it didn’t surprise me. You can disable the shutter in the menu if you want a completely silent start, but I’d leave it on, since it really does keep dust off the lens.
One more thing you don’t notice right away: the projector doesn’t reach its working noise level the moment it’s switched on. For the first few minutes it’s noticeably quieter, and the fans ramp up gradually as it warms up. First impressions are misleading here, so judge the noise once the unit has warmed up.
Lens, Sharpness & Optical Resolution
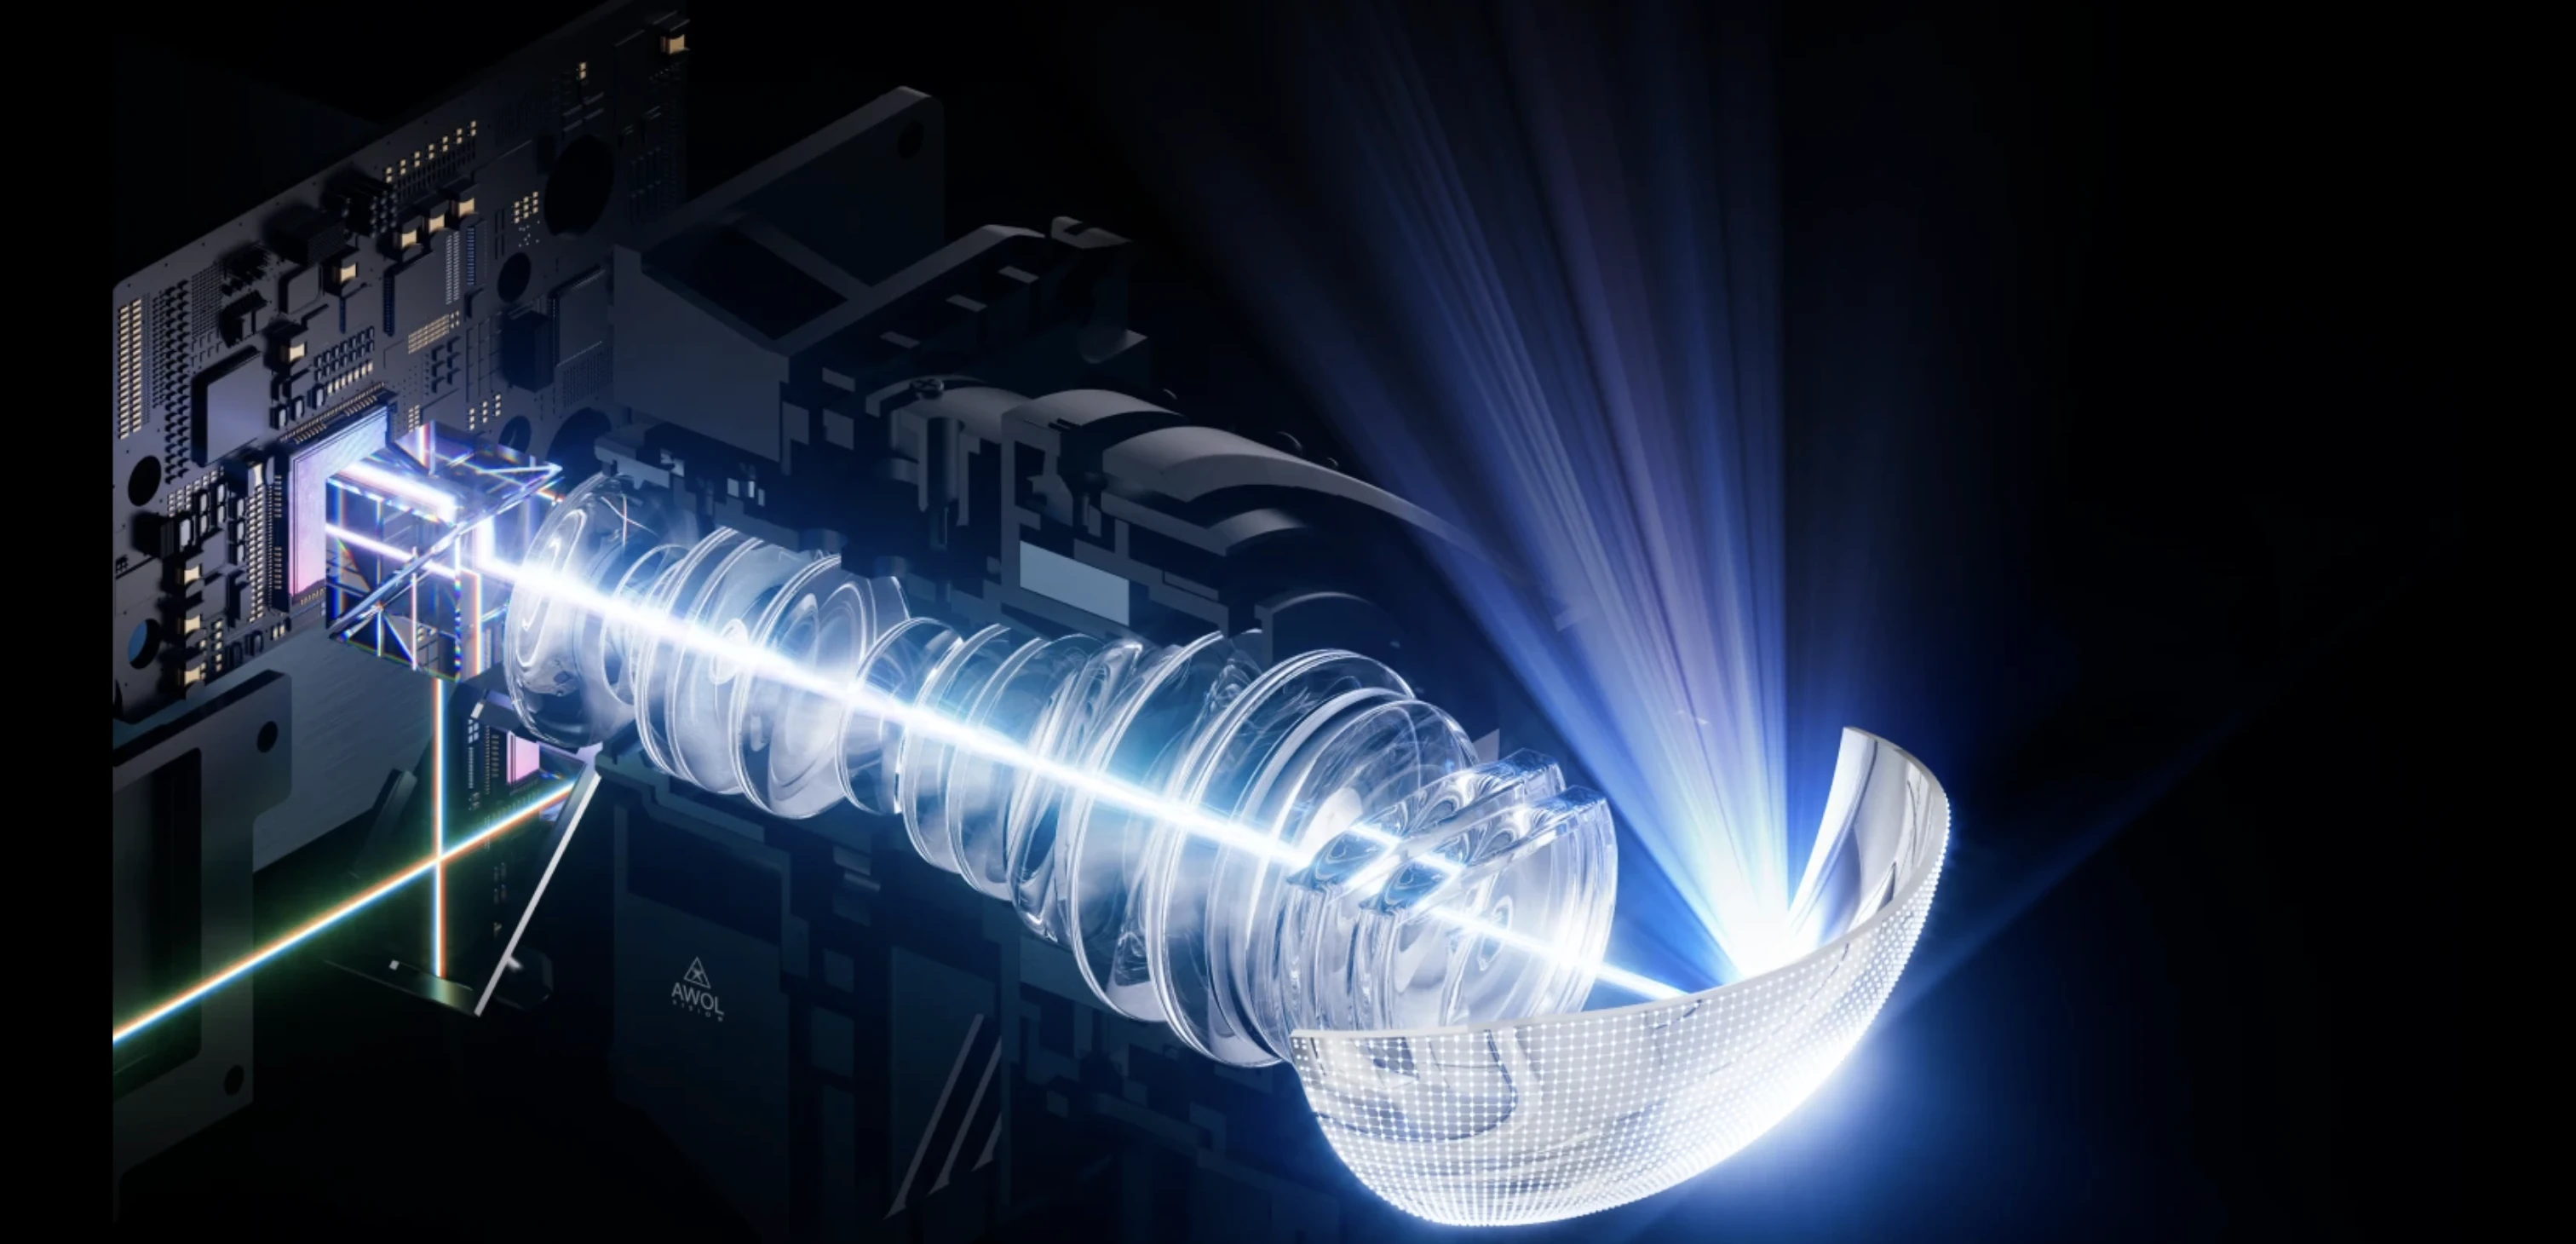
The Aetherion does very well on optical sharpness, and by UST standards it beats many competitors. Focus adjustment is very fine-grained, and it’s easy to find a setting where the whole image is evenly sharp. Soft corners, a common problem, are barely an issue here. Against long-throw projectors it’s a step back, of course, even compared with AWOL’s own Valerion Max, but that’s expected. My main complaint has nothing to do with the quality of the optics. It’s about how per-pixel convergence is implemented (more on that later).
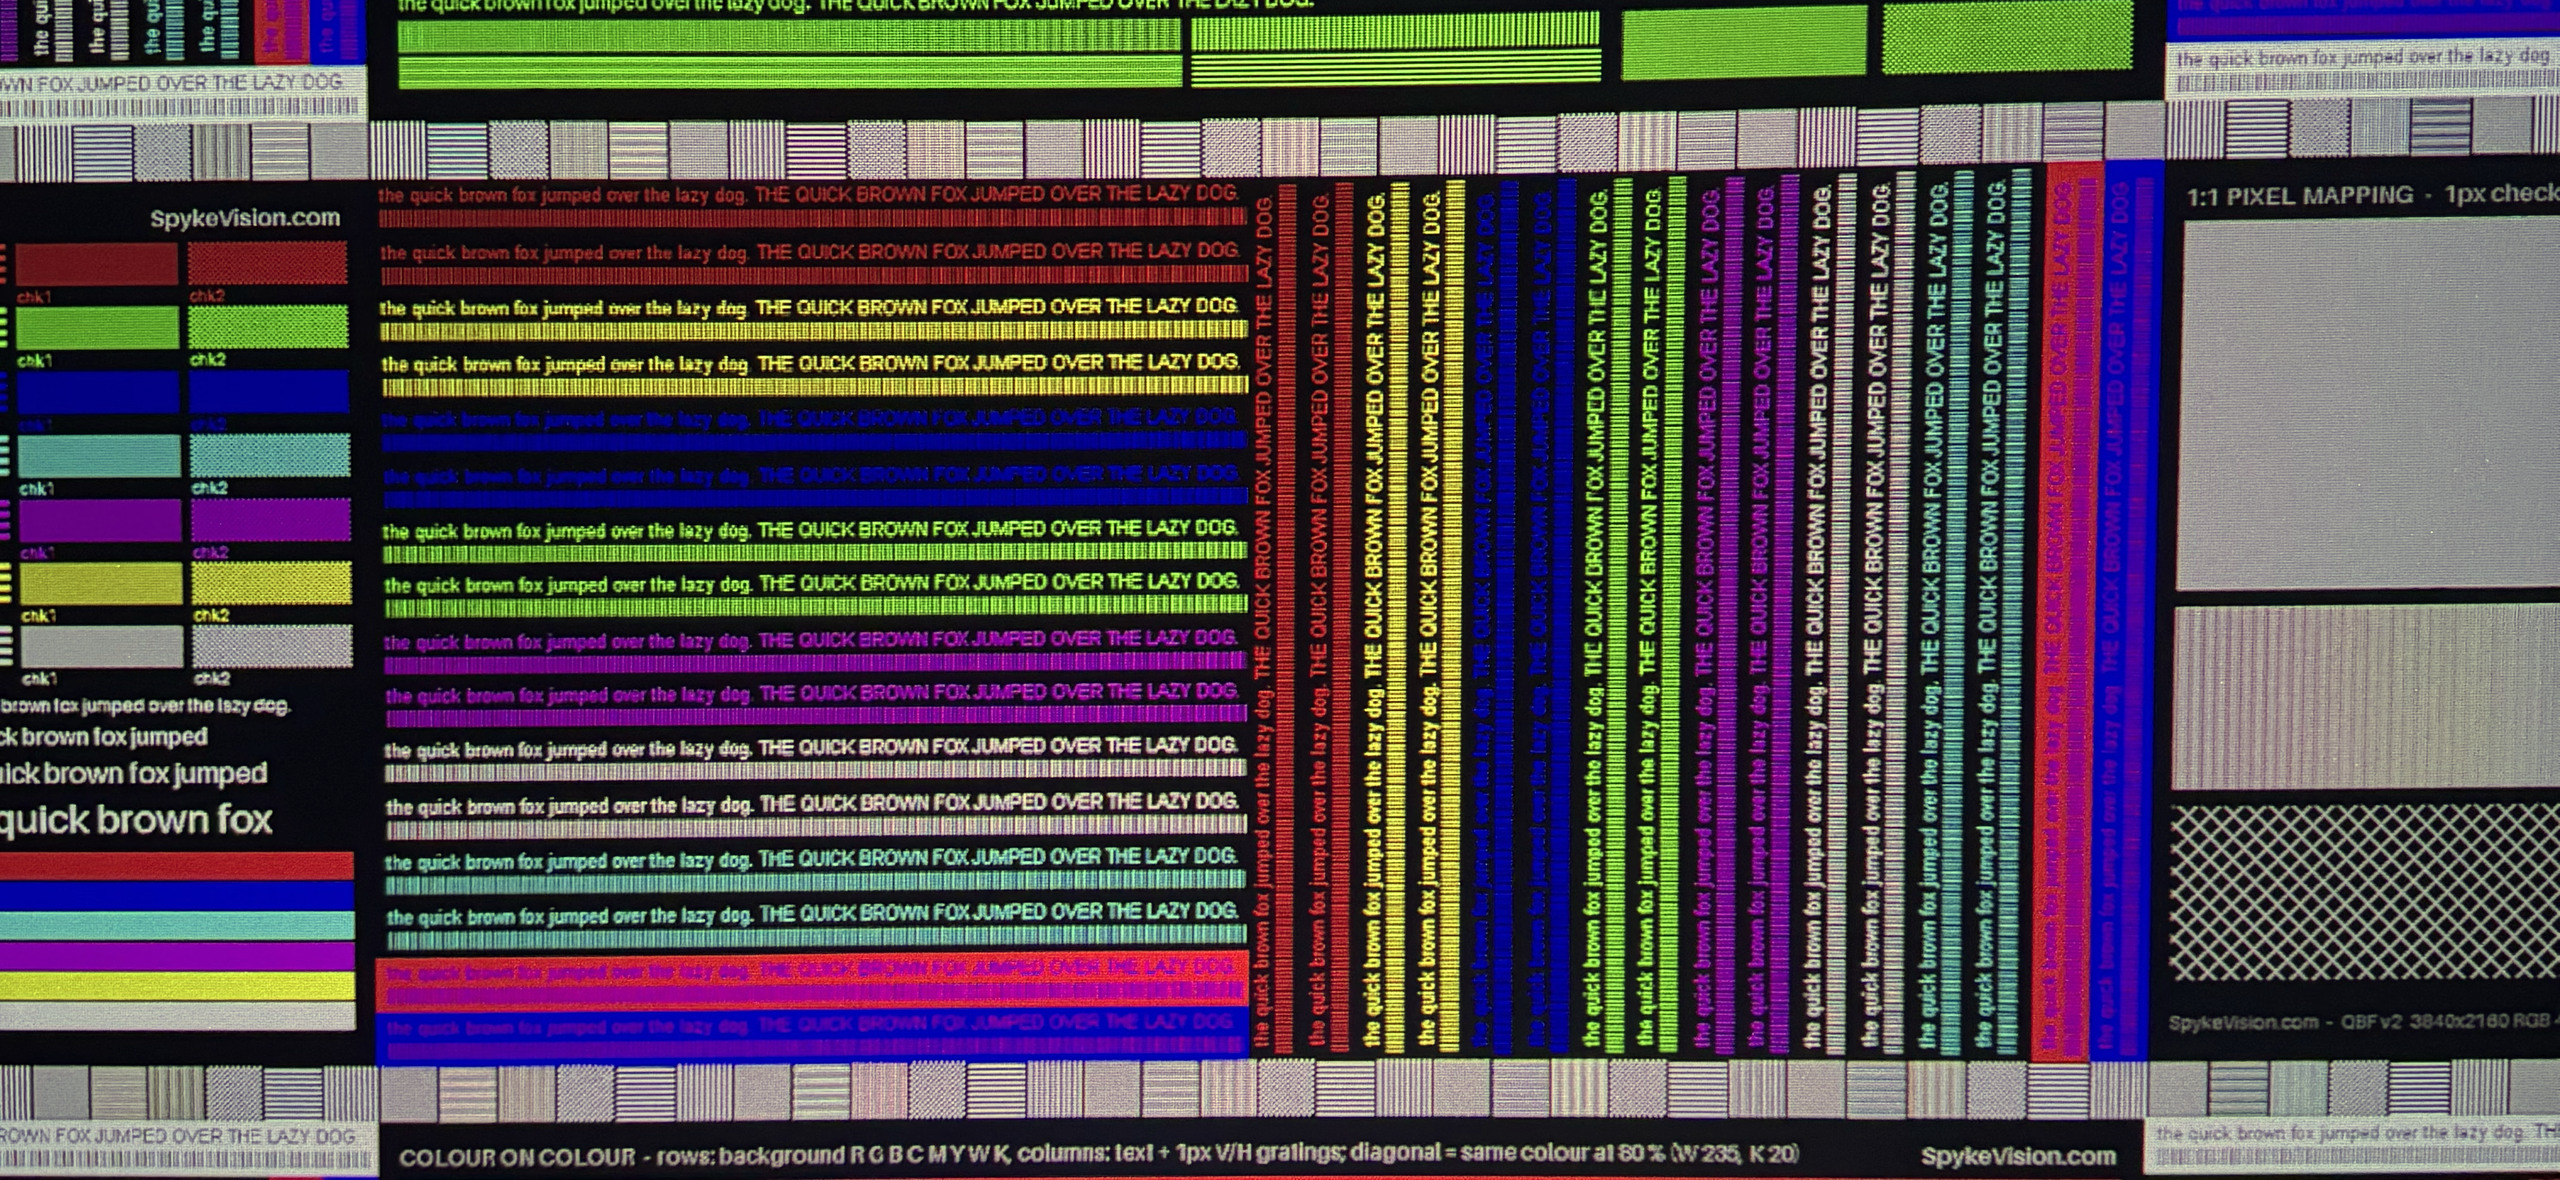
The pattern in the shot above shows where the system’s resolution limit lies. Vertical lines are only marginally resolved: the strokes partly merge into one another, even though convergence is fine. And a grating of one-pixel-wide lines at 4K doesn’t fully resolve anywhere on the screen. The glass isn’t to blame. The image loses this detail before it even reaches the DMD, and we’ll dig into why in the PixelLock section.
Color channel convergence is a topic of its own. Fighting misconvergence is exactly what PixelLock was built for, and the Aetherion’s residual error is small, about a third of a pixel at the edge of a one-pixel line. For a UST with its complex optical engine that’s an excellent result, though there are downsides we’ll get to later.
White Field Uniformity
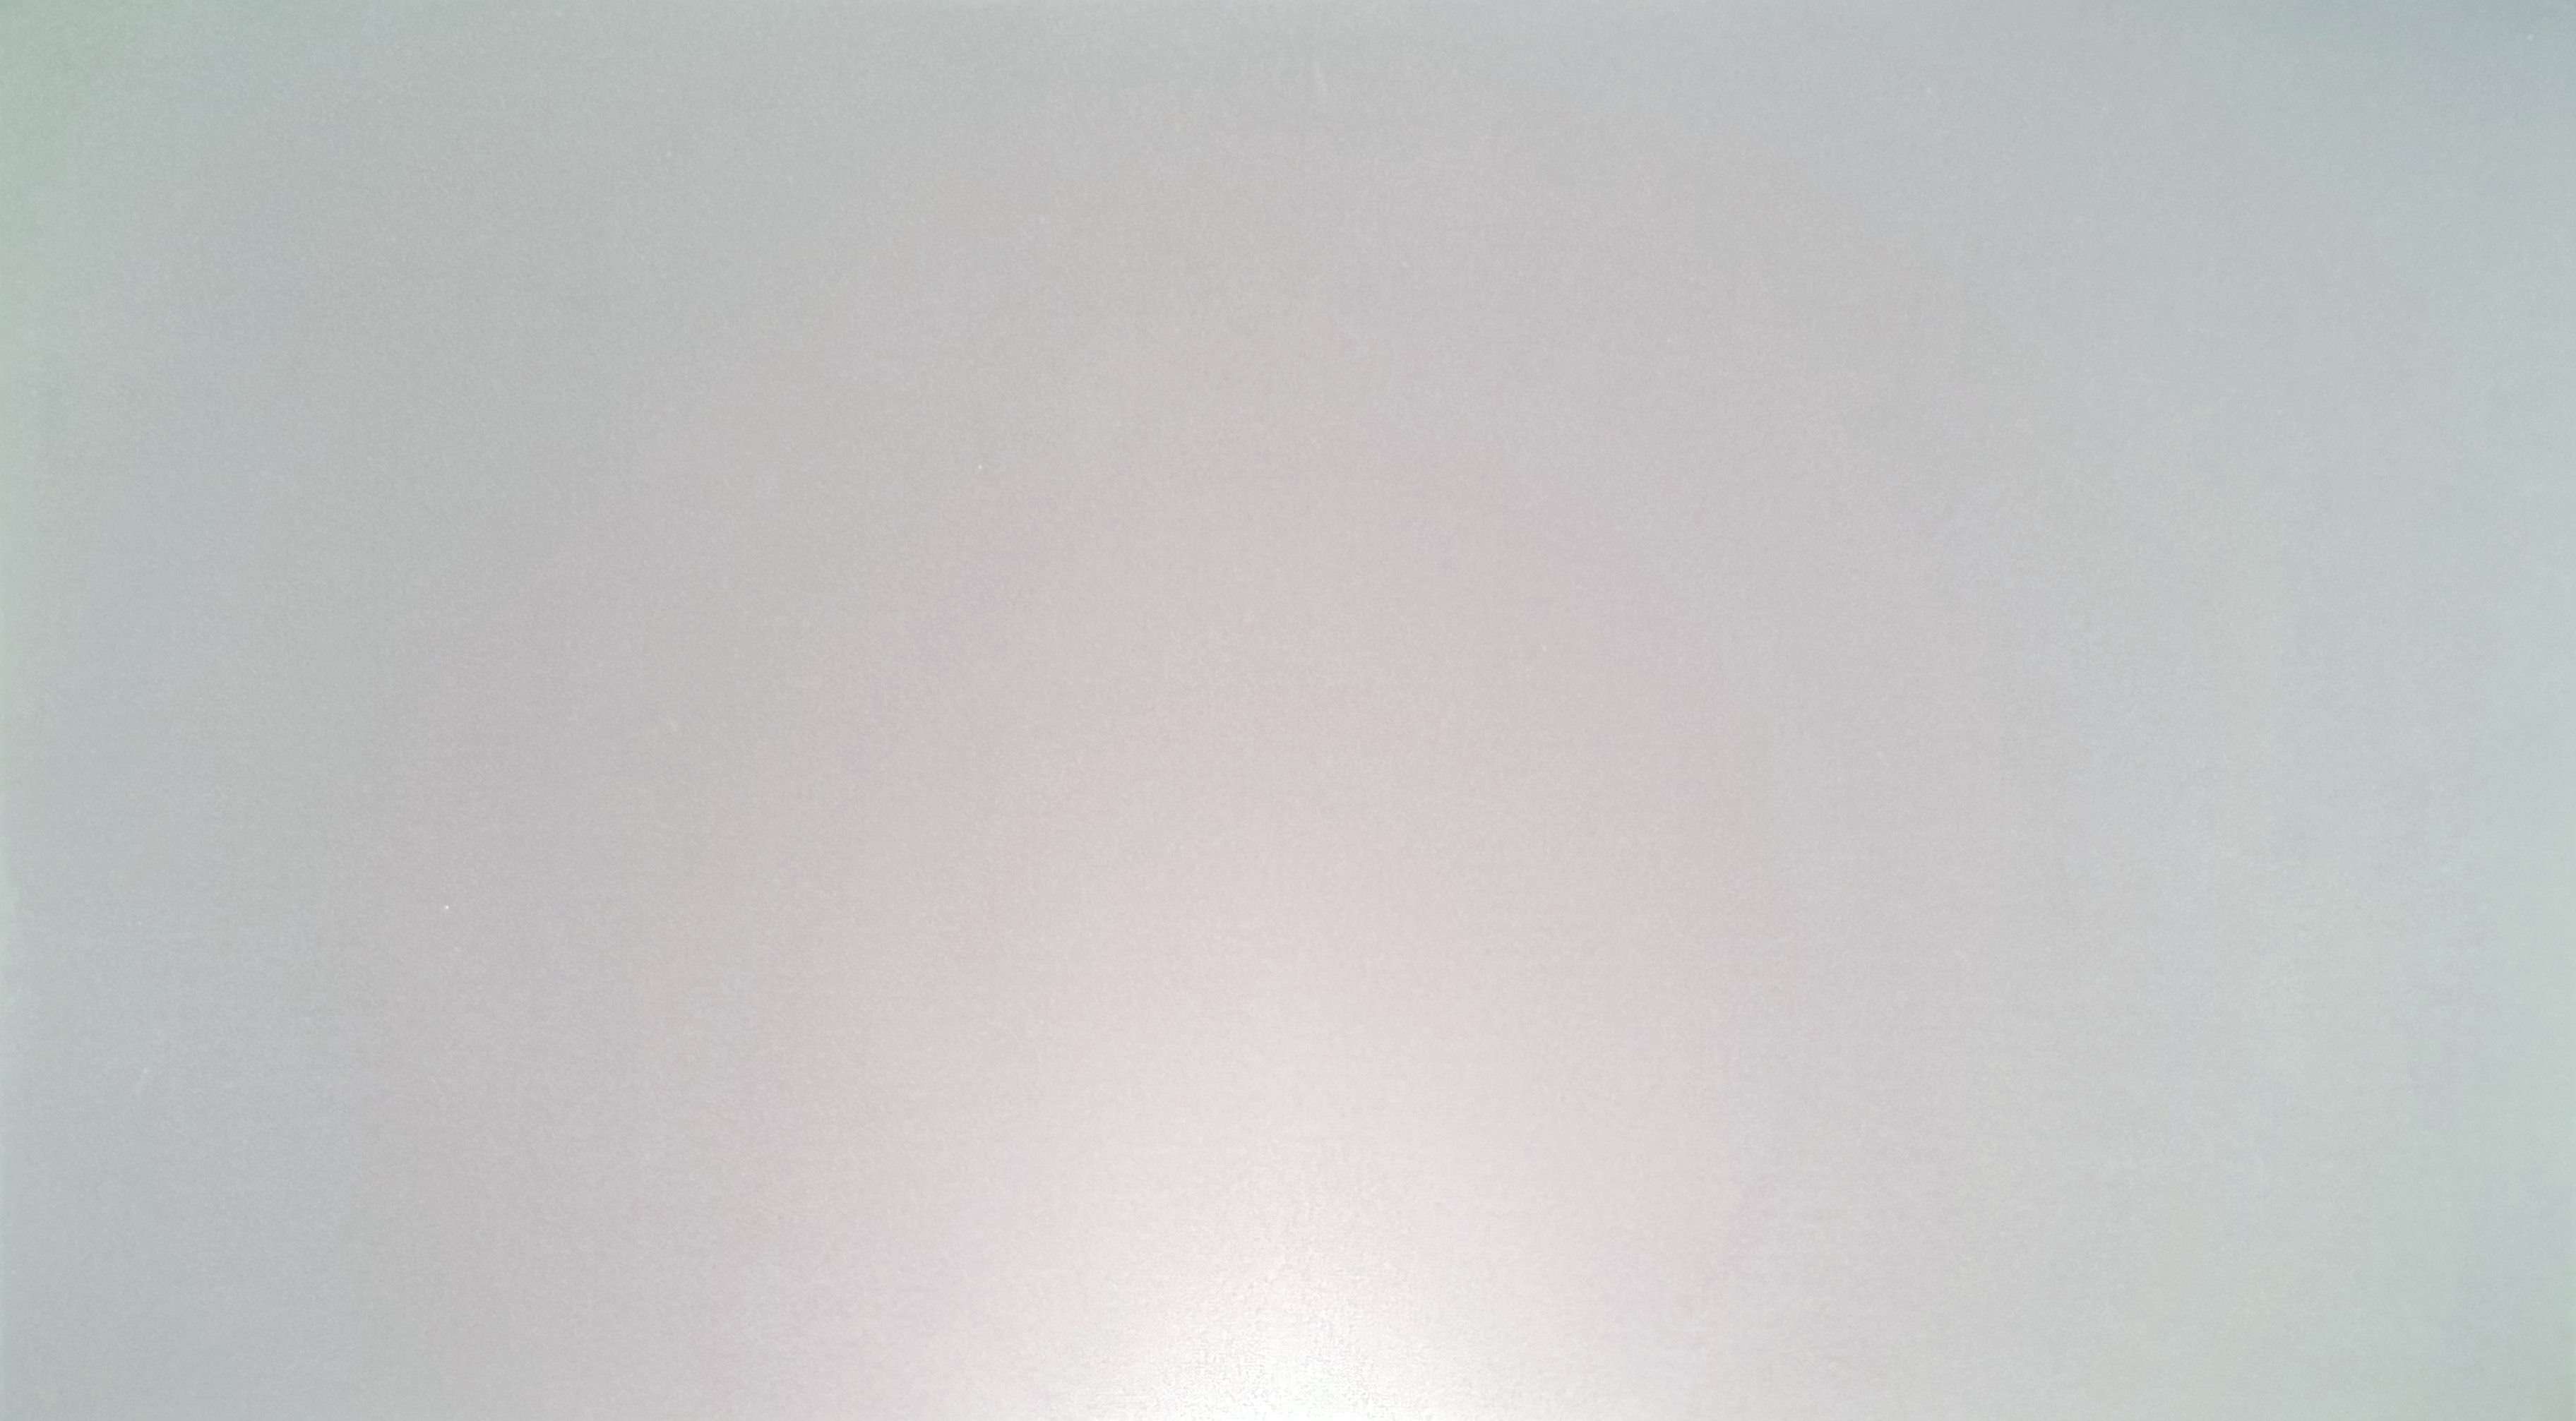
White uniformity is far from perfect, which is par for the course with UST projectors and many DLPs in general. In the photo you can see where the color drifts. The top and corners lean slightly green, while the lower center is warm. The green–magenta spread between corner and center is about 3%, calculated directly from this frame, and the photo actually renders it a little more gently than it looks in person.
On normal content it doesn’t catch the eye, but on a white field it’s visible. The eye adapts to a smooth gradient quickly, which helps, and after a couple of minutes of viewing you stop noticing it. It only starts to bother you on static flat fills, like the white background of a document or a light-colored menu. Still, a digital uniformity calibration feature like the one on the Titan would be very welcome.
Laser Speckle
Speckle is another common problem with triple-laser projectors, and the Aetherion is no exception. On a plain matte white screen it shows at full strength, but screens like that go into dedicated dark rooms. A UST almost always lives in a bright living room or bedroom, where an ambient-light-rejecting (ALR) screen goes without saying.
Mine is a 4th-generation FScreen Fresnel, and speckle is noticeably lower on it than on a white screen, thanks to its anti-speckle layer. I wouldn’t generalize to all ALR screens, though. Not every Fresnel has one, and on a CLR screen, with its ribbed surface and high gain, the grain can actually get stronger. A lot depends on which screen you use.
The good news is that I couldn’t see any difference in speckle between the Aetherion, the Valerion VisionMaster Max, and the XGIMI Titan Noir Max. The only way to eliminate the effect completely is a combination of the right screen and a DIY vibration system.
XPR-Shift
Let’s start with the good news: XPR-Shift. It’s the standard pixel-shifting technology, and here it builds a 4K image from a 0.47″ DMD with a physical resolution of 1920×1080. Every projector I’ve come across shifts at the same 240 Hz, including the sister Valerion VisionMaster Max and the XGIMI Titan Noir Max with its new controller. That makes sense: 4K/60 needs four shift passes per frame, and 4 × 60 is exactly 240 Hz. The Aetherion is the exception. Despite a previous-generation DMD and a controller from the same family as the Titan’s, AWOL’s engineers squeezed higher shift rates out of it, and with just one controller.

We confirmed this on slow-motion video, with an XGIMI Titan Noir Max running the same signal alongside. In the same span of time, the Aetherion gets through roughly twice as many shift cycles, so the four-phase cycle completes twice per frame instead of once. The XGIMI runs at the standard 240 Hz; the Aetherion comes out at roughly 480 Hz.
Note that the higher rate applies only to the shift itself. On the input side, the projector still tops out at 4K/60 because there’s only one controller. It accepts a 4K/120 signal but displays 60 frames per second (see Gaming, Refresh Rates & Motion). In 1080p modes, XPR-Shift is turned off and the DMD runs at its native resolution.
What does this mean for the viewer? First, the image holds together better, both in stills and in motion. On other projectors, any fast motion on screen visibly costs resolution, and even flicking your eyes across a test pattern makes the image break up into its sub-frames for a moment. The Aetherion almost entirely avoids this, and resolution holds up visibly better in motion.
Second, the faster shift makes the pixel grid less visible. The size of the gaps between pixels doesn’t depend on the shift rate (that’s down to the DMD’s fill factor and the optics), but the faster the phases cycle, the more completely the eye blends them together. This is most obvious in motion. With a slow shift, the eye has time to pull the sub-frames apart and the grid shows through. That doesn’t happen here. The practical upshot is simple: you can sit closer to the screen or go for a bigger image with no penalty. The optics contribute too, but the effect is impossible to miss.
Now for the bad news: AWOL’s in-house PixelLock technology. Its main purpose is to reduce chromatic aberration, a problem in its own right for UST projectors because of how their optical engine is built. It does that job quite well. But at what cost?
PixelLock
Every UST lens has lateral chromatic aberration. The lens magnifies red, green, and blue slightly differently, so the red and blue channels land on the screen a little off from green. To the eye, this shows up as a colored fringe along high-contrast edges. You can fix it with expensive glass, which you won’t find in an ultra-short-throw lens at this price, or with digital correction.
UST projectors have a quirk here. The optical axis runs below the image, almost at its bottom edge, which means the entire picture is formed toward the edge of the field of both the lens and the aspheric mirror. As a result, the aberration doesn’t vanish at the center of the screen as it would on a conventional long-throw projector. It’s present across the whole frame and grows toward the edges and corners. On the plus side, the error is stable and known in advance for a given optical design, which means it can be compensated in advance too.
That’s why AWOL went digital. The projector carries a map of its own lens’s chromatic aberration and pre-shifts the red and blue channels in the opposite direction to the error, each with its own displacement field, so that all three land on the same pixel on screen. That’s exactly what the end of the promo video shows. And it works well: on our unit, residual misconvergence is about a third of a pixel at the center of the screen, an excellent result for a UST, and color fringing on edges really is minimal.
Now the downsides. You can’t shift a channel by a fraction of a pixel without resampling, which means redistributing the image onto a new pixel grid. And since the displacement field changes smoothly across the frame, the compensation phase also varies gradually from one edge of the frame to the other. Where it’s close to zero, a one-pixel-wide line lands exactly on one output pixel of the DMD and everything is displayed natively, 1:1. Where the phase reaches half a pixel, the resampler has no choice. It spreads the line across two adjacent pixels at half brightness each, and the line doubles.
So what does that look like? At 4K, resampling eats one-pixel detail, which cuts into effective resolution and the ability to render fine detail.
The easiest way to see it is a full-screen grating of one-pixel-wide lines at 4K. The lines should stay clearly separated, but across most of the frame they blur together, and in several spots they merge into a solid fill. The spots are always the same. This is definitely not a focus issue: the lines are all still there, and their pitch is intact. Most importantly, if you move the image across the screen, the bands stay put. They’re tied to the screen, not to the image being displayed.
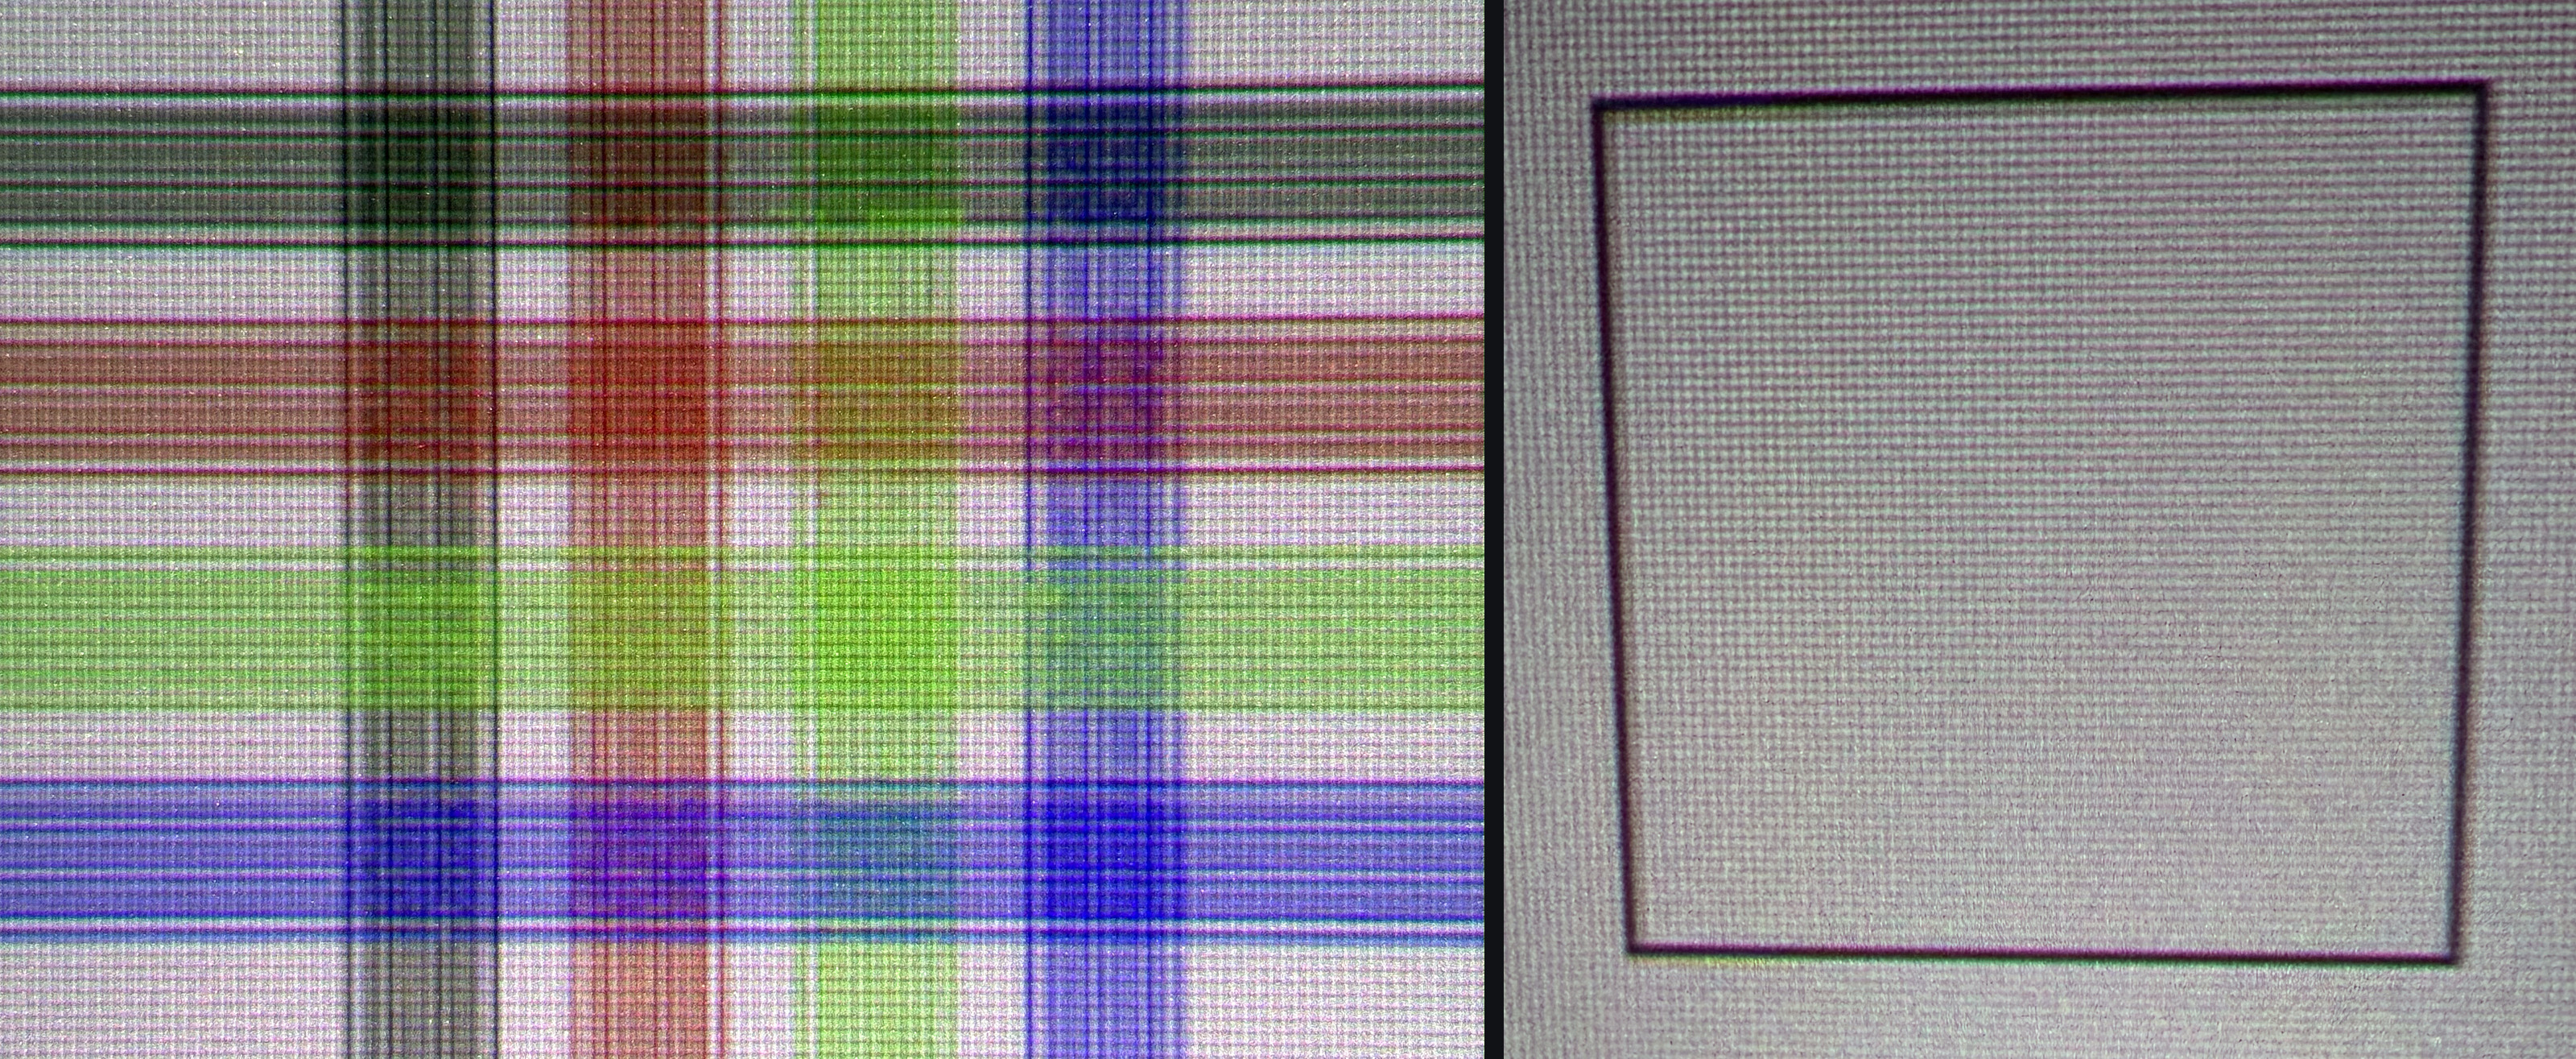
The resampler doesn’t switch off at 1080p either, so parts of the image show striping from offset pixels. It’s very easy to spot: with the 1080p version of our QBF pattern on screen, you can clearly see areas where the image smears and pixels overlap.
To pin down exactly what’s going on, we made simple analysis patterns: 1080p and 4K versions of one-pixel horizontal and vertical lines. They showed us how and where the resampler kicks in, and even let us count the compression bands and measure how much of the frame they cover.
Now the numbers. Input was 1080p and 4K from a MacBook over DisplayPort, all geometry correction and image enhancers were off, and the grating pitch was calculated across the full frame.
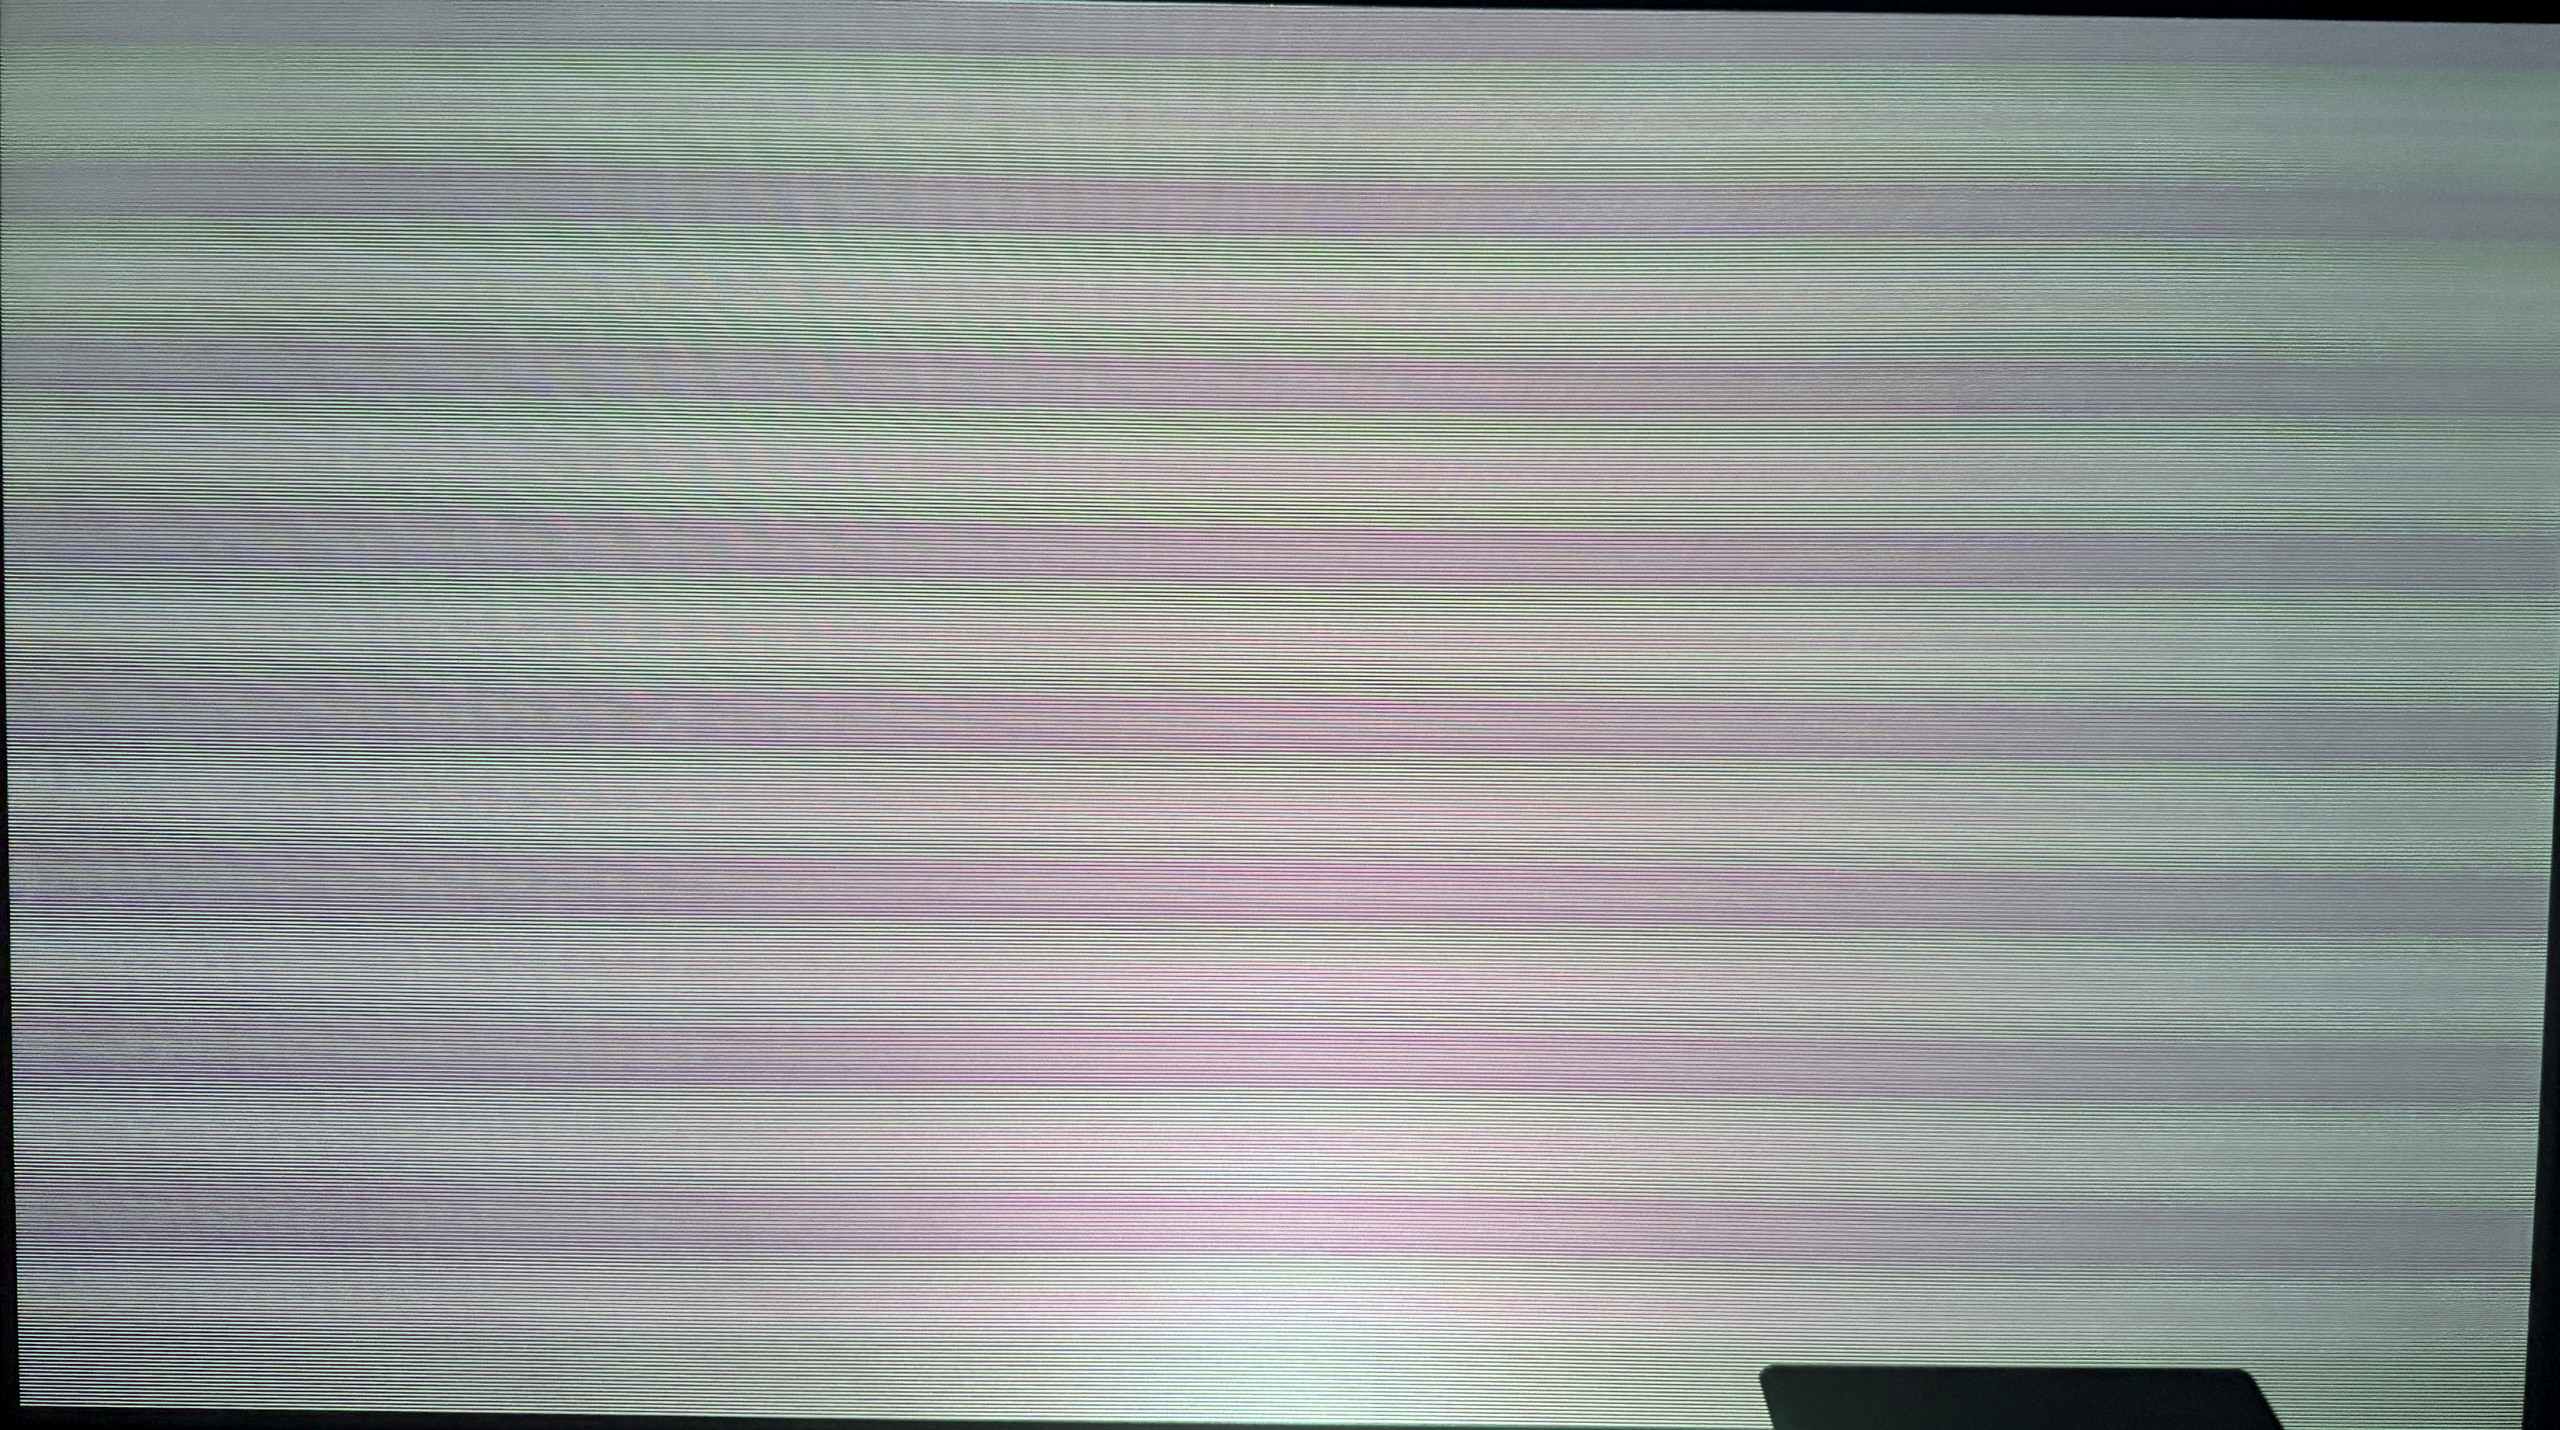
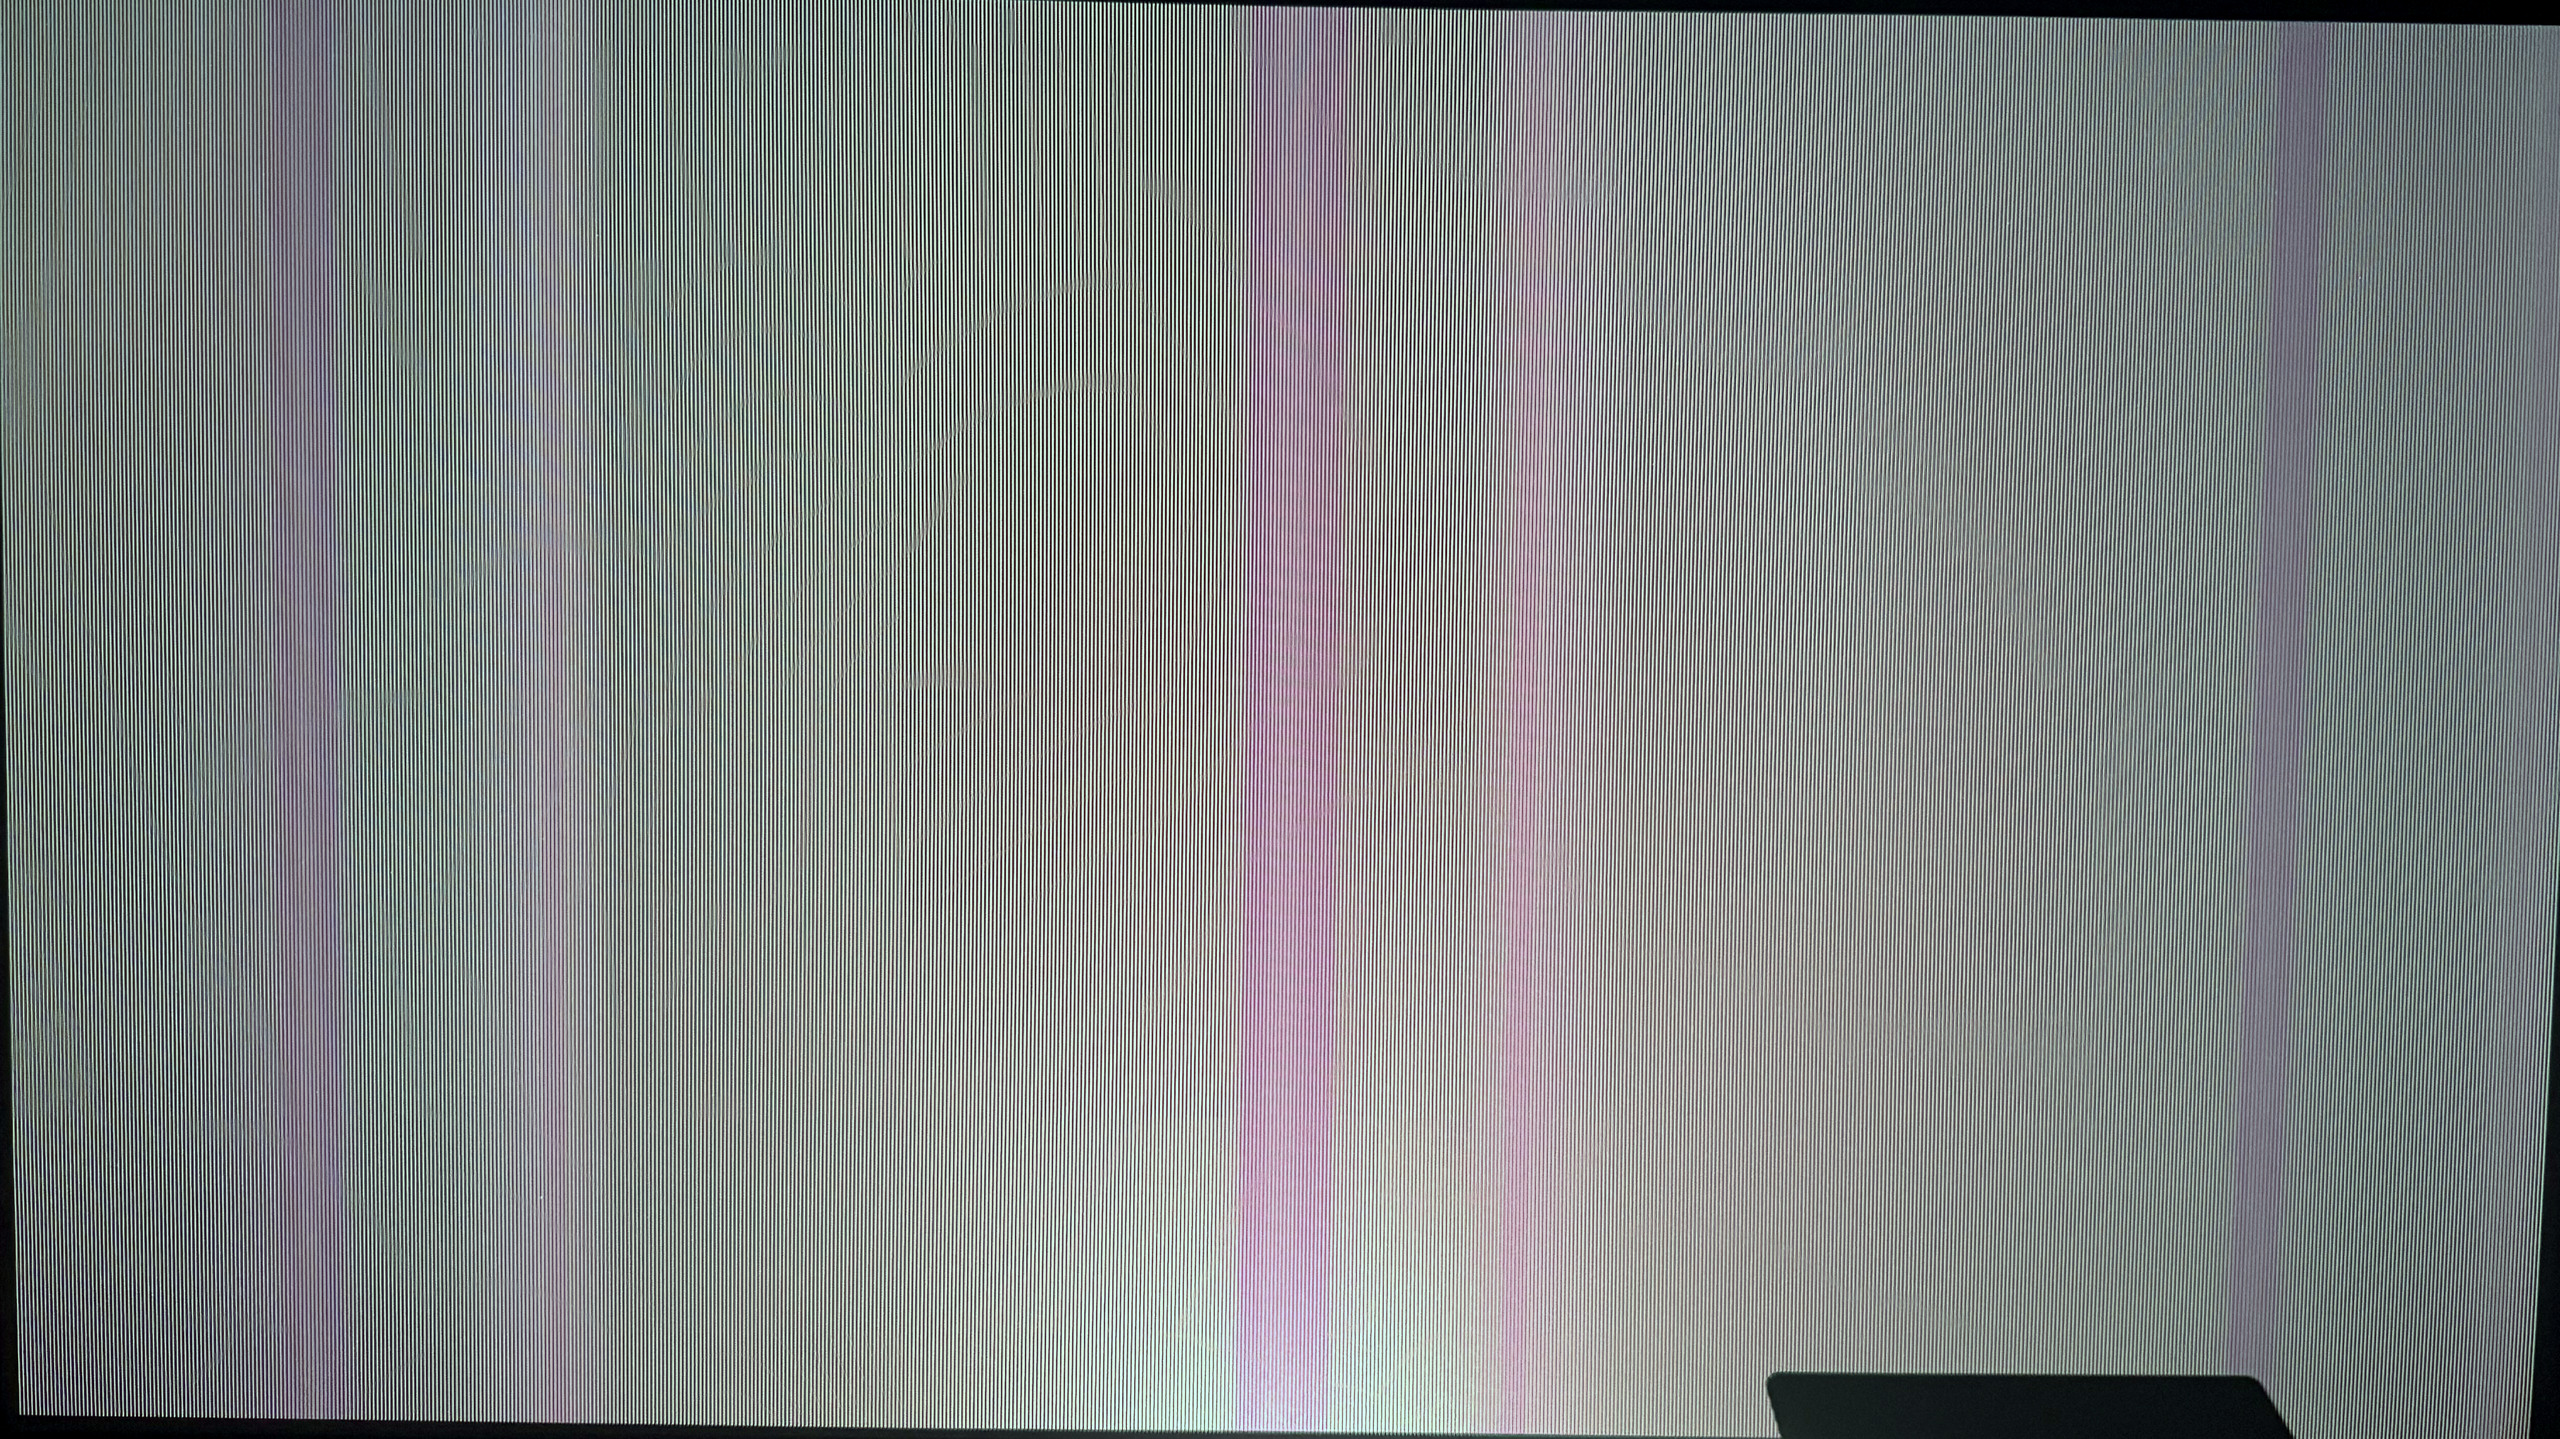
Horizontally, the error is three times larger than vertically, which you can see with the naked eye in the shots above: about seventeen bands across the frame versus just six along it.
Switch the input from 1080p to 4K, and the band pitch as a fraction of the screen stays the same: 9.6% vs. 10.1% horizontally, 11.6% vs. 11.8% vertically. The bands are pinned to the screen, not to the incoming image, which means PixelLock runs before the XPR shift.
The same thing on a real pattern, from closer up:
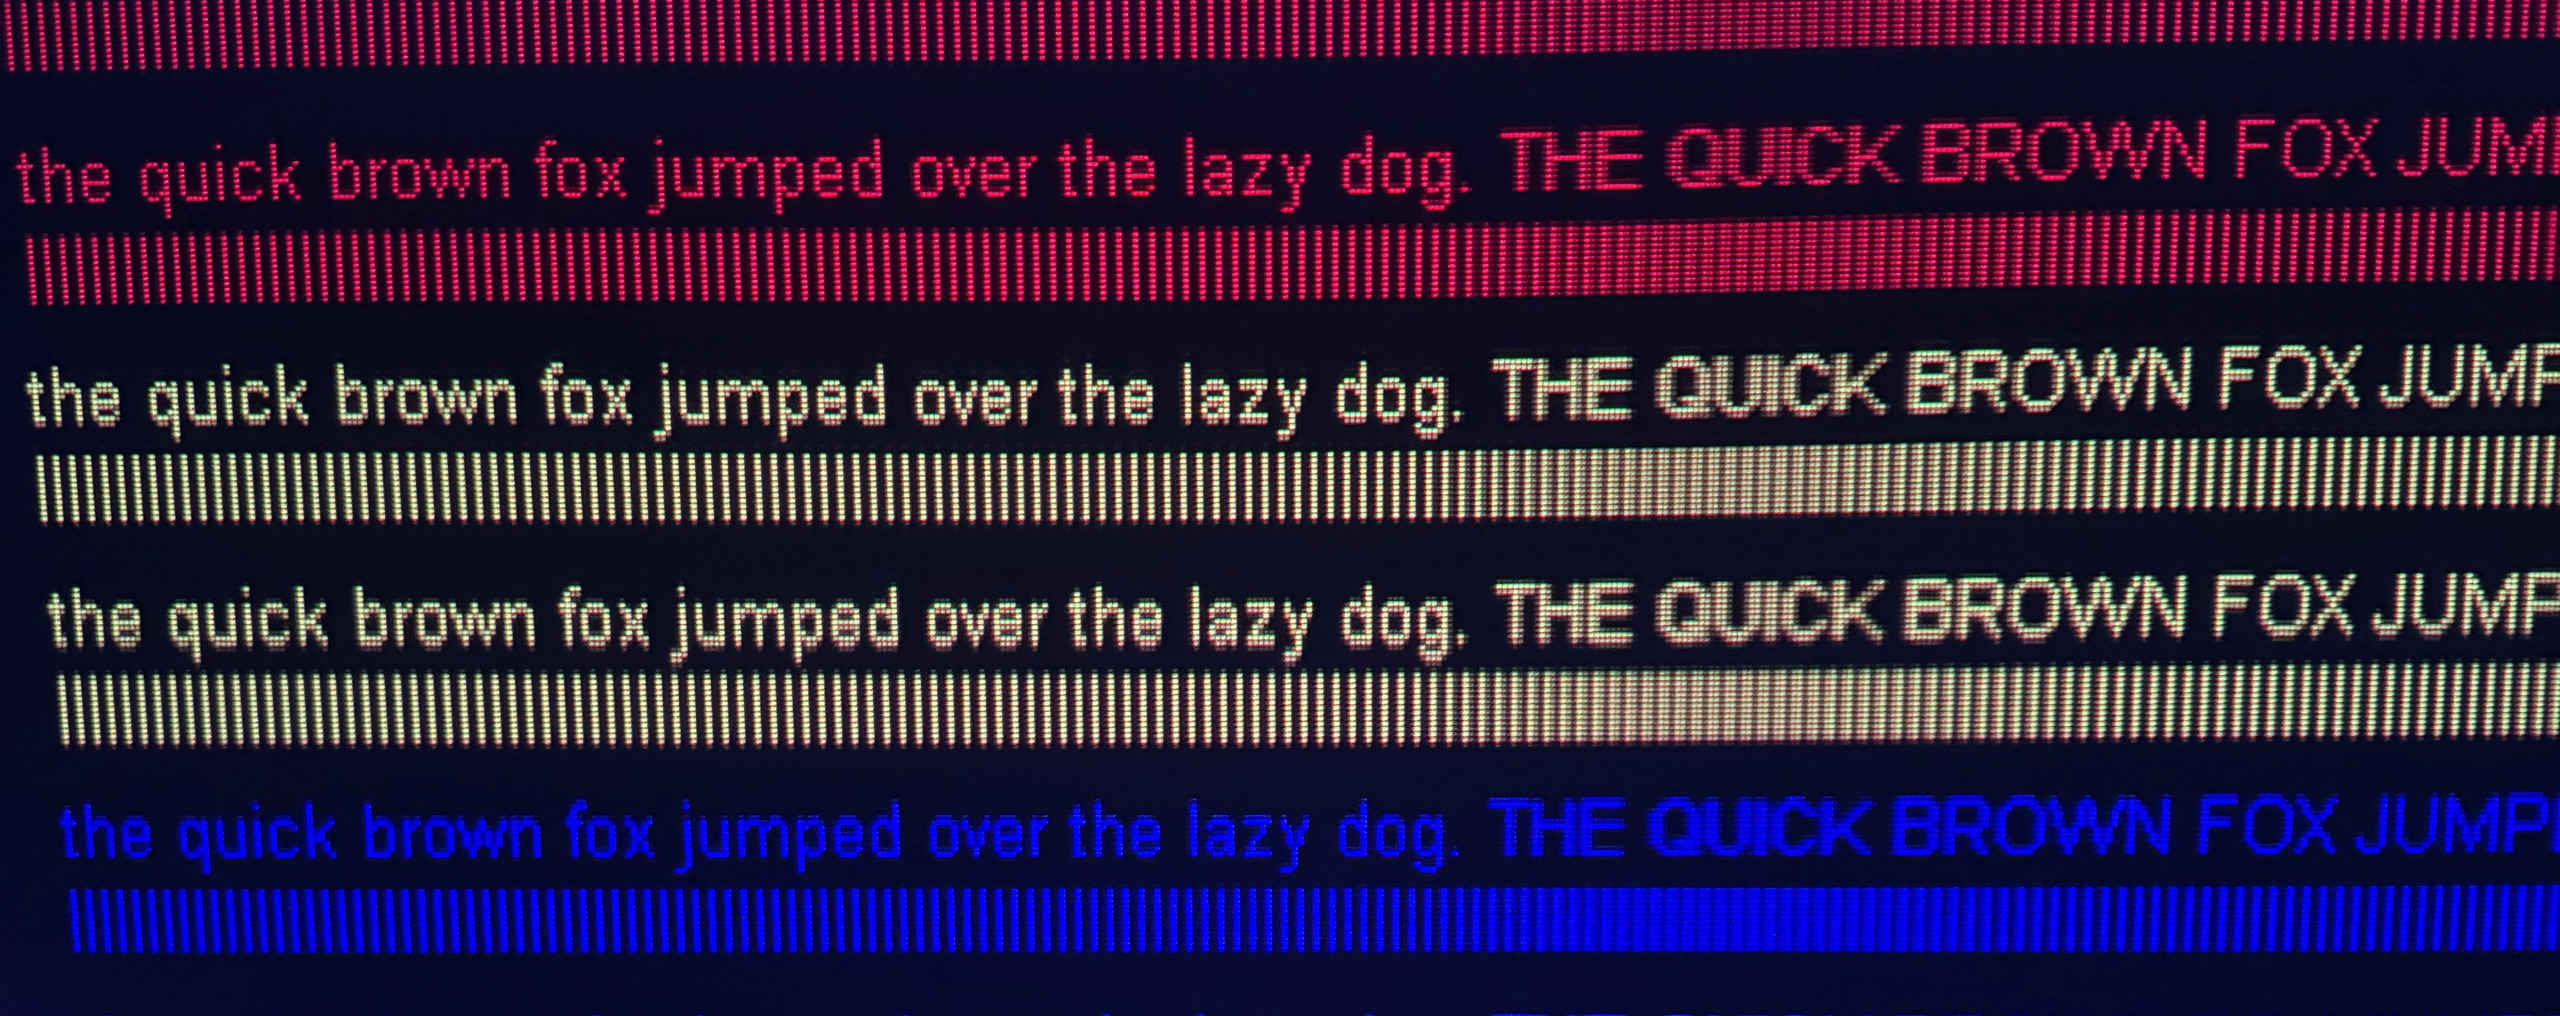
Only a macro lens shows what actually happens inside a band. Up close, the lines separate cleanly and can be counted.
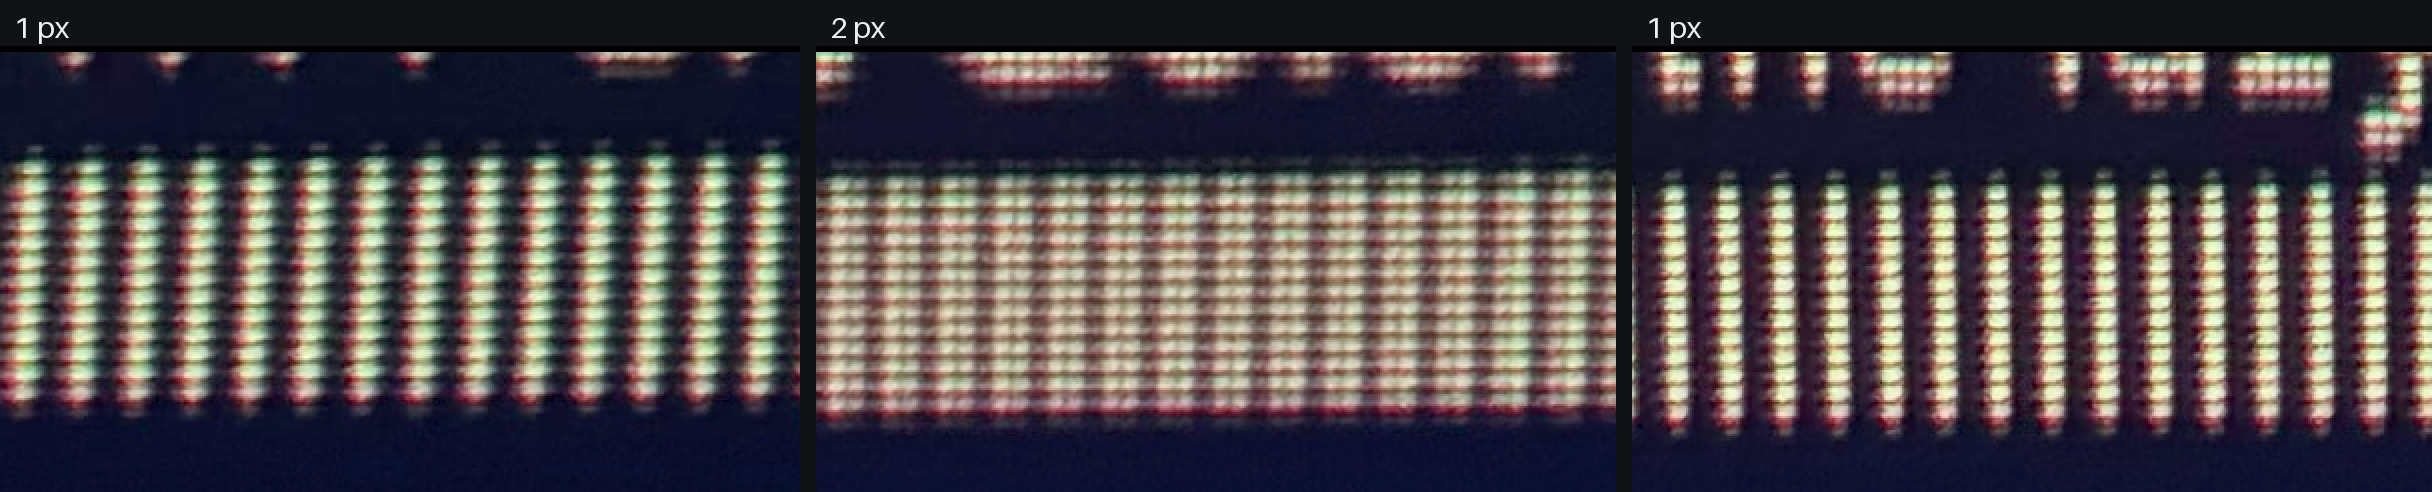
It’s tempting to blame the loss of 4K detail on XPR, but that doesn’t hold up. Resampling happens before the shift, and the shift can’t repair what was lost upstream; it faithfully displays whatever it’s fed.
Here’s the most frustrating part. PixelLock can’t be turned off at all. Not in the user menu, not in the service menu. I tried. It’s always on, with every signal, including 1080p, where pixels are four times larger and a third-of-a-pixel misconvergence could simply be forgiven in exchange for untouched resolution. You don’t get that choice. The projector makes the decision for you, at every resolution.
How much does this matter in practice? Less than the measurements suggest. It’s only noticeable on content that actually contains pixel-wide detail: test patterns, small text, fine architectural texture, games with detailed textures, and so on. With movies at a normal viewing distance, you won’t see it.
On the bright side, this finding has been reported to AWOL and already passed on to their engineers for investigation.
Brightness & Contrast Measurements
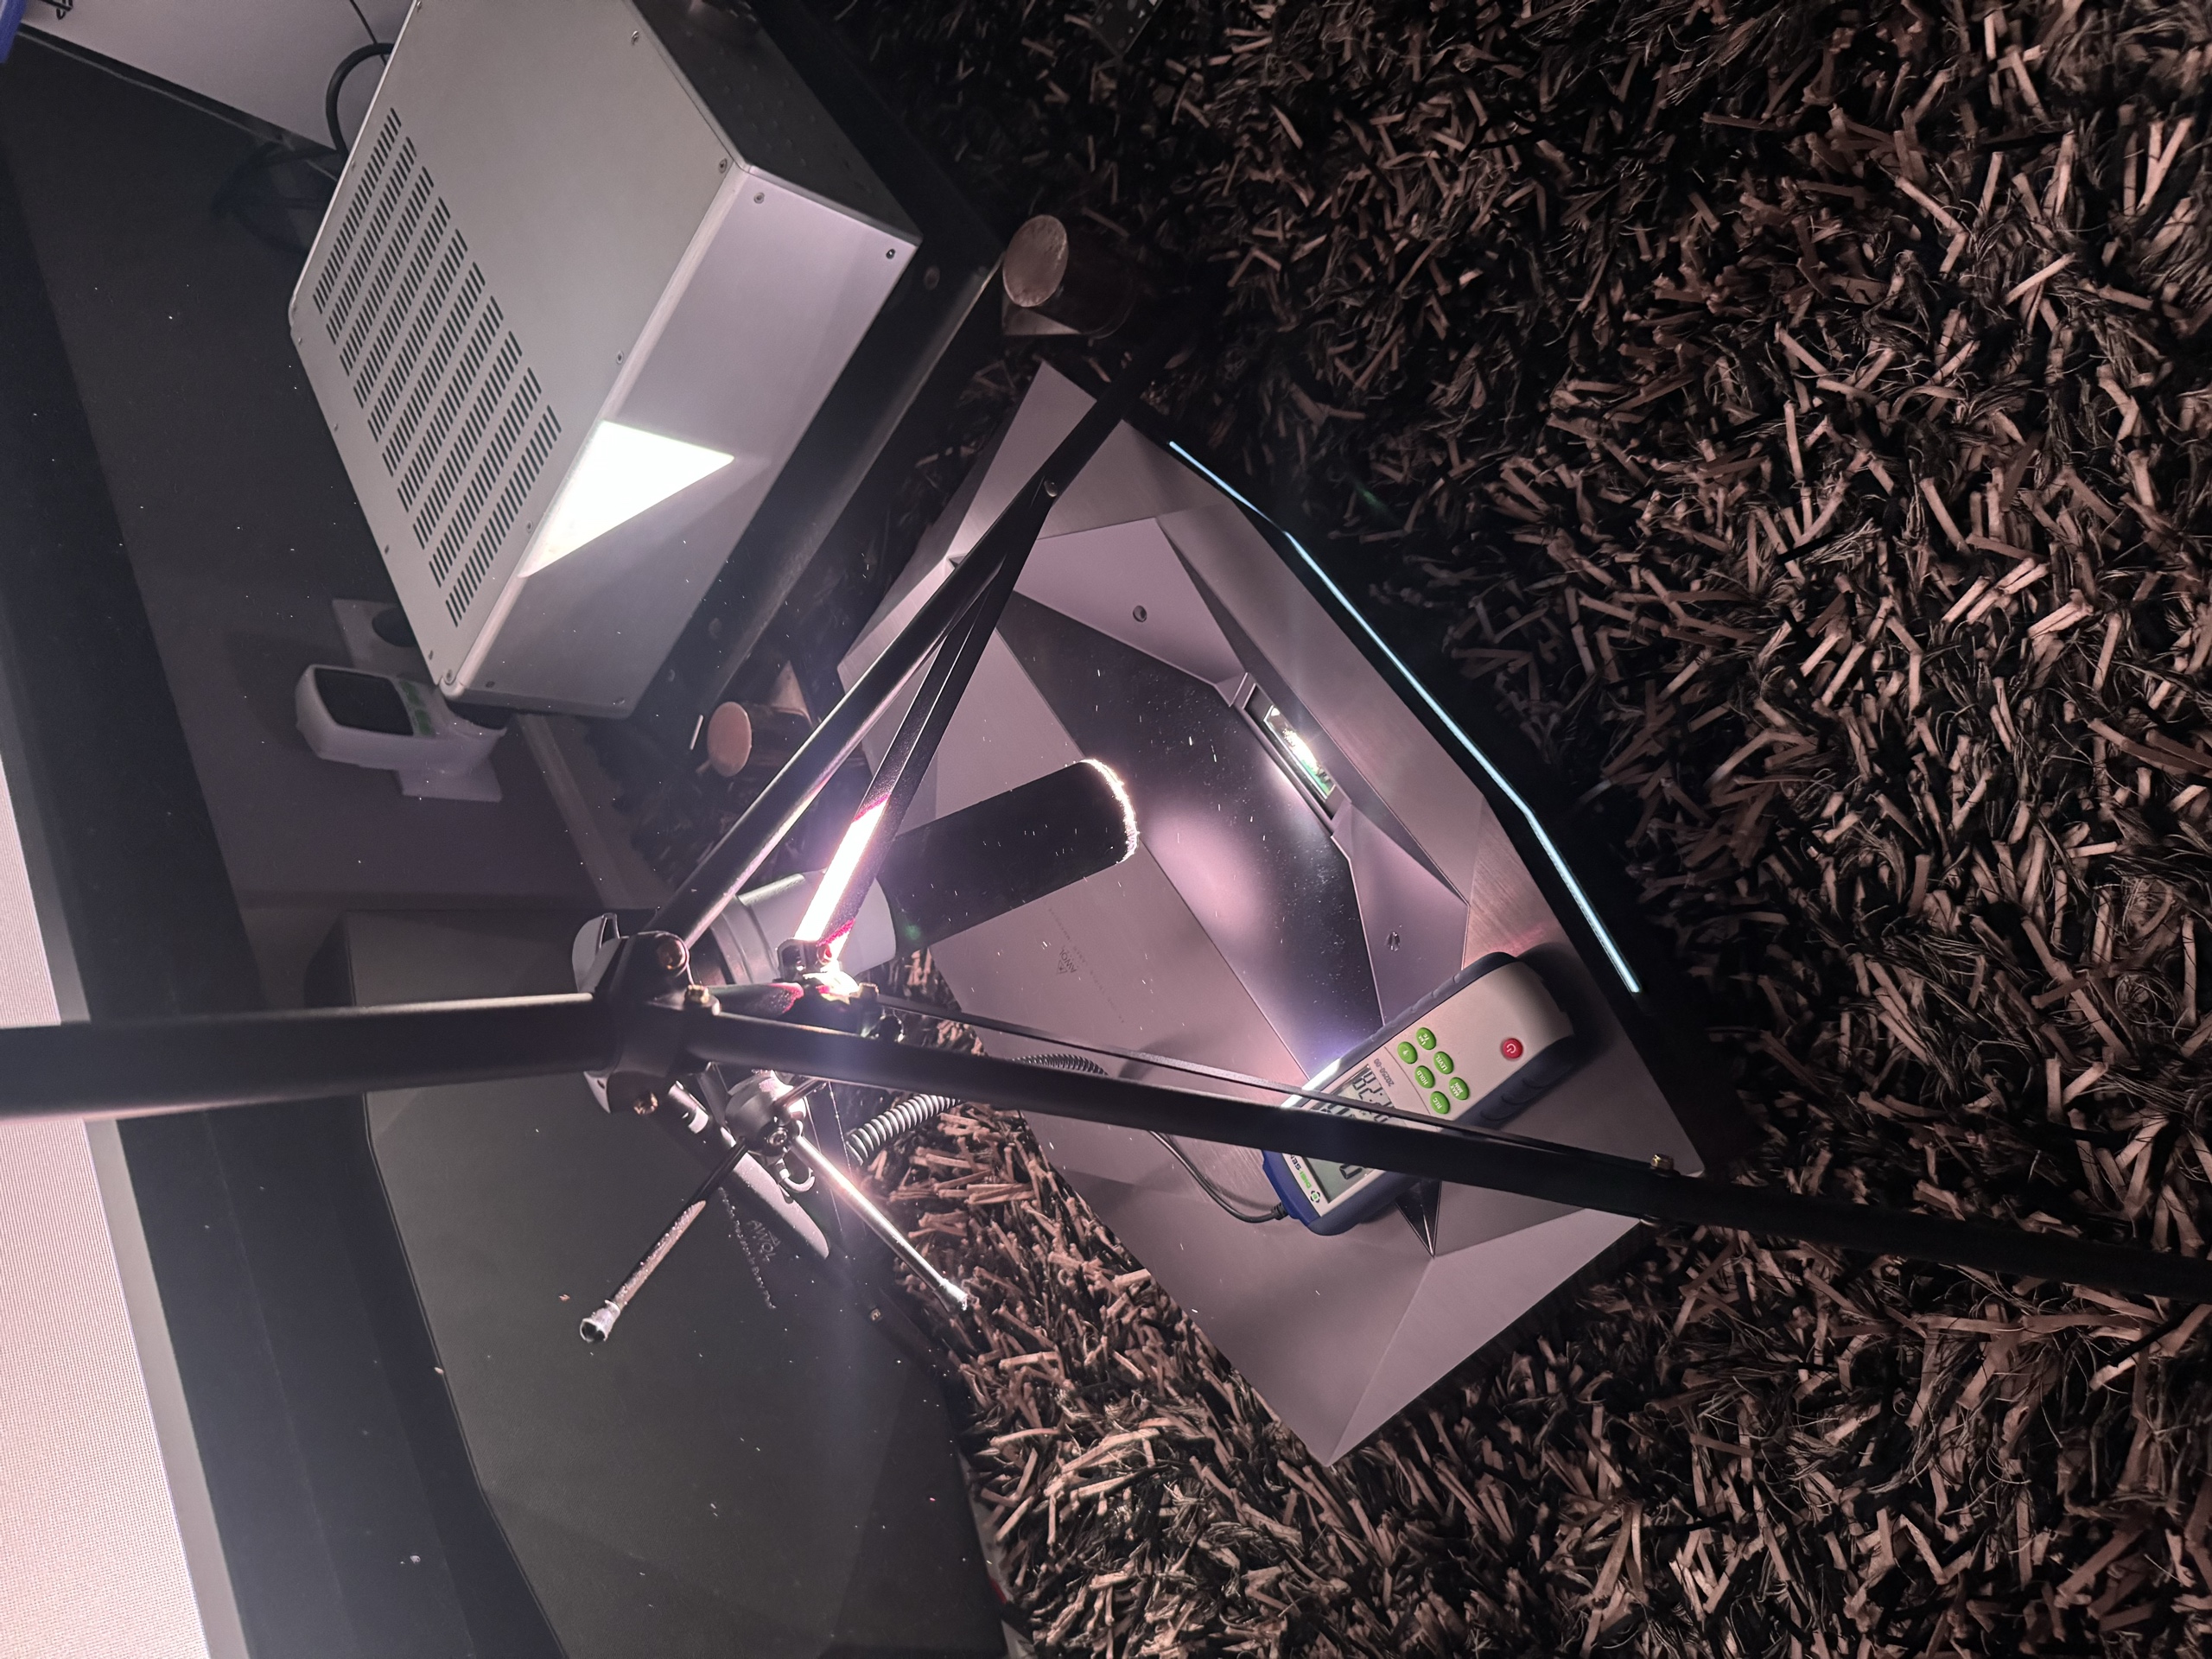
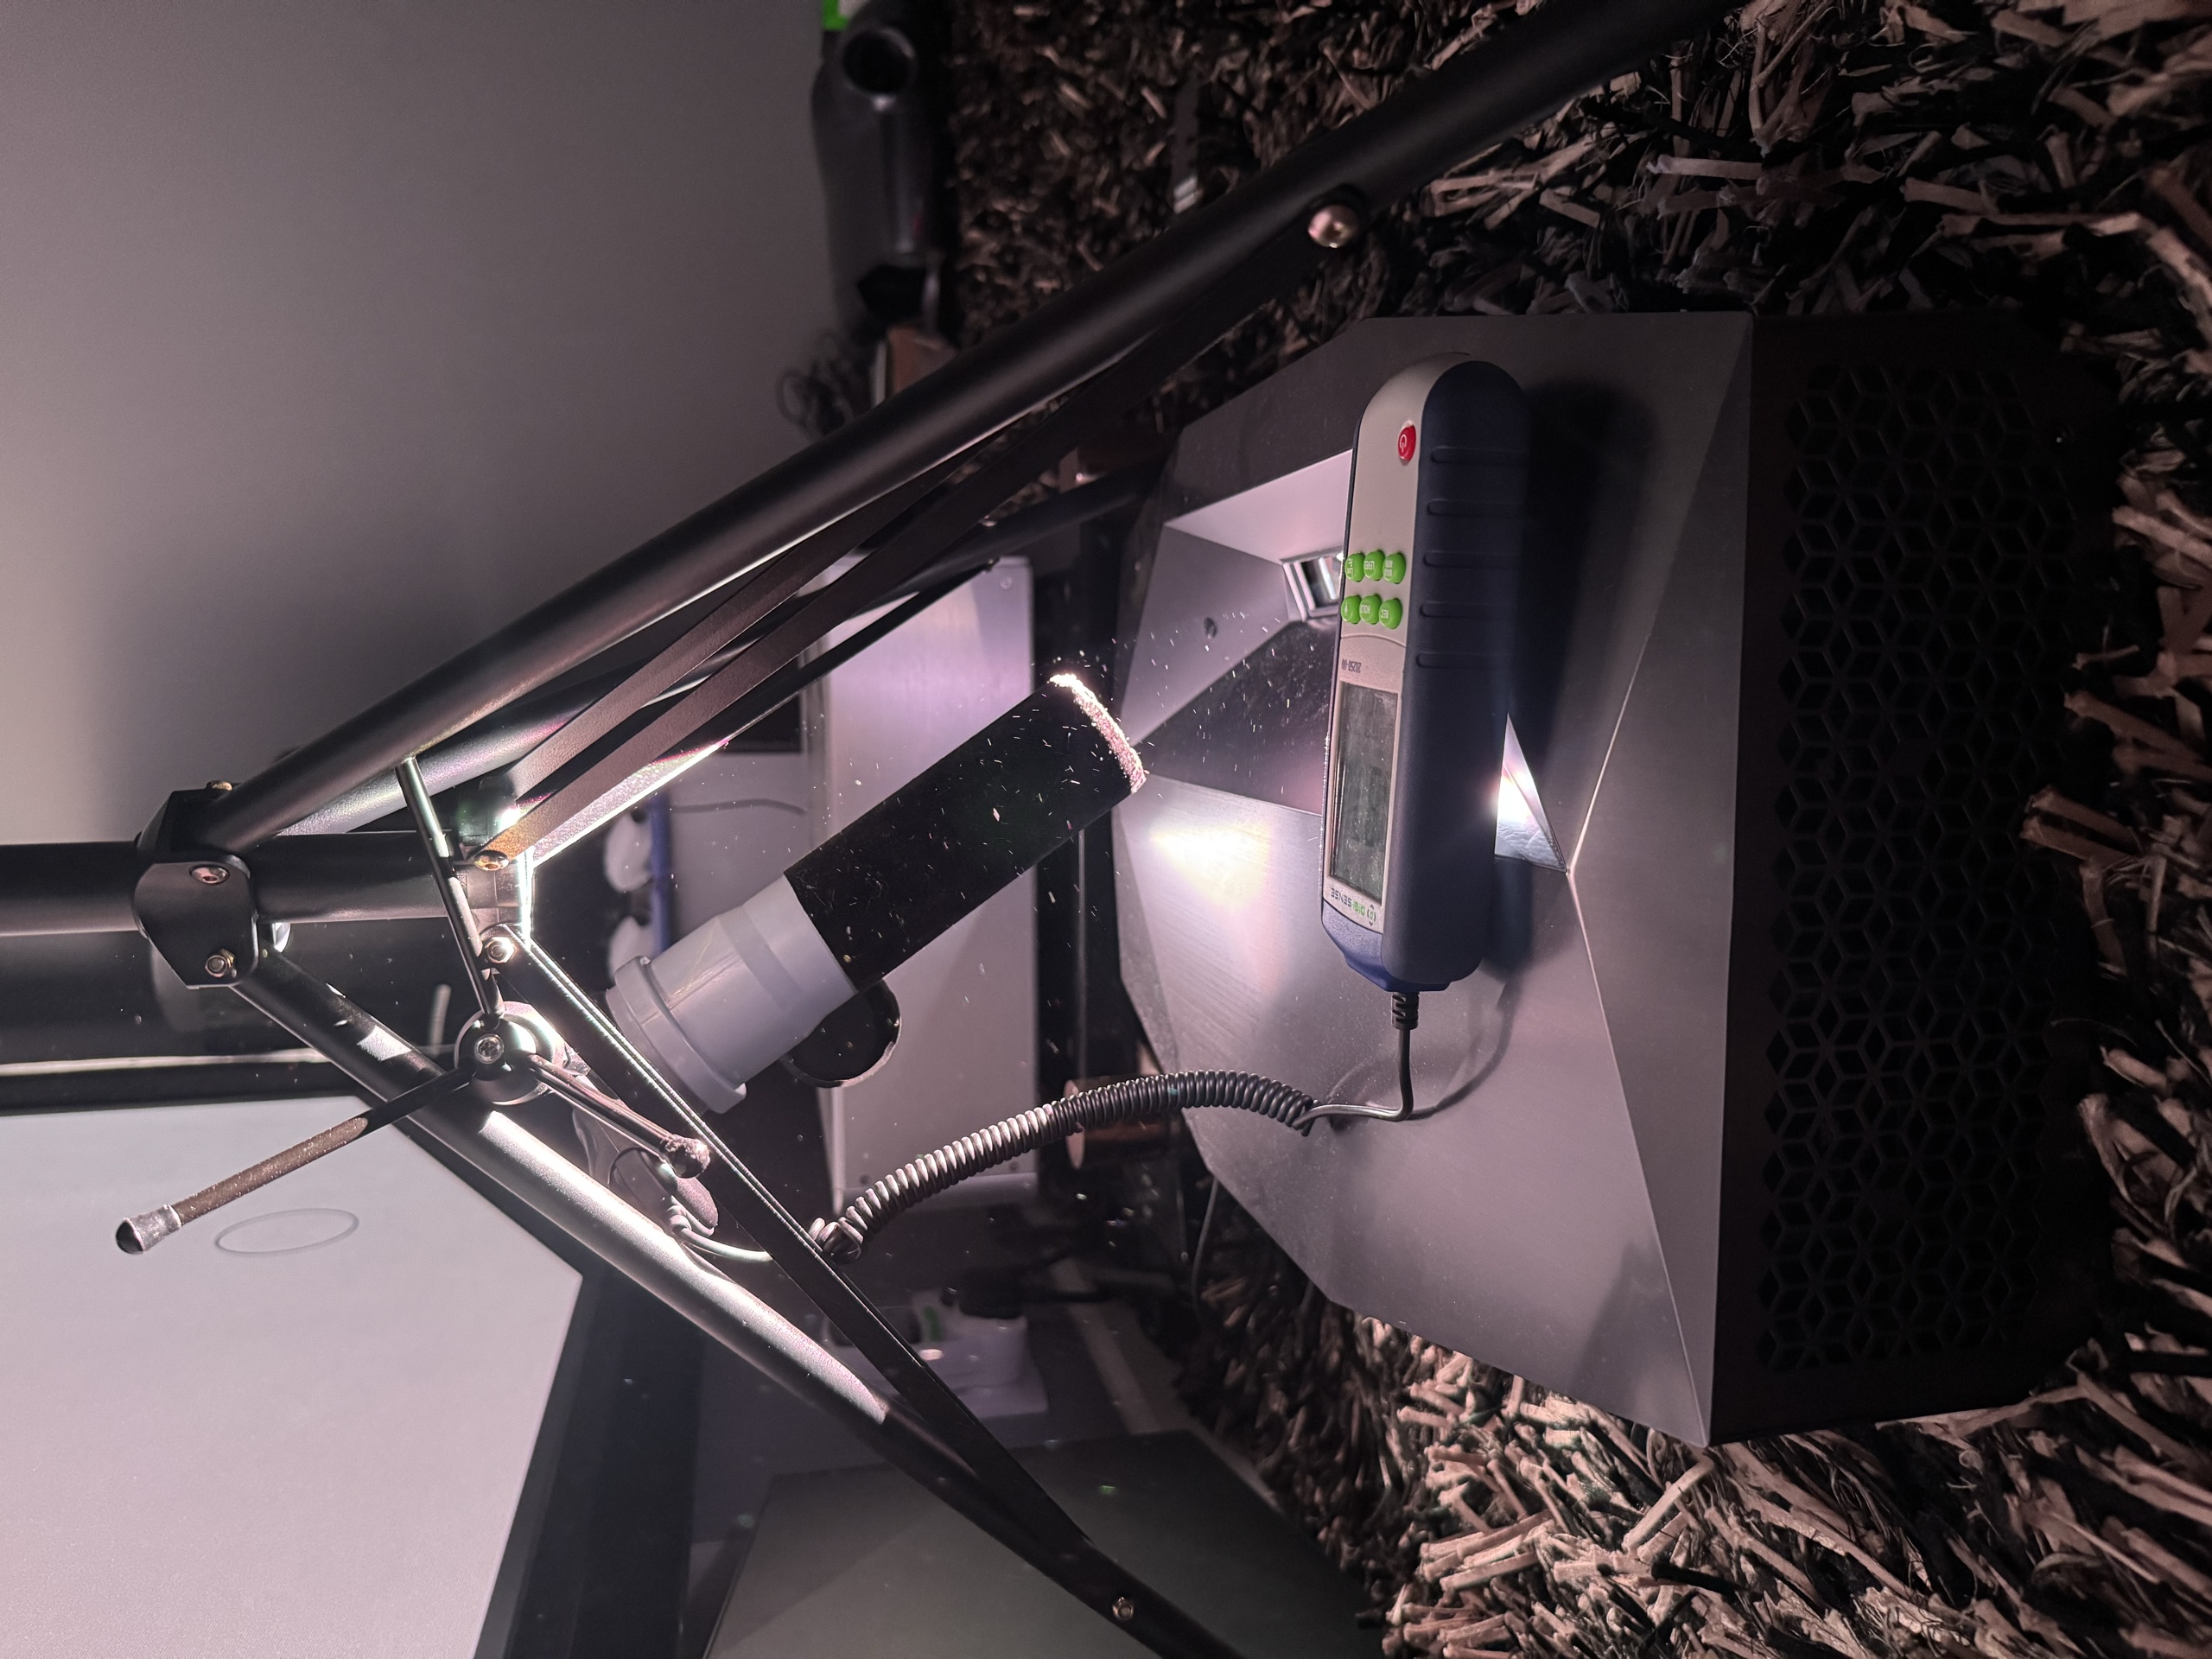
Below is a detailed breakdown of the Aetherion Max’s light output and contrast across every laser level and iris position. All measurements were taken with a calibrated, NIST-certified lux meter mounted on a tripod. To keep stray reflections to a minimum, I used a dedicated tube lined with velvet both inside and out. The meter’s sensor was always fully illuminated, and I set the angle so that nothing cast a shadow inside the tube and the reading stayed at its maximum. Brightness was measured at nine points and averaged.
Brightness Modes
Brightness Enhanced, High and Low is the “everything for maximum brightness” mode. It delivers 3,920 lm, the highest figure this projector can produce, period. It’s only available with Iris Off, and you’ll struggle to find a use for it with real content. The white balance swings hard toward green right away, and the higher the setting, the greener the picture. Modes like this exist purely to post a maximum brightness figure on paper, even though our unit came close to the rated 3,300 ISO lumens in the proper modes as well. Warm 2 with the iris wide open delivered 3,210 lm, 97% of the rated figure.
Warm 2 uses a mixed color sequence. With Iris Off and laser level 10, it delivers 3,210 lm, and this is the figure to use as the baseline when comparing against the rated specs. Instead of outputting pure RGB primaries, this mode partly mixes them, which raises brightness at the cost of color gamut, fan noise, and anti-RBE.
Warm 1 is a proper RGB sequence, with a noticeably wider color gamut and quieter operation. It’s also the only mode with anti-RBE. The price shows up right away: the same Iris Off and laser 10 now give 2,720 lm, which is 15.3% less than Warm 2.
Laser levels 0–10 raise brightness smoothly, but the top steps add less than the lower ones. Level 8 in Warm 2 gives 2,850 lm and level 10 gives 3,210, so the last two steps add only 12.6% more light.
Brightness vs. Iris Position
As the chart shows, closing the iris reduces light fairly linearly, except at the last position, M7, where brightness drops much more than at the other steps. In Warm 2, the laser comes into play as well as the mechanics. The entire ladder from Iris Off to M6 runs at the same power, and only at the seventh step does the projector cut it back. Warm 1 has no such cut: power is the same at every position, M7 included.
You can win back some of the lost brightness by simply switching from M7 to Cinema 2 (a trick discovered by FS Home Theater). The iris stays at M7, but the image is now processed by the Cinema 2 preset. Contrast holds, and you get more light: 1,600 lm vs. 1,530 in Warm 1. In Warm 2 the gain is bigger, 1,600 lm vs. 1,400 lm, because at M7 the projector cuts the laser, while Cinema 2 always runs at full power.
The main calibrated modes, Cinema 1 and Cinema 2, roughly correspond to the M4 and M6 positions. In Cinema 2, though, switching the white balance from Warm 1 to Warm 2 does nothing. The menu item changes, but brightness and contrast stay the same.
In Dynamic Iris High mode, the iris stays slightly closed, roughly matching the M1–M2 position: 2,950 lm in Warm 2 and 2,620 lm in Warm 1.
In general, brightness and contrast in Cinema 1 and Cinema 2 depend heavily on which position you enter them from. Come in from Iris Off, as on our chart, and you get maximum brightness and minimum contrast. Come in from M7, and brightness is lower but contrast is higher. That isn’t random. The motor only hits a hard stop at the two extreme positions, and every intermediate preset moves the iris by a relative amount from wherever it already was.
Native Contrast (On/Off)
Before looking at the Aetherion’s numbers, it helps to have a reference point. We measured the Valerion VisionMaster Max ourselves (though we never published a review of it on the site). It’s the Aetherion’s closest relative from the same company, right down to identically named iris presets, Cinema 1 and Cinema 2. With the iris fully open we got 2,500 lm and 2,050:1, and in Cinema 2, 1,250 lm and 4,100:1.
Note how neat that trade-off is: exactly half the light, exactly twice the contrast, which means black improved fourfold.
Keep those 2,050 and 4,100 figures in mind. On paper, the Aetherion’s rated 6,000:1 puts it a class above its long-throw sibling.
The measurements show decent contrast even with the iris fully open. As expected, the highest figures came with the iris closed all the way. Even without touching the white balance settings, contrast reaches 5,760:1 at M7. With a quick calibration and the trick described above, contrast climbs to 5,895:1, within touching distance of the rated 6,000:1, while delivering more brightness than plain M7.
Dynamic Iris High delivers about 5,000:1, the same as Cinema 2, but with considerably more brightness. Keep in mind, though, that these are best-case figures: you can’t get maximum brightness and maximum contrast at the same time.
Pareto Chart: Optimal Brightness–Contrast Combinations
Plot every measured operating point on a brightness vs. contrast chart, and a clear efficiency frontier emerges across the white balance and iris settings.
The best combinations come from Warm 2 in the bright half of the chart and Warm 1 in the dark half, with the boundary between them at around 2,400 lumens. In the bright half, Warm 1 is nearly useless. Five of its positions, Iris Off through M3, sit strictly below the frontier, and for each of them there’s a Warm 2 setting that’s both brighter and more contrasty. Warm 1 starts to earn its keep at Cinema 1 and M4, and from there down it leads almost everywhere. The only exception is M5, which loses to M6 on Warm 2.
If maximum brightness is your goal, the sweet spot runs from Cinema 2 (1,910 lm, 4,900:1) to Warm 2 in Cinema 1 (2,750 lm, 4,049:1): you gain 44% more light while losing only 17% of contrast. For most large screens I’d go with Warm 2 in Cinema 1, which gives 2,750 lm at 4,049:1, the brightest point that still stays above 4,000:1. Or Dynamic Iris High, if its visible artifacts don’t bother you. Beyond that, the trade-off stops paying off: the last 460 lumens cost almost a third of the contrast.
If your goal is the best contrast and the deepest black, the only real option is M7 with the switch to Cinema 2. This mode gives around 1,600 lm at nearly 6,000:1 contrast.
ADL Contrast Curve & ANSI Contrast
As expected, the best contrast across the whole curve came with the iris closed all the way (M7 or M7 to Cinema 2). These are record numbers for any UST projector on sale at the time of this review. AWOL really did hit 6,000:1 native contrast, beating its own Valerion VisionMaster Max by almost 1.5×.
ANSI contrast was measured with the classic checkerboard pattern, reading only the central square. As the chart shows, iris position has almost no effect on it, which means the main source of light scatter lies further down the optical path, in the wide-aperture lens and the aspheric mirror. The figures are good for a UST but trail long-throw projectors.
Dynamic Iris
The dynamic iris arrived in a new beta firmware for testers that will go public soon. All figures below refer to the High level. Low mode limits the iris travel, but it has exactly the same lag and visibility issues as High, so I tested the brightest mode, which is also the most popular with users.
In brightness, it nearly matches the manual M1 position at 2,620 lm, and it barely cuts peak brightness. Native On/Off contrast, on the other hand, rises to about 4,850:1, versus 3,173:1 at the same position with the iris fixed. The reason is simple: the iris closes on a black frame and opens on a white one, so the measurement pairs white from the open iris with black from the closed one. The ADL curve above shows how that gain holds up on a real frame, where light and dark areas sit side by side, and On/Off figures always flatter this kind of mode. Contrast starts to drop sharply as the scene’s average brightness rises, because the projector has to open the iris to deliver more light.
Visually, though, it’s close to the best viewing option: bright scenes get extra punch, and dark ones still hold high contrast. Yes, you can sometimes see the iris at work, but it’s a fair trade.
Power Consumption
The Aetherion Max’s power draw depends on the color sequence you pick, Warm 1 or Warm 2. In normal operation at maximum laser, Warm 1 with anti-RBE on holds at around 142–146 W, while Warm 2 with its mixed colors climbs to 175 W. The thirty-watt gap within the same mode comes down to how each sequence is built. Warm 2 doesn’t output colors one after another, so it runs less efficiently and turns more of its power into heat. The same thing explains the fan-noise gap covered in the Noise section. And it’s the anti-RBE trade-off we described above, only this time in your favor: Warm 1 uses about 17% less power and puts out roughly that much less light.
The laser level ladder scales smoothly and almost linearly. In Warm 1 it runs from 56 W at “Laser 0” to 141 W at “Laser 10”, and in Warm 2 from 70 to 175 W. Each step adds roughly 8 W in Warm 1 and 10 W in Warm 2, and the gap between the two sequences stays constant across the whole ladder.
The power meter confirms what the brightness measurements showed: the top steps give you less than the lower ones. “Laser 8” in Warm 2 gives 2,850 lm at 146 W and “Laser 10” gives 3,210 lm at 175 W, so dropping to Laser 8 saves 16% of the power for 11% less light. Laser efficiency sags at the top end because of heat, so level 8 is a sensible compromise if you don’t need maximum brightness.
PC/Game Mode Throttles the Laser
Know this before you sit down to play: PC/Game and Sports modes forcibly cap the laser at level 8. The slider shows 9 and 10, but nothing happens above 8, and the projector tops out at 146 W instead of 175 in Warm 2. In lumens, that’s roughly 11% of brightness you simply can’t get, however far you push the slider.
This limitation isn’t new. It goes back to Valerion Pro 2 firmware, it was reported to the manufacturer about a year and a half ago, and the reply amounted to “working as intended.” The workaround is simple and effective: skip the game mode and use Filmmaker or Theater with Instant Game Response enabled. IGR gives you the same low input lag, while the laser, the iris and all picture settings remain at your disposal. The catch is that you lose Clarity → Film for true 24p, since it’s unavailable with IGR on (more on that in the Gaming section). You’ll need to keep two presets, one for movies and one for games.
Iris position has almost no effect on power draw. In Warm 2, everything from Iris Off to M6 holds at 175 W regardless of how far the iris is closed, and only M7 drops to 133 W to keep the mechanism from overheating. In Warm 1, the entire ladder from Iris Off to M7 sits at exactly 142 W, so even M7 takes nothing away.
The Brightness Enhanced modes are a curious case. BE Low draws 172 W, while BE High draws 164 W. So the “high” mode uses less power than the “low” one at virtually the same on-screen brightness, making up for it with an even greener white balance. You can’t change the white balance in these modes, and they can’t be enabled with a manual iris setting.
With EBL off, power draw barely changes with frame content: a fully black field and a fully white one differ by just a few watts. All dynamic power reduction comes from EBL. With EBL on, the projector draws 140 W on a white field in Warm 1 and just 44.5 W on a fully black one. On real dark scenes, the range is 83 to 124 W, and this is where it gets interesting. The same frame can land anywhere in that range depending on what was shown before it. The spread in pure laser power reaches 1.51×. The EBL section covers the mechanism in detail. For now, it’s enough to know that it shows up on the power meter as clearly as on screen.
One last observation. On a static frame, EBL doesn’t recalculate the level at all: with no scene-change event, power stays wherever it settled. That’s the logic of the detector itself, not laser throttling or warm-up.
EBL (Enhanced Black Level)
EBL is the signature laser dimming system that earned Valerion a reputation for one of the most effective solutions on the market. On the Aetherion, it has been adapted to the new seven-step iris and to the specifics of UST optics, so everything we know about EBL on Valerion has to be rechecked from scratch.
So we took the system apart in detail on real frames, and the results proved far more interesting than this mode’s bare On/Off figures.
But Let’s Start With the Numbers
In every mode except PC/Game, the Aetherion always engages forced laser dimming on a fully black field, even with EBL off. Miss this and you’ll get absurd contrast readings, and such numbers do show up in some reviews. Fortunately, forced dimming only kicks in on a perfectly black frame; the slightest bit of light switches it off immediately.
As the table shows, the absolute figures for both rise as the iris closes, but the forced-dimming multiplier drops from 5 to 4, while EBL holds steady at a multiplier of about 7 across all positions. The maximum is 42,083:1. That falls short of the rated 60,000:1, but it’s still a very strong result.
Still, On/Off with dimming enabled is a secondary figure. On a black field it can be almost anything, especially if the projector supports a pseudo-FFTB mode. What matters is how the system performs on real frames, and we measured that too.
How Much EBL Really Adds
On a fully black field, EBL raises contrast by about 7×, depending on iris position. But a black field almost never shows up in movies, so we ran 56 real frames, from nearly all-black to scenes with medium and very high average brightness, and checked how deep the system dims on each.
On 30 frames, EBL works hard, delivering a gain of 1.3× to 5.5×. On the other 26 it barely does anything (1.1× to 1.25×), right at the threshold of visibility.
Even among the frames where it engages, only one in three gets more than 3×. Across the whole set that’s less than a fifth, so it’s fairly rare. An “average multiplier” means little here because there isn’t one: the system either engages or stays put.
How EBL Works
Let’s figure out how EBL actually works and what it looks at when it analyzes a frame.
The dimming level is set by the brightest object in the frame, not by its average brightness (ADL). We ran more than fifty test patterns: the dependence on the peak fits a formula to within a few watts, while average brightness contributes almost nothing.
On the chart, the highest multipliers cluster on frames with a low peak, up to about 0.45. That’s where the system shows its full potential. And since it looks at the peak rather than at average brightness, it has no trouble engaging on bright scenes too, as long as there’s nothing truly bright in them. Our run includes a few. A frame with an ADL of almost 12% and a peak of 0.42 is dimmed by 3.4×, while a frame half as dark with a highlight at 0.88 gets just 1.16×. The brighter scene is dimmed three times as much, because there’s nothing in it to clip.
EBL is in its element with uniform, hazy, dusky shots and subdued light sources. There it gives a lot and costs nothing: highlight detail survives intact in every such scene. But the moment a lamp or a window appears in the frame, it backs off, however dark the rest of the picture is. You can see this clearly at the right end of the chart, where lots of scenes with a peak between 0.97 and 1 cluster. Some are bright, some quite dark, with an ADL of around 1%, and in those frames EBL is almost completely off.
The multiplier for the next frame depends on more than its own peak, though. It also depends on what came before. This is a form of protection against “pumping”: within a single scene, brightness shouldn’t jump or flicker. So how does it work?
A recalculation of the dimming level is triggered by the area of bright content, not by peak brightness. We tested this directly. A frame with pure white over a small area doesn’t shift the level at all, while the same frame with a bright patch covering five percent of its area pushes the laser almost to the ceiling. So the peak decides how deeply EBL can dim a scene, while the area decides when the dimming multiplier needs to be recalculated at all. As long as the bright area covers less than a couple of percent of the frame, EBL barely moves, and all scenes keep roughly the same multiplier, even if the frame contains pure white. That explains the familiar complaint about dim flashlights in dark scenes: the system would rather keep the extra contrast and sacrifice the brightness of a small light source. Once the area passes five percent, the laser jumps almost to full power in one go.
This isn’t just a lab result; we saw the same thing on real movie frames. If two adjacent scenes have a similar amount of bright area, the recalculation trigger doesn’t fire, and the second scene simply inherits the laser level left over from the first, which can be higher or lower than its own. The easiest way to explain it is with two adjacent scenes from our run; call them A and B. Watched on its own, A has deep black. But if B, which is similar but slightly brighter overall, plays right before it, A inherits B’s laser setting and its black is noticeably lighter. It works the other way too: after A, scene B looks darker than it would on its own. The same scene’s black depth can vary by up to 1.5×. So the black level in any given scene depends on what came before it as well as on the scene itself.
Your impression of EBL, then, depends entirely on what you’re watching. On a dark film with sparse light sources it looks superb. On material where something bright keeps flashing in the frame, its effect is harder to notice, even though it’s on in the menu.
Firmware Q0908
We got our hands on a new beta firmware for testers that noticeably refines EBL’s behavior. First, many bright scenes now show less compression, and therefore less clipping. Second, transitions within a scene are smoother. The occasional visible flicker and brightness jumps within a single scene are gone, and response speed hasn’t suffered. It’s a clear step forward from the previous version of EBL on Q0421. It’s quick to engage yet smooth enough not to cause flicker, has almost no color shifts, and, most importantly, now loses less detail.
We’d still like a three-step aggressiveness setting (Low / Medium / High) like the one Valerion currently offers, but the current version already feels finished.
A Word About a Bug
There is one real bug, and we caught it twice: the power level freezes and stops responding even to a sharp change in frame brightness. The first time, switching EBL off and back on helped. The second time, the toggle did nothing, and only changing the picture mode fixed it. That means the state is held somewhere deeper than EBL itself, and there’s no reliable way for the user to reset it.
Telling the bug from normal behavior is easy. Put any frame with a large bright patch on screen, then go back to the stuck frame. If the black level has changed, it was the normal hold behavior. If it hasn’t, it’s the bug.
Anti-RBE
Another key Valerion feature has made it into the Aetherion series. As far as we know, this is the first UST with full-fledged anti-RBE, though the implementation differs somewhat from its long-throw sibling’s. The marketing claims 99.99% suppression of the rainbow effect and a TÜV certification for reduced harmful light exposure. The algorithm works in both 2D and 3D, which is also new: Valerion is limited to 2D.
At its core, anti-RBE is a faster color cycle. The laser runs through the colors more times per frame, which helps tame the so-called rainbow effect. The more often the colors alternate, the harder it is for the eye to see them separately, and the weaker the rainbows on high-contrast edges.
On the Aetherion, each color is output 8 times per frame. On the Valerion Max, red and green are output 20 to 24 times, and blue only 4. On paper, Valerion suppresses rainbows twice as effectively, and it also offers anti-RBE as a separate global setting, while on the Aetherion the mode is locked to Warm 1. The reason is the color sequence. Warm 1 outputs pure RGBRGB, while Warm 2 uses an RGBCY scheme, adding cyan and yellow segments. Those segments supply the extra brightness, but anti-RBE can’t run with them.
To the eye, though, the difference is smaller. The Aetherion’s new controller outputs the frame line by line (a rolling buffer), so the color bands at edges break up into fine ripples that the eye picks up less easily. So in practice it works better than the nominal 8× suggests.
Why not more? Our guess is that the controller has a single time budget per frame, split between pixel shifting and color flashes, and you can see how it gets spent. With a 240 Hz shift, a single controller manages 12–16× on average across the three colors (Titan, Valerion Max), while at 480 Hz, as on the Aetherion, exactly 8× is left. Getting 16× at the same 480 Hz would take two controllers. AWOL may have chosen to spend the budget on the faster shift, or it may simply take more optimization and a tailored approach, as Valerion did. Either way, hopefully the engineers can push the count higher in future updates.
The Cost of Anti-RBE: Whine
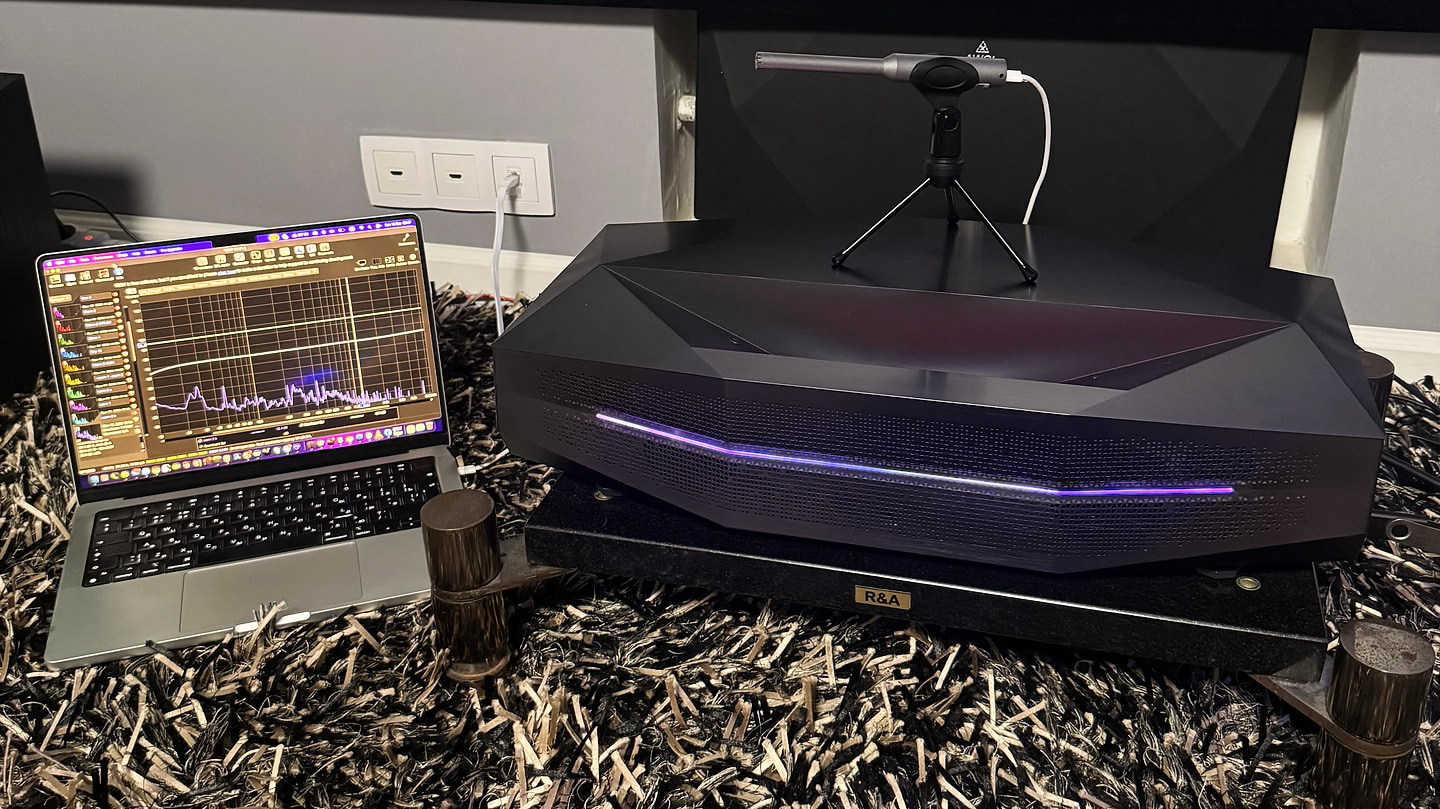
On the Valerion, anti-RBE comes with an acoustic cost: turning it on produces a high-pitched whine, and the Aetherion has inherited that trait. The chart above shows what the sound looks like in the spectrum. Our UMIK clearly picks up the change, as anti-RBE raises the tones at multiples of 480 Hz by 5–14.5 dB. It’s a thin whine, but you can hear it in a quiet room. It tracks laser power, so with EBL active it rises and falls with scene brightness.
With real content and the soundtrack playing, it’s practically inaudible. If it does bother you, the only fix is switching from Warm 1 to Warm 2, where anti-RBE is off.
Anti-RBE Bug at 120/240 Hz
During testing, we found an obvious bug with 1080p content at 120 or 240 Hz: switching from Warm 2 to Warm 1 causes severe posterization. For now, that means high-refresh-rate gaming effectively requires anti-RBE off.
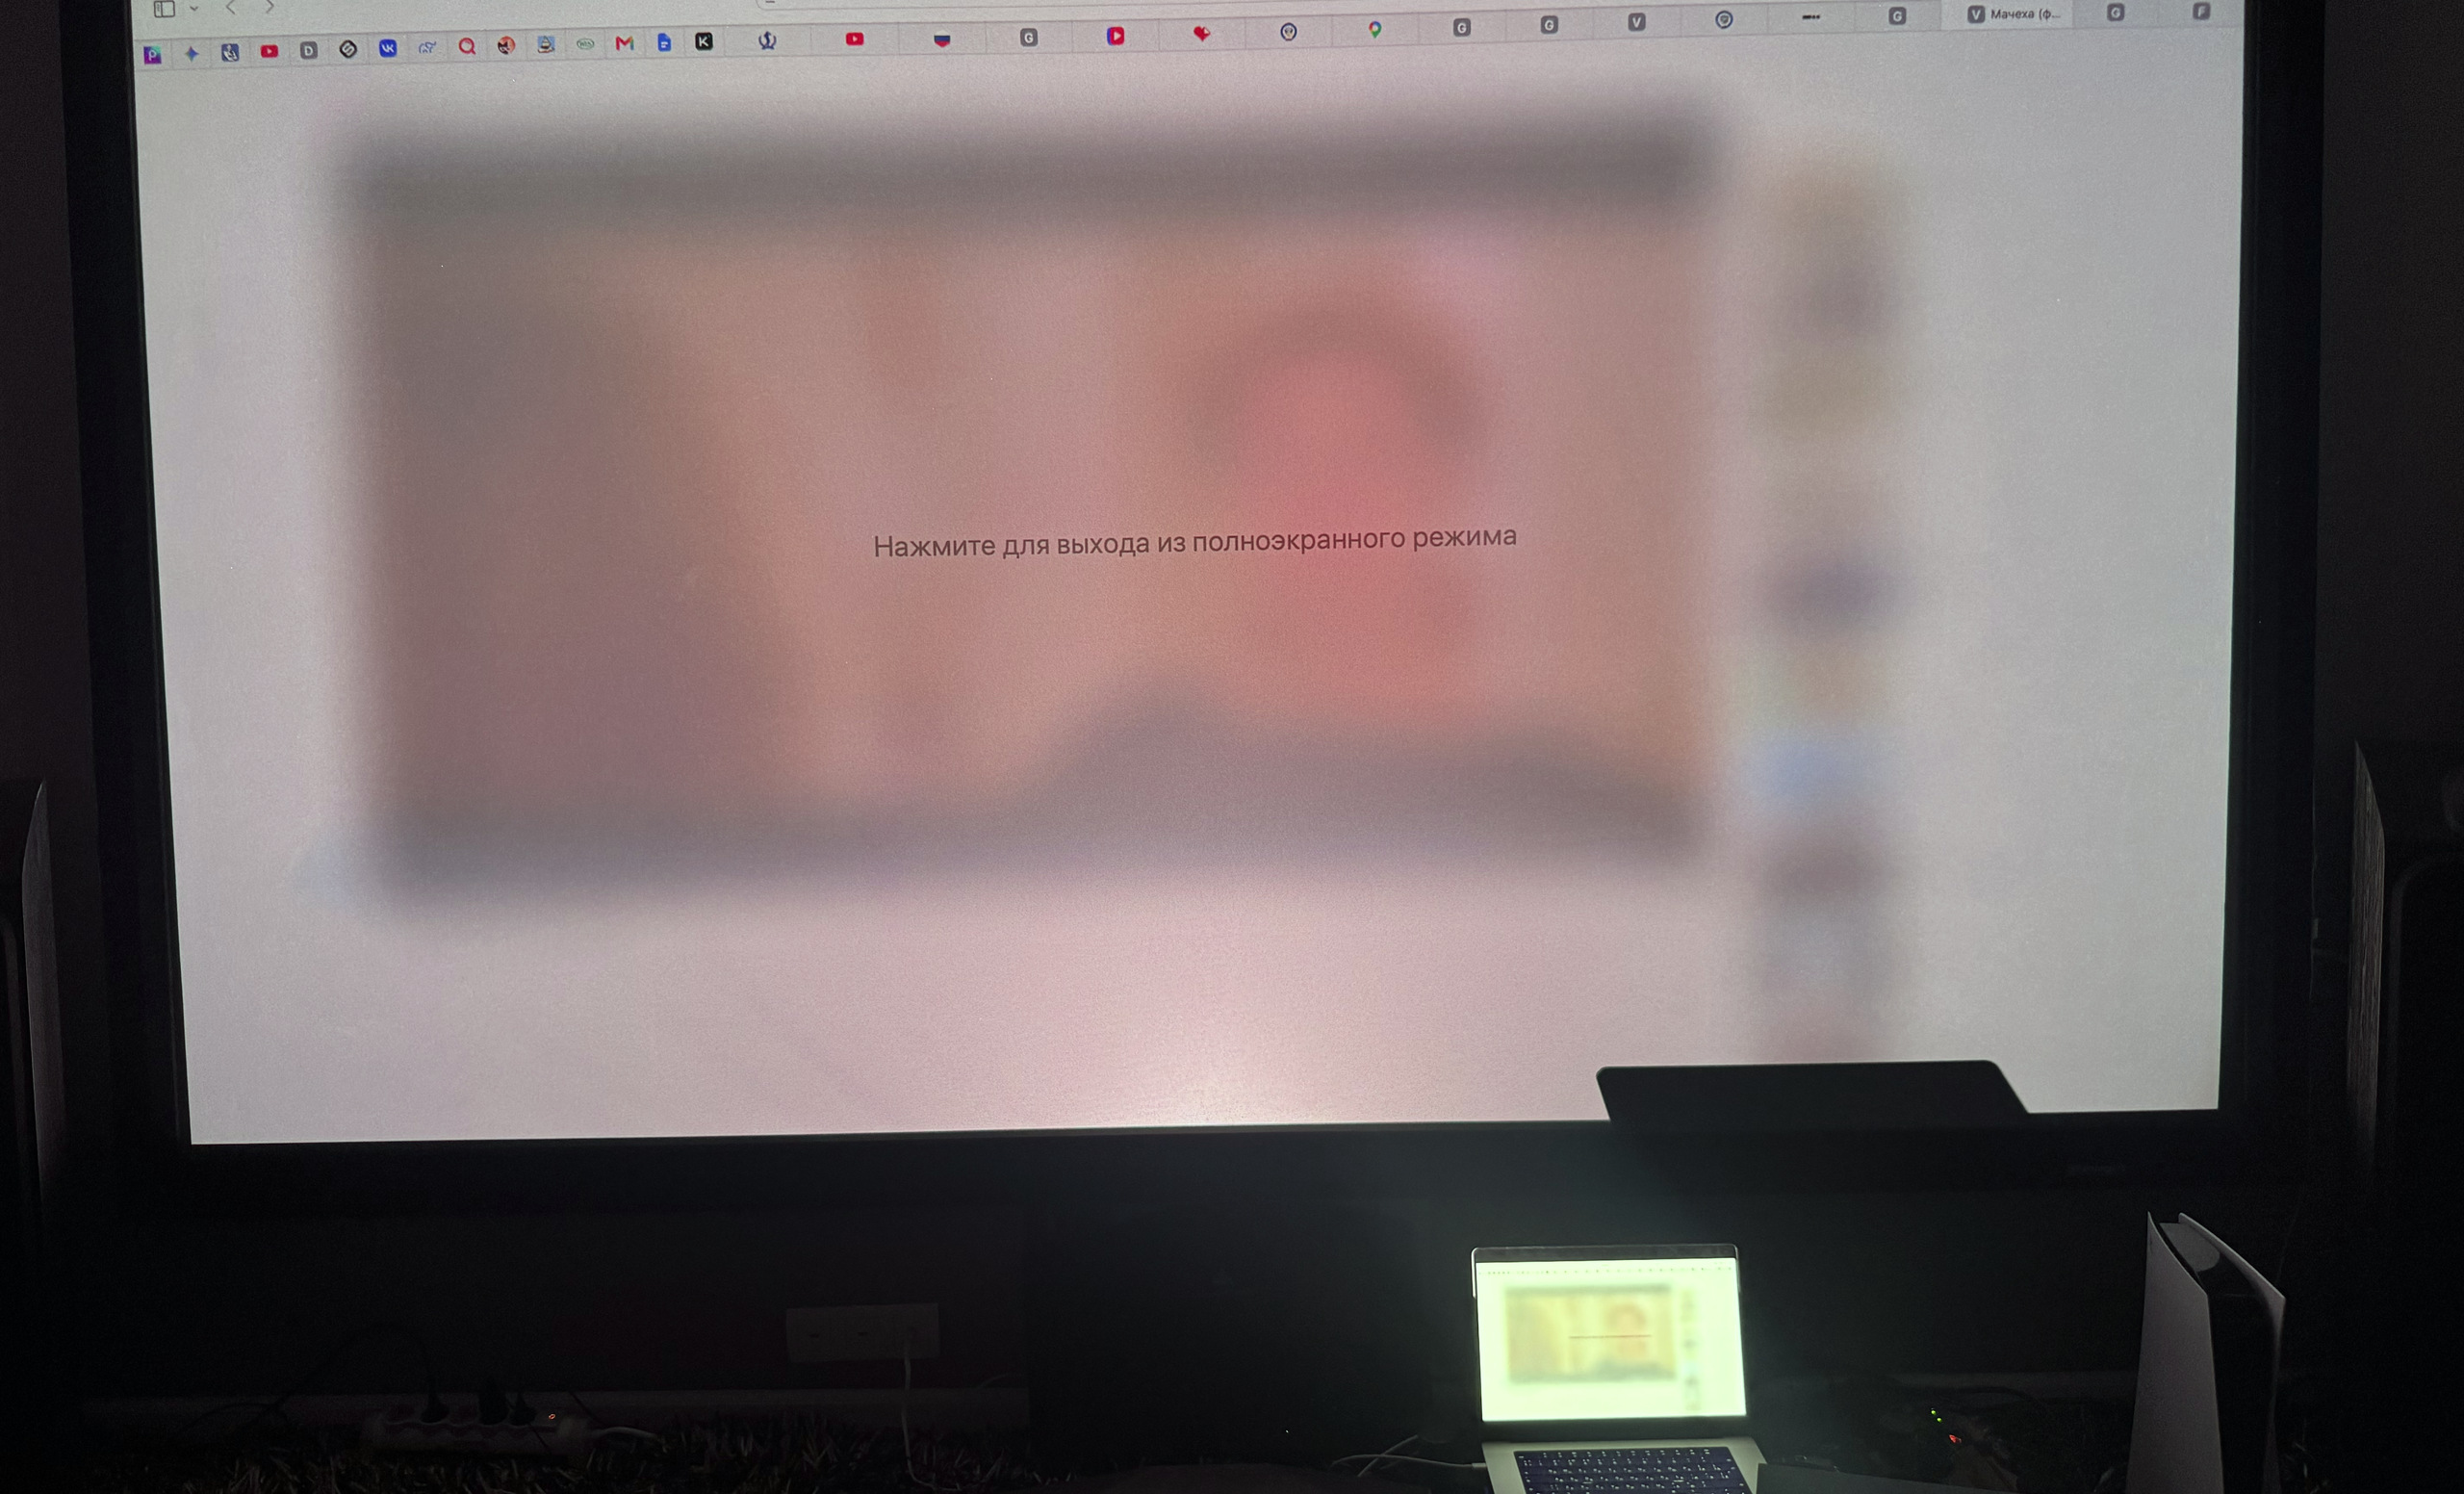
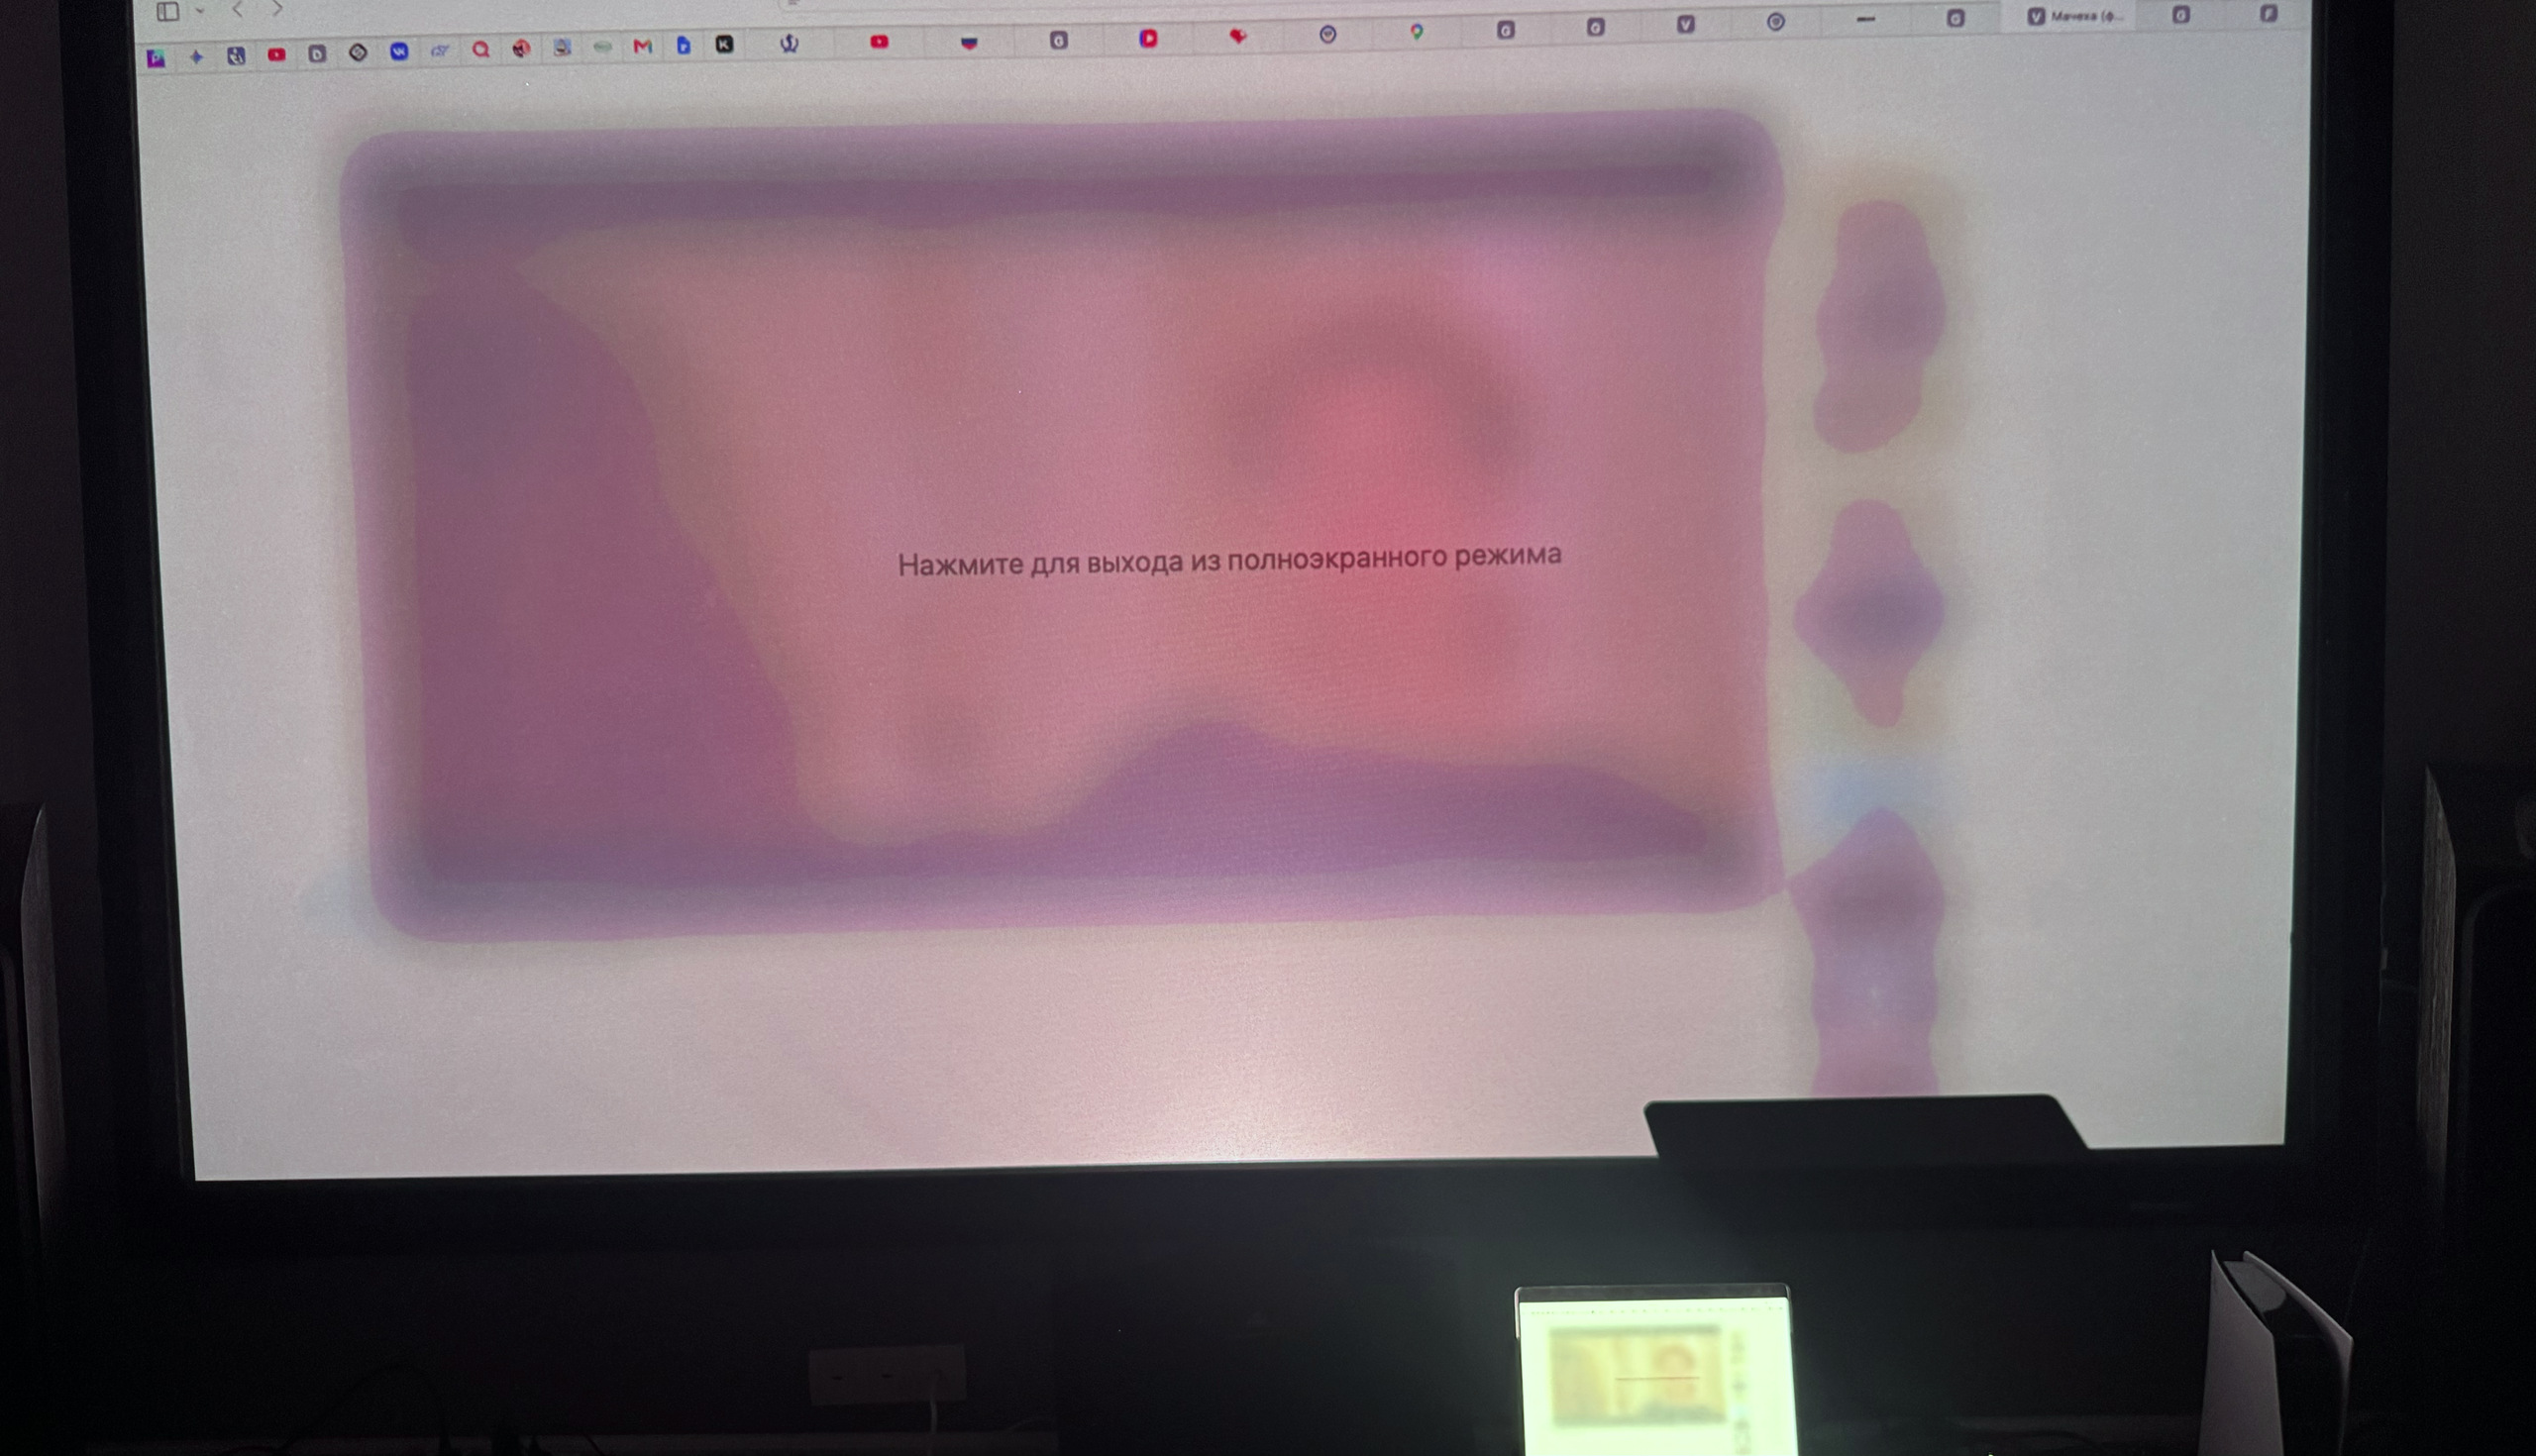
We’ve passed this finding on to AWOL’s engineers for analysis as well. According to beta testers, the problem didn’t exist in the very first firmware versions, so we’re hopeful a future update will fix it.
Image Enhancers
The shots below weren’t taken with a camera. The projector can save its own screenshots, captured after all processing but before the light engine, so you’re seeing exactly the signal the DMD receives, with no camera in the way. The flip side is that nothing introduced by the optical path shows up in them.
There are five settings you can enable: AI Contrast, HDR Enhancer, Dynamic Color Enhancer, AI Super Resolution, and Dark Detail. Each was captured separately on five frames covering the full range of scene brightness.
AI Super Resolution is sharpening, with three levels from Low to High. It’s the only enhancer on the projector that does exactly one thing: it leaves brightness and color alone. It works only on edges, and its effect grows with the amount of fine texture in the frame. On Low it’s useful for games and small text. On Medium and High the picture starts to look oversharpened.
AI Contrast has a misleading name. Rather than boosting contrast, it compresses the picture toward mid-level brightness, lifting dark scenes and tamping down bright ones. Low and Medium both lower the gamma slightly, but Low also softens the image a little, while Medium adds noticeable sharpening that the other levels don’t have. The result is a deeper but “overcooked” picture, and on dark scenes High also eats into saturation. You can still find a usable setting for games, though.
HDR Enhancer is a simple on/off switch with no levels. It only works on SDR content and tries to make it look like HDR. It’s the most aggressive feature of the lot: it pulls bright scenes down, lifts dark ones, and heavily sharpens edges on top of that. That first impression of a “punchier” picture is paid for with lost shadows. With three aggressiveness levels and a way to disable it in bright scenes, it could be useful in some situations. For now, it does more harm than good.
Dynamic Color Enhancer boosts saturation, with three levels. It does what the name says. Sharpness doesn’t change at all, brightness drops by a fraction of a percent, and saturation rises with the level, by up to 1.5× in bright scenes. If you want richer color and more vivid hues, it delivers, but it costs you detail in color gradations. Low is a perfectly safe choice for any scenario. In some games we even got away with High by lowering the Color slider to 44.
Dark Detail is also on/off only, and it’s the most restrained algorithm of the five. It lifts the gamma curve, but only in the shadows. In a dark scene there’s less pure black and more distinguishable shadow detail, while sharpness and color stay the same. It’s also adaptive: in bright scenes, where there’s nothing to pull out of the shadows, its effect is practically zero. If you want more shadow detail, it does the job, although the picture may look less appealing.
See for Yourself
Off is always on the left, the selected enhancer on the right. The switch at the top changes the comparison mode.
Bottom line: everyone has their own tolerance for artifacts, so pick the mode and level to taste. Our take: Dark Detail is a safe all-rounder. It solves one specific problem, does it gently, and switches itself off where it isn’t needed. AI Super Resolution on Low has its uses, but at higher levels it oversharpens. Dynamic Color Enhancer on Low is also harmless. AI Contrast doesn’t do what its name promises and is really three different modes in one. HDR Enhancer looks impressive at first glance, but it costs you shadow detail and is best left off entirely.
Artifacts: Banding, Dithering, Posterization
Banding with the iris closed. The Aetherion’s most discussed artifact, inherited from the Valerion Max. Red-green bands appear on smooth gradients, and the further the iris closes, the more of them appear. At Iris Off there are almost none, and by M7 they become visible even in real content, especially in skies and transitions. The cause is digital rather than optical: adjust contrast on a gradient and the bands crawl along with the setting. The projector appears to have a separate gamma correction profile for each iris position, and remapping the image to it eats some of the gradations. It’s worst at 24 Hz in Film mode; in Cinema 1 and Cinema 2 it’s much less noticeable on normal content. AWOL has acknowledged the bug, and firmware Q0908 reduces it considerably, especially in dynamic iris mode, where almost no banding remain.
Horizontal stripes. A separate defect that’s often confused with the previous one. These are wide horizontal bands on bright flat fills, resembling window blinds, and they appear at any iris position. According to owners, it’s a unit lottery: some units don’t have them at all, on others they get worse as the projector warms up. Our unit has them, clearly visible on a green background, but they don’t do much damage to image quality.
Posterization at 120 and 240 Hz. At 1080p with a high refresh rate, enabling anti-RBE breaks smooth gradients into flat magenta and green patches. We covered this in detail in the Anti-RBE section.
Dithering in dark scenes without EBL. DLP renders intermediate brightness levels by rapidly flickering pixels. In dark scenes with EBL off, noticeable dithering and other artifacts can appear on dim fields. Switching EBL on clears them up. Overall, with EBL on, the Aetherion’s dithering is very clean, and here it beats the competition.
Rolling buffer. The new controller draws the frame line by line, top to bottom, rather than all at once. On fast high-contrast edges this causes tearing, where the top of a moving object is already in its new position while the bottom is still in the old one. The Aetherion tears just like the Titan, and colored patterns can appear along the edges of a moving object. Our Titan review covers the effect in more detail, with examples. The upside is lower input lag in games and a less visible rainbow effect.
Red line at the bottom. A thin red line glows along the bottom edge, outside the image itself. On a regular screen with a black frame, it lands on the frame and is barely visible, but on a borderless screen or a light-colored wall it’s hard to miss.
PixelLock striping. Fine pixel-wide detail is lost in 4K. At 1080p, the image shows striping from offset pixels. With movies it’s practically invisible. The PixelLock section has a detailed breakdown of the mechanism.
Warm 1’s green tint. Strictly speaking this is factory calibration rather than an artifact, but you notice it immediately. Out of the box, Warm 1 leans visibly green. A quick calibration in the white balance menu fixes it. We raised blue considerably and pulled green down slightly, and after that the mode looks neutral.
The good news: most of these artifacts are software-related, and AWOL knows about them. Iris banding has already been noticeably reduced in Q0908. The anti-RBE posterization is also a firmware matter, as is PixelLock, which AWOL’s engineers are already aware of, and Warm 1’s green tint can be fixed in the menu in a minute. The only hardware issues left are the horizontal stripes on some units, the red line at the bottom, and the quirks of rolling scan-out.
Noise
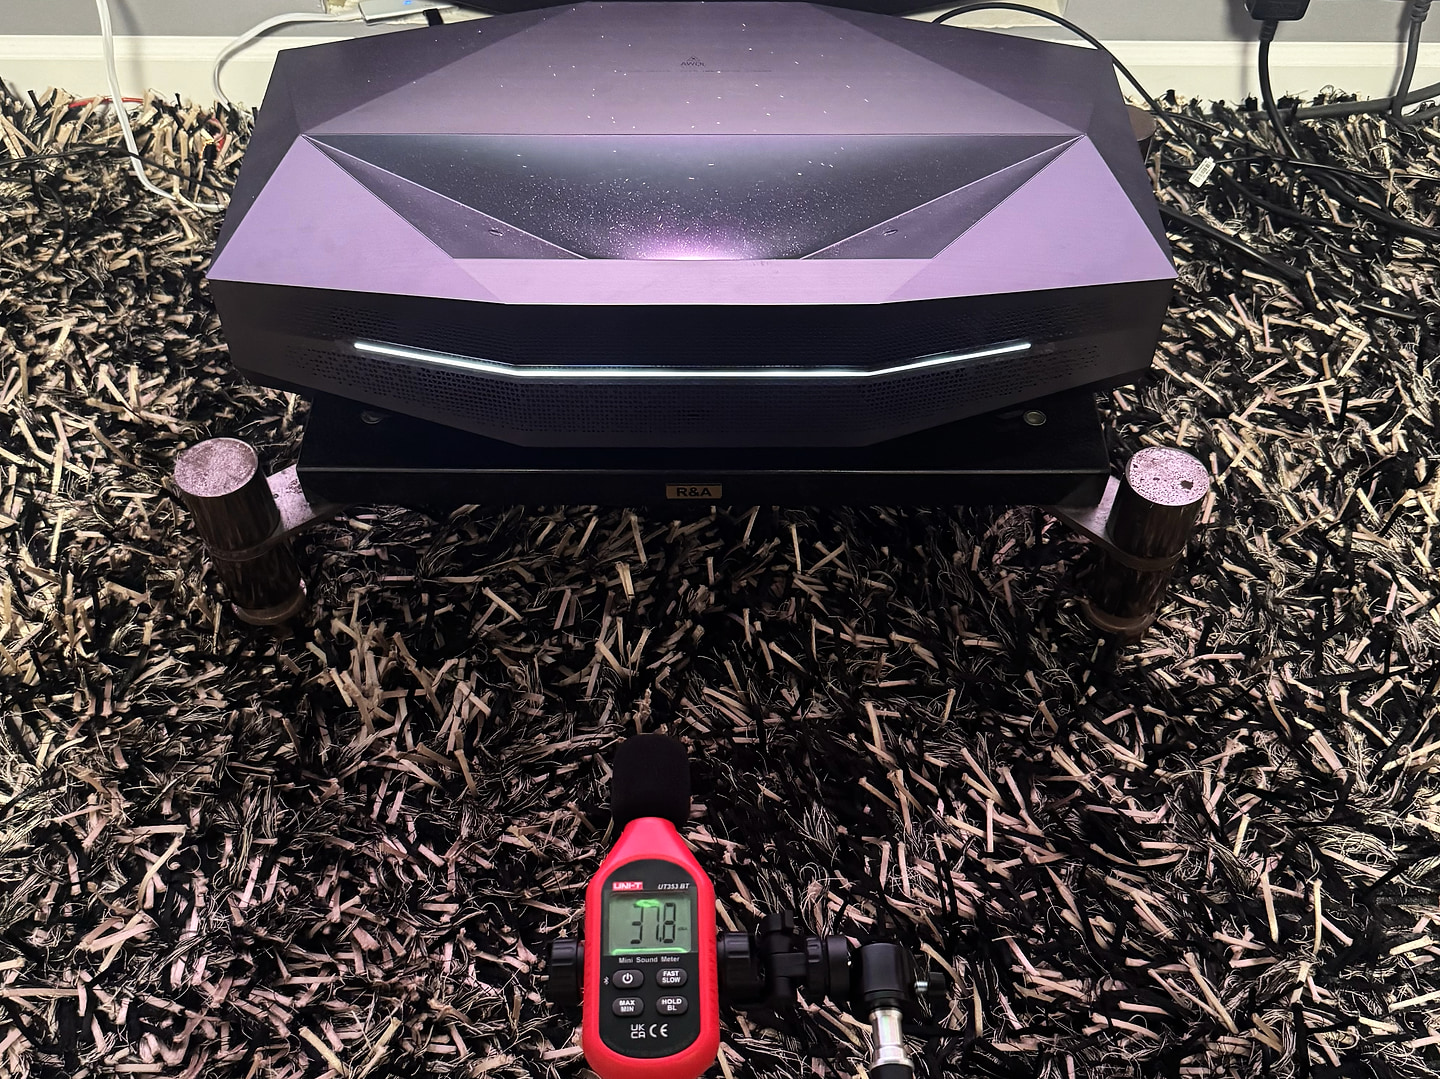
We measured noise with a sound level meter at 30 cm from the chassis, after the projector had fully warmed up. The room’s noise floor was 34.5–35 dBA, which is fairly quiet.
In Warm 1, the Aetherion settles at 38–40 dBA, depending on how warm it is. From the couch at a normal distance it’s practically inaudible, even during pauses. Warm 2 is a different story: 44.8 dBA, 5 decibels louder. The culprit is the color sequence rather than anti-RBE itself. Warm 2 squeezes more light and more heat out of the laser, so the cooling has to work harder. If you pick Warm 2 for its brightness, you pay for it in fan noise as well as in color gamut.
After warm-up, the noise slowly “breathes” within ±0.7 dB over a cycle of several minutes as the fans adjust to the temperature.
As for its character, it’s a low, even fan hum with a fundamental around 120 Hz and no unpleasant overtones. The only exception is the thin anti-RBE whine described in the Anti-RBE section.
XPR Noise
Pixel shifting has a sound of its own. The actuator that moves the image produces a narrow tone at 419.7 Hz. Switching XPR off drops the tone by 13 dB, which leaves no doubt about its source. It’s a pure single tone with no harmonics.
But 419.7 Hz isn’t the shift frequency itself. When we switched the frame rate from 60 to 24 Hz, the tone didn’t budge by even a hundredth of a hertz, although the shift rate is tied to the frame rate. So it’s a mechanical resonance, either of the actuator assembly itself or of the chassis.
Gaming, Refresh Rates & Motion
What AWOL Promises
The Aetherion Max’s list of gaming features reads like a good gaming monitor’s:
- Refresh rates: up to 240 Hz at 1080p, and 4K/120 input.
- Input lag: per the manual, 1 ms at 1080p/240, 4 ms at 1080p/120, and 2 ms at 4K/60 (Game Mode, enhancers off).
- VRR (AMD FreeSync) and ALLM, so the projector switches to game mode by itself when a console or PC asks for it.
- Dolby Vision Gaming, plus HDR10+, HDR10, and HLG.
- Game Bar: an in-game overlay menu showing the current refresh rate, VRR status, and quick settings.
- 21:9 and 32:9: ultrawide games can be stretched across a 2.35:1 screen. This only works in Game Mode, and only with a source that enables ALLM.
- Connectivity: three HDMI 2.1a ports (HDMI 2 with eARC) and DisplayPort over USB-C, so you can connect a computer directly, without an adapter.
Input Lag
First, the figure on the box. AWOL claims 1 ms at 1080p/240 Hz. For 4K/60, the manual states 2 ms, while press materials say 10 ms.
The millisecond is real, but it applies to the top edge of the screen, not to the screen as a whole. The DLPC8445 controller draws the picture line by line, top to bottom, so the bottom line of the frame lags the top by exactly one frame period: 4.2 ms at 240 Hz, 8.3 ms at 120, and 16.7 ms at 60. So in the best case, at 240 Hz, you get roughly 1 ms at the top, 3 in the middle, and 5 at the bottom. All three numbers are correct. They just describe different parts of the same picture.
Which Refresh Rates Are Actually Supported
A claimed refresh rate and the frames actually displayed are two different things. Rather than take the menu’s word for it, we built our own test.
The pattern is a black field with a grid on top, where the number of cells equals the frame rate: 24 frames is 6×4, 120 frames is 12×10, 240 frames is 16×15, and likewise for the other modes. Each frame lights up exactly one cell with its own number, in a snake pattern, so a full pass through the grid takes exactly one second. At the bottom there’s a strip where a marker advances one position per frame. Then all you need is a camera on a tripod with an exposure of exactly one second. Every cell in the shot should be lit, and every number should be legible. A missing number means a dropped frame. A cell brighter than its neighbors means a frame shown twice. In the bottom strip, a gap is a drop and a bright outline is a repeat.
The results, with input at 1080p or 4K from a MacBook over DisplayPort, with all enhancers and digital geometry correction turned off:
| Refresh rate | Result | Verdict |
|---|---|---|
| 24 Hz | all 24 cells, no drops or repeats, no 3:2 pulldown | ✓ passed |
| 30 Hz | all 30 cells, no drops or repeats | ✓ passed |
| 60 Hz | all 60 cells, no drops or repeats | ✓ passed |
| 120 Hz | all 120 cells, no drops or repeats | ✓ passed |
| 240 Hz | all 240 cells, each with its own number | ✓ passed |
At 240 Hz, the projector displays 24p without judder: exactly ten refreshes per frame, with a frame-duration spread of 2.5%.
So the Aetherion supports and properly displays every refresh rate you need today, including true 120 and 240 Hz at 1080p. We’ll cover 4K/120 separately. For comparison, the Titan Noir Max, at the time of our review, converted 24 Hz to 60 Hz before processing and ended up with classic 3:2 pulldown judder, which shows up in slow pans. There’s none of that here.
4K/120: Input Only
The Aetherion happily accepts a 4K/120 input, but it only puts 60 frames on screen. It has a single controller, and as of this review no dual-controller UST is on sale, so no UST can show true 4K/120 yet. The higher refresh rate has another cost, too. In 4K/120 mode, and whenever MEMC is on, the projector reduces color resolution, with the controller squeezing a signal of that bandwidth down to 4:2:2 chroma subsampling. You won’t see it in movies, but small colored text and thin colored lines lose sharpness. For gaming and PC use, where there’s a lot of UI and text on screen, my recommendation is 1080p at 120/240 Hz. If you need maximum resolution, stick with 4K/60. Higher refresh rates at 4K are a job for the next generation of projectors, such as LuxVision.
Film Mode and IGR
Film mode displays 24p correctly, without judder, and IGR mode gives the lowest input lag. But officially you can’t combine them. Turn on IGR, and Film switches off. For anyone who watches movies from a computer or console and wants both true 24p and fast response, that’s a real gap. According to owners, there’s a workaround. Set Film first with IGR off, then turn IGR on, and Film keeps working in the background. We hope AWOL officially supports this combination in the future.
Motion Handling
Motion handling is one of the Aetherion’s biggest strengths. It renders motion noticeably smoother and softer than most projectors in its class, the Titan included. Fast pans hold together instead of breaking up, fine detail holds up longer in motion, and tearing on fast edges is barely noticeable.
It’s hard to say for certain what’s behind this, but there are two candidates. The first is the doubled pixel-shift rate. Each pixel position is refreshed 120 times per second instead of 60, making it harder for the eye to break the picture into sub-frames as your gaze moves. The second is AWOL’s own motion processing. Even with identical hardware, motion handling can differ noticeably between projectors, depending in part on the manufacturer’s own tuning and optimizations. Most likely both contribute, but it’s hard to tell which matters more. For the viewer it doesn’t matter anyway, because the difference is obvious to the eye.
Resolution
This is the projector’s weak spot for gaming. 1:1 pixel mapping and maximum sharpness in fine detail are among the main requirements for a gaming display. And this is where the Aetherion stumbles, because of AWOL’s in-house PixelLock technology, covered in its own section. If AWOL lets users disable it, at least in game mode, it would be a big step forward and would make the Aetherion one of the best projectors for gaming.
3D
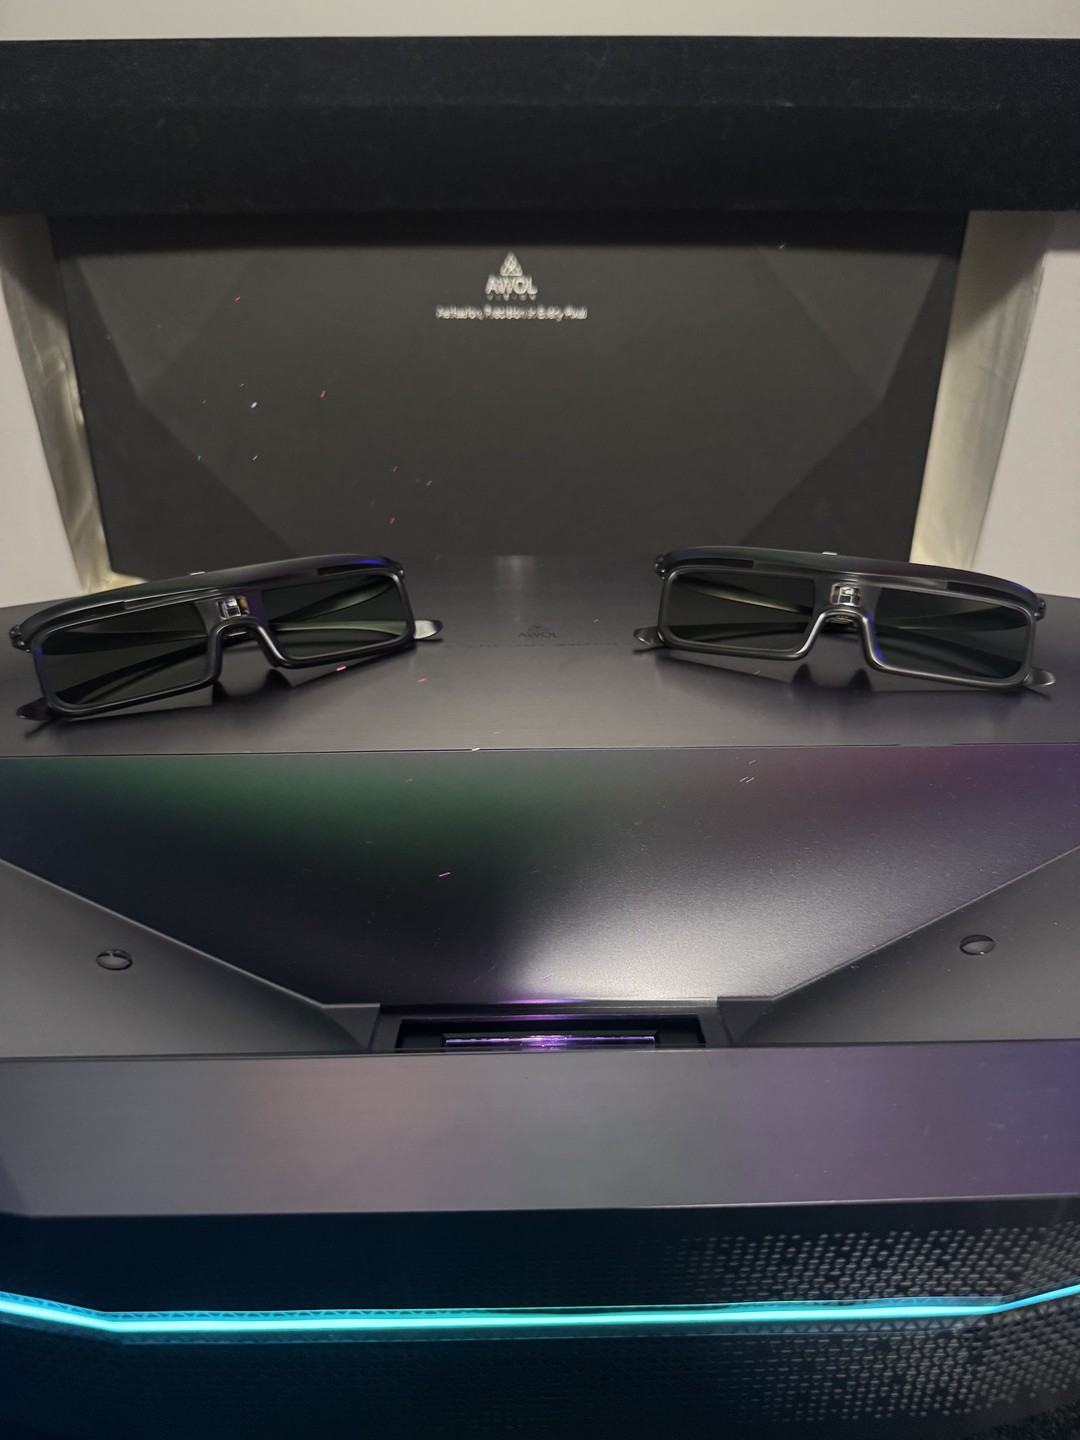
The Aetherion’s 3D story has a happy ending, though it took a while to get there.
What AWOL promises:
- Formats: Frame Packing, Side-by-Side, and Top-Bottom, with the format detected automatically or selected manually.
- Glasses: active DLP-Link, synced through the screen itself, with no external emitter.
- Quick access: 3D is switched on from the quick menu, and the button can be pinned to the start of the panel.
Syncing with the glasses
Active glasses work globally: they open and close their shutters for the entire frame at once. The new controller, however, writes the frame line by line, top to bottom, which takes several milliseconds. If the glasses open an eye on a schedule designed for conventional output, that eye’s frame isn’t finished yet. The top already shows the correct image, while the bottom still holds the tail of the previous frame, meant for the other eye. The result is ghosting that grows toward the bottom of the screen.
One of the spring firmware releases had sync issues, and the ghosting at the bottom of the frame was quite noticeable. The cause was the DLP-Link signal timing rather than the hardware, and firmware Q0908 fixes it. With it, 3D works as it should again, and we’re eagerly waiting for this update to reach all owners.
Rainbows in 3D
Here the Aetherion beats its sibling. On the Valerion Max, anti-RBE doesn’t work in 3D at all, while on the Aetherion it works in 3D mode too, at about 7× on average, with 8 flashes of green and red and 4 of blue per frame. As a result, the Aetherion shows noticeably less rainbow effect in 3D than the Valerion, even though the Valerion’s anti-RBE is still stronger in 2D.
My main advice: check your firmware before judging the 3D.
Verdict
What's great
- Record native contrast for a UST: up to 5,895:1 in M7 → Cinema 2, almost 1.5× the Valerion VisionMaster Max
- Faster XPR-Shift gives a more cohesive image with less visible SDE
- Motion handling is one of its biggest strengths
- Low input lag, VRR, ALLM, and DisplayPort over USB-C, which is rare in this class
- EBL delivers up to 5.5× on real dark scenes
- Anti-RBE works in 3D
- Proper temporal dithering
- Good edge-to-edge sharpness for a UST; channel convergence within about a third of a pixel
- Premium chassis, built-in power supply, quiet in Warm 1
Watch out for
- PixelLock can't be disabled: fine detail is lost in 4K, and 1080p shows striping from offset pixels
- Anti-RBE is only 8×, tied to Warm 1, and causes whine and posterization at 120/240 Hz
- Banding with the iris stopped down (reduced in Q0908), horizontal stripes on some units, a red line along the bottom edge
- Warm 1 is noticeably green out of the box
- EBL depends heavily on preceding scenes, occasionally gets stuck, and has no aggressiveness setting
- Loud
- Uneven white field
Conclusion
The Aetherion Max is the first UST to seriously tackle the class's biggest problem: an iris and a redesigned optical engine give it the highest native contrast of any UST to date, while the faster pixel shift and proper refresh-rate handling make its motion among the best of any DLP. It's let down by software compromises (PixelLock that can't be turned off, a limited anti-RBE, fickle iris presets), but most of them are fixable in firmware, and Q0908 shows AWOL is working on it. Right now it's the best UST for anyone who cares about contrast in a dark room.
Comments
No comments yet — be the first.